



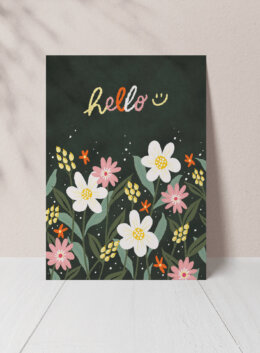
Hello! My name is Nico Ng. I’m a lettering artist and designer, and I’m excited to share this Procreate crash course with you.
This app has been life-changing for me. It opened up so many opportunities and allowed me to create projects I couldn’t imagine before. I want you to experience that too, which is why I’m sharing this tutorial to help you get started.
Whether you’re creating a heartfelt birthday card, festive Christmas cards, or a personalized illustration for a special occasion, designing your own greeting card is a meaningful way to express your creativity. Thanks to intuitive drawing apps like Procreate, creative professionals and aspiring artists alike can turn an iPad and Apple Pencil into a portable digital art studio, creating beautiful artwork that’s ready to print, share online, or send to friends and family.
This tutorial is completely beginner-friendly. I’ll show you everything step-by-step, from starting your canvas, importing brushes, drawing, layering, and exporting your artwork. By the end, even if you’re a complete beginner, you’ll have a project you can proudly share with your friends, family, or online.
Why Use Procreate for Digital Art Greeting Card Design?
Procreate has become one of the best drawing apps for digital illustration thanks to its intuitive interface, responsive Apple Pencil support, and powerful creative features. Whether you’re using an iPad or iPad Pro, the app makes it easy to sketch, paint, organize layers, experiment with brushes, and polish your artwork before exporting it for print or digital sharing.
While software like Photoshop offers advanced editing tools, many illustrators absolutely love Procreate because it combines professional-quality features with a streamlined workflow that’s approachable for beginners and experienced artists alike.
This is the first part of a three-part crash course, and I hope you’re excited. Let’s get started!
Step 1: Install and Open Procreate
First, make sure your Procreate app is installed on your iPad. It doesn’t come pre-installed, so you’ll need to go to the App Store and download it before starting this tutorial.
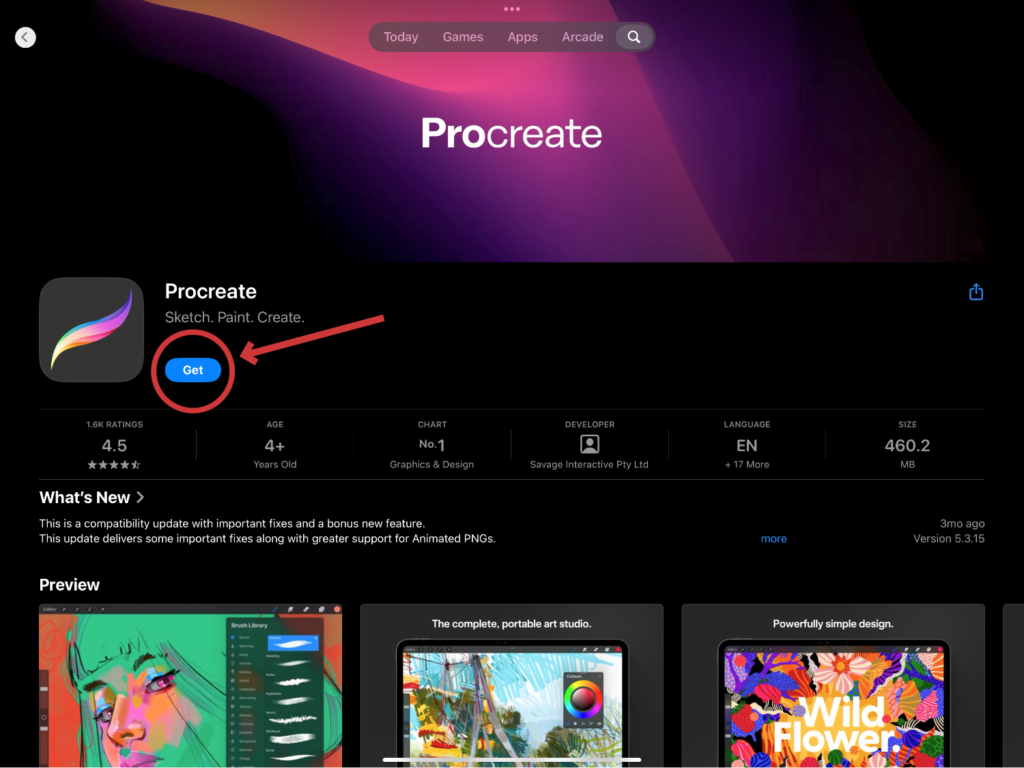
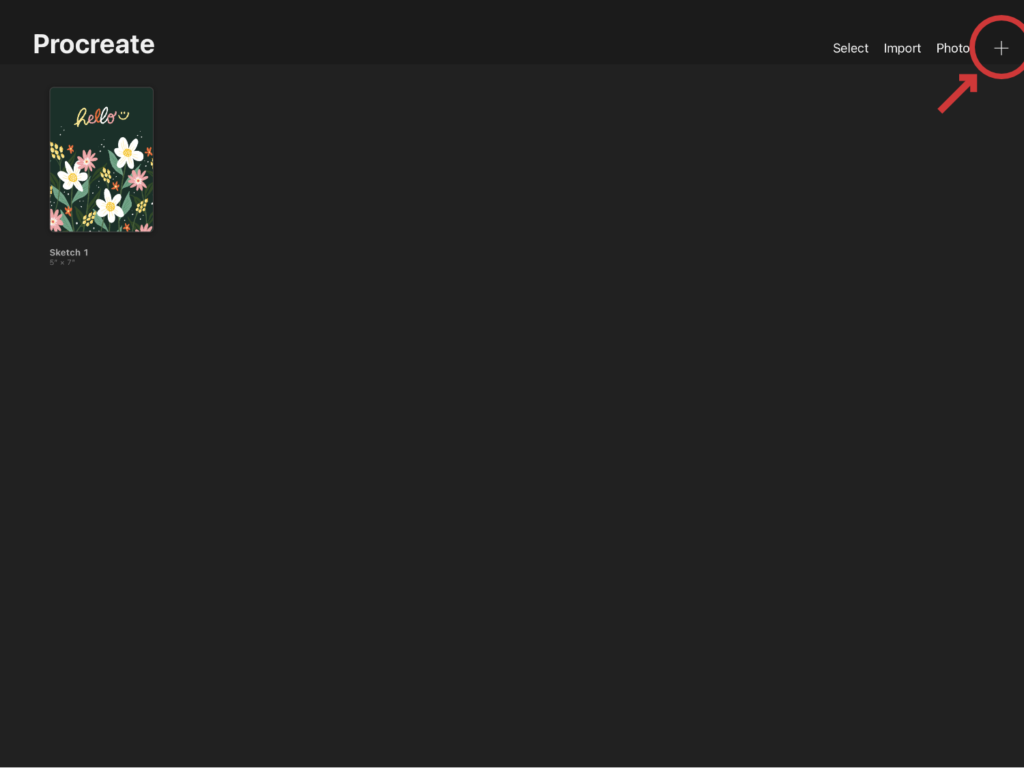
Once you have Procreate installed, open the app, and you’ll see the Gallery interface. Yours might look different from mine since I already have projects here, but you will see a clean interface where you can view your projects, import brushes, templates, images, and other files you may need for your projects.
You will also see a plus (+) icon in the upper right corner to create a new project, which is what we will do next.
Step 2: Create a New Canvas
Tap the (+) icon on the upper right corner to start a new canvas.
We’ll create a 5×7 inch canvas for our greeting card. Since there are no preset files for this size, we need to create one.
Tap on the new canvas icon, which is the icon right below the plus sign.
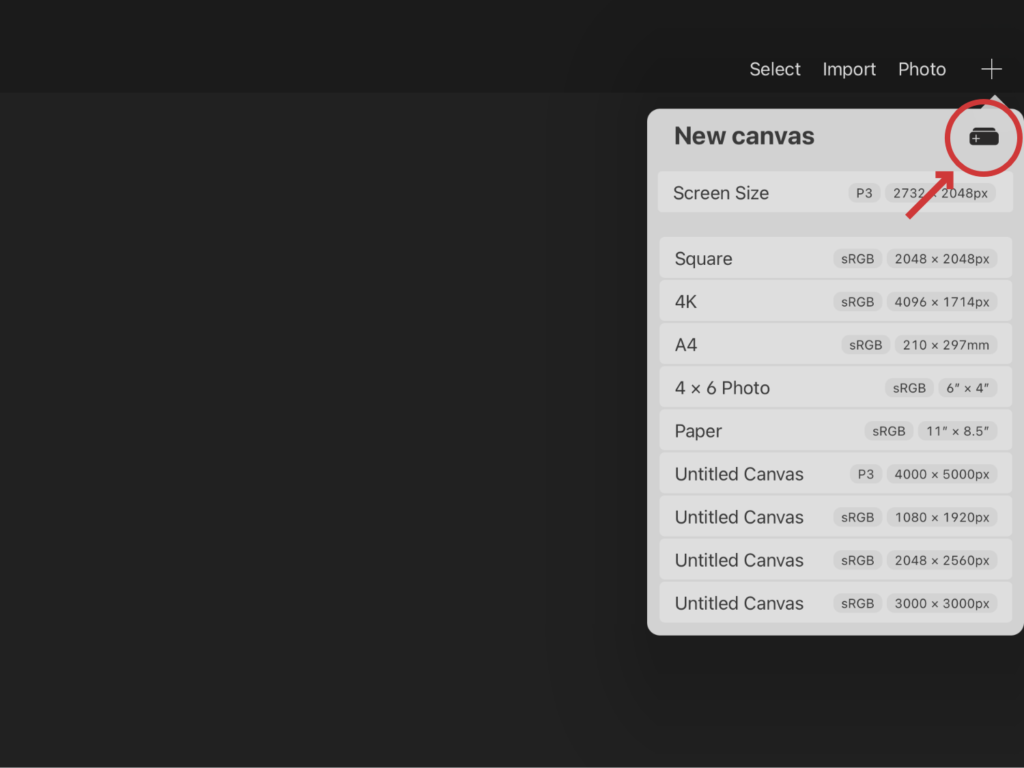
Set the unit of measurement to inches then type in 5 inches for the width and 7 inches for the height. Leave the DPI at 300 to keep your work high-resolution.
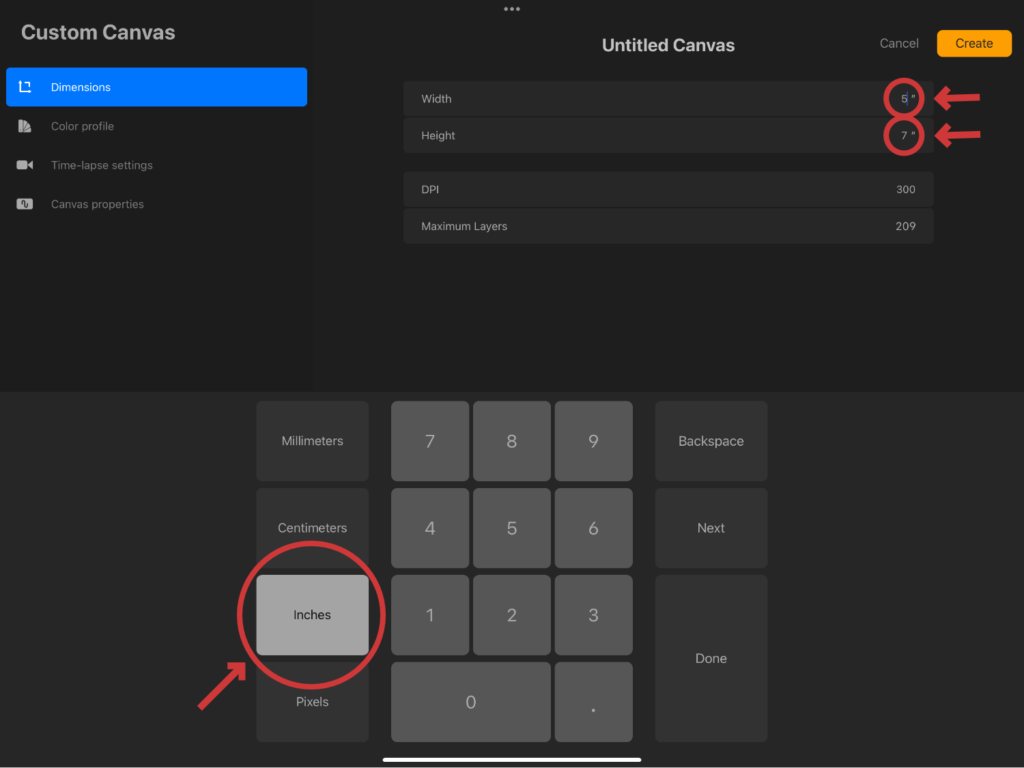
You’ll see a section showing the maximum number of layers your canvas can have, which depends on your iPad model. Higher-spec iPads will allow you to have more layers, but don’t worry, it’s just good to know your layer limit.
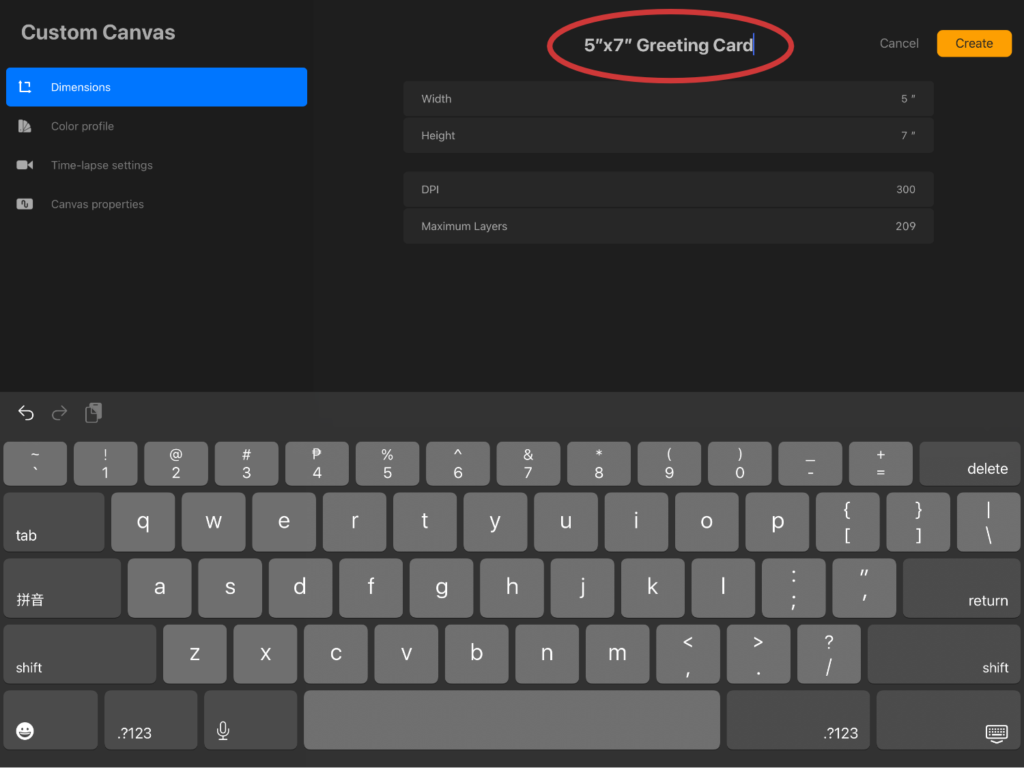
It’s a good practice to start organizing your canvases early on, so rename this canvas preset for easy reference. Tap on “Untitled Canvas” at the top and change the name to “5×7 Greeting Card.”
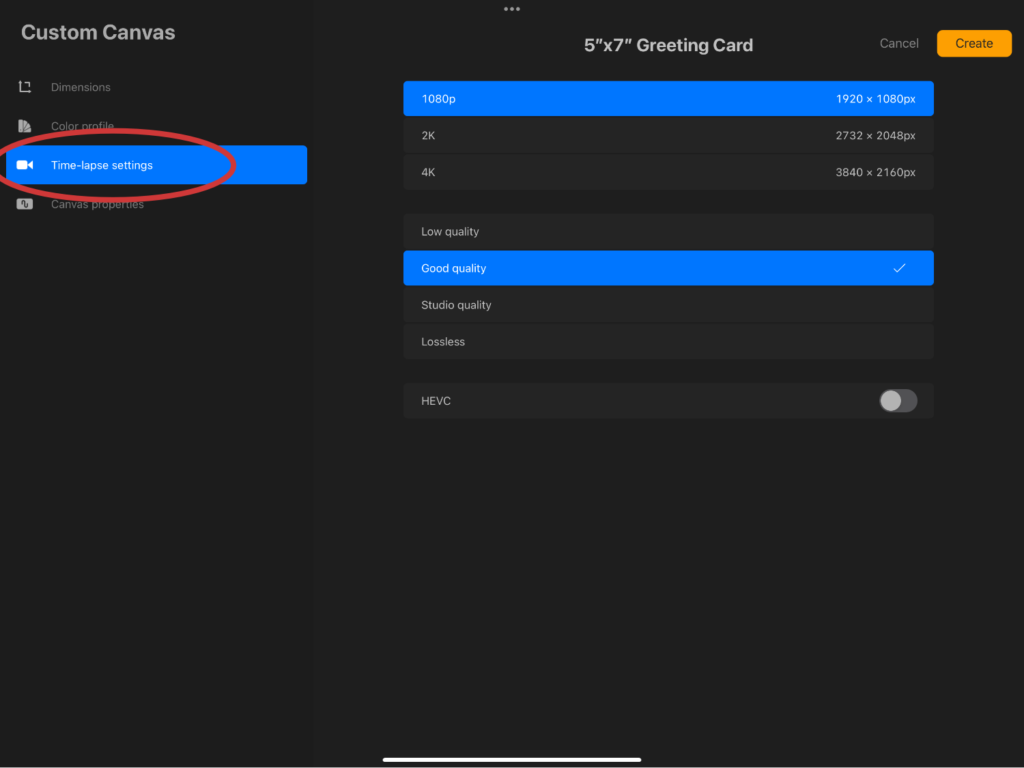
Before tapping “Create,” you can adjust the Time-Lapse Settings on the left column if you want to save a higher-quality video of your process to view later on.
Now, tap the orange “Create” button, and your new blank canvas will open as your working page. Once you have Procreate installed, the Gallery gives you easy access to your projects, imported files, and other creative resources. If you’re new to the app, tutorials and updates from the team can help you get started quickly.
Step 3: Understanding Basic Tools, Apple Pencil, and Gestures
Before we start drawing, let me share with you a few must-know gestures:
- Zoom In/Out: Pinch the screen with two fingers to zoom in and out.
- Pan: Hold two fingers down to drag and move your canvas around.
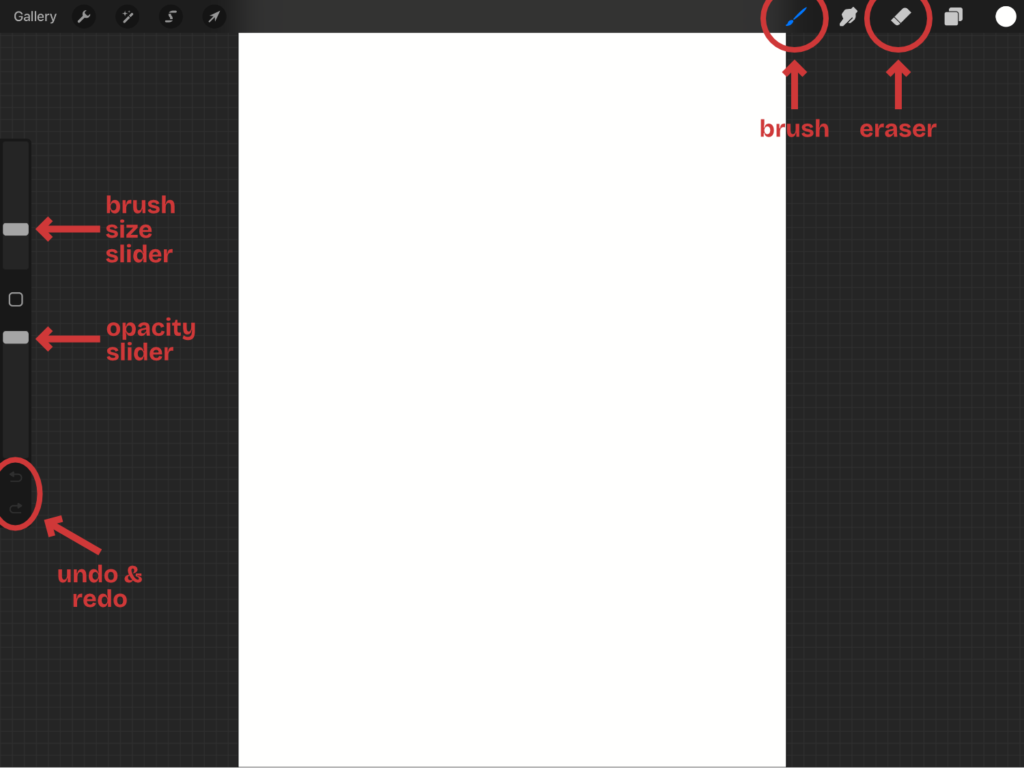
- Undo: Tap with two fingers to undo or use the first curved arrow icon on the sidebar.
- Redo: Tap with three fingers to redo or use the second curved arrow icon on the sidebar.
These gestures will make your drawing process smoother. Now, here are the tools you need to know:
- Brush Icon: This opens your brush library. The left column shows your brush sets, and the right column shows the brushes in each set. (Yours will look cleaner than mine because I already have a lot of brushes installed.)
- Eraser Icon: This is your eraser tool. Just like with brushes, you can choose different types of brushes to use as your eraser, depending on the texture or shape you need.
- Brush Size Slider: The top slider on the left adjusts your brush size. Slide up to increase the size and down to decrease it.
- Opacity Slider: The bottom slider on the left adjusts brush opacity. Slide up to make your brush strokes more opaque, and slide down to lighten them.
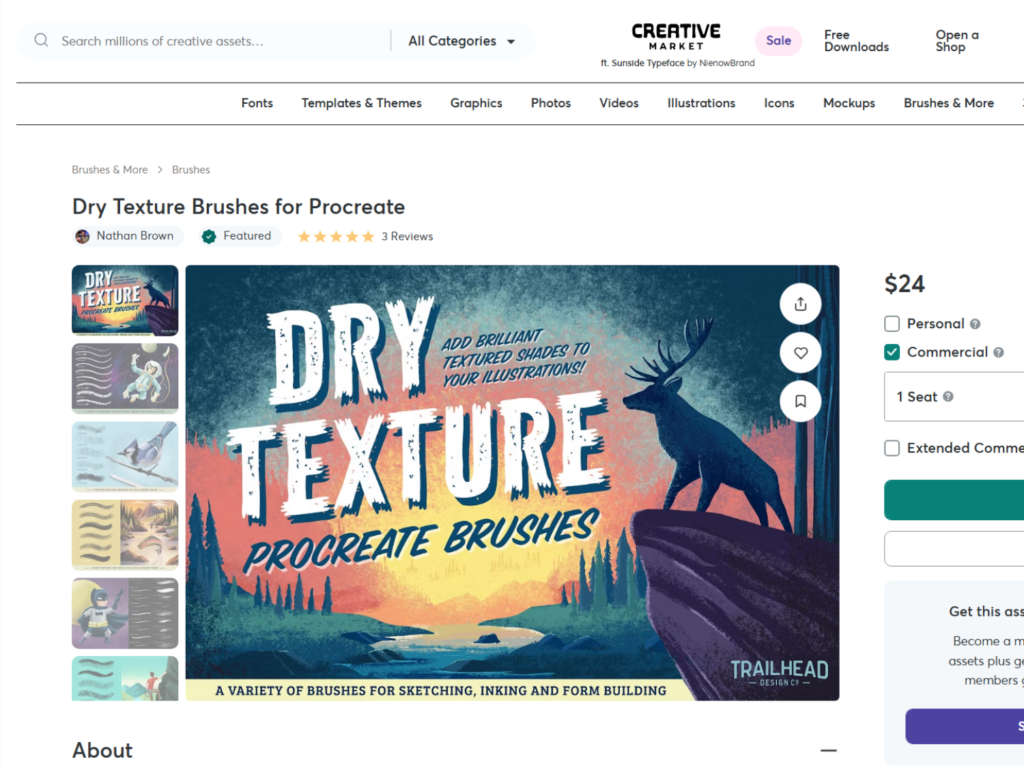
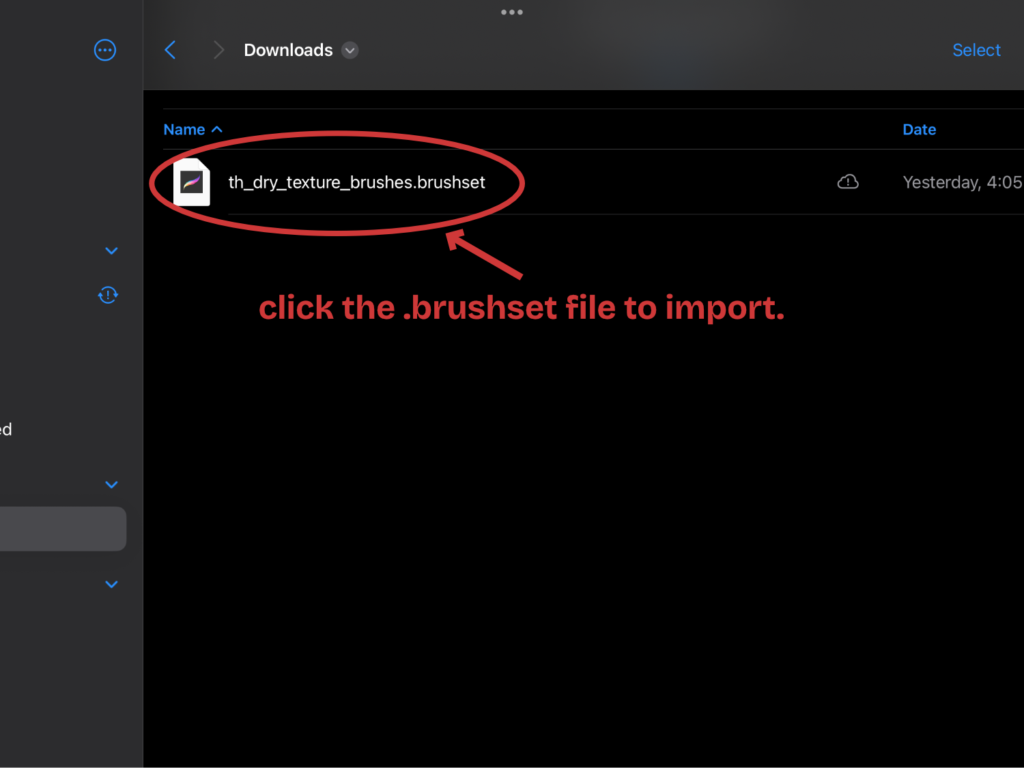
Procreate comes with many useful pre-installed brushes that you can use and explore. For example, you can use a textured brush for a paper-like look, then clean edges with the eraser for sharper details. It also includes simple animation tools if you ever want to experiment beyond static artwork. However, if you have purchased artist-designed brush packs like the one I’m using, Dry Texture Brushes for Procreate by Nathan Brown, you can easily install them by locating the .brushset file in your Files app, tapping it, and it will automatically import into your Procreate app under your brush sets.
Step 4: Set the Background Color
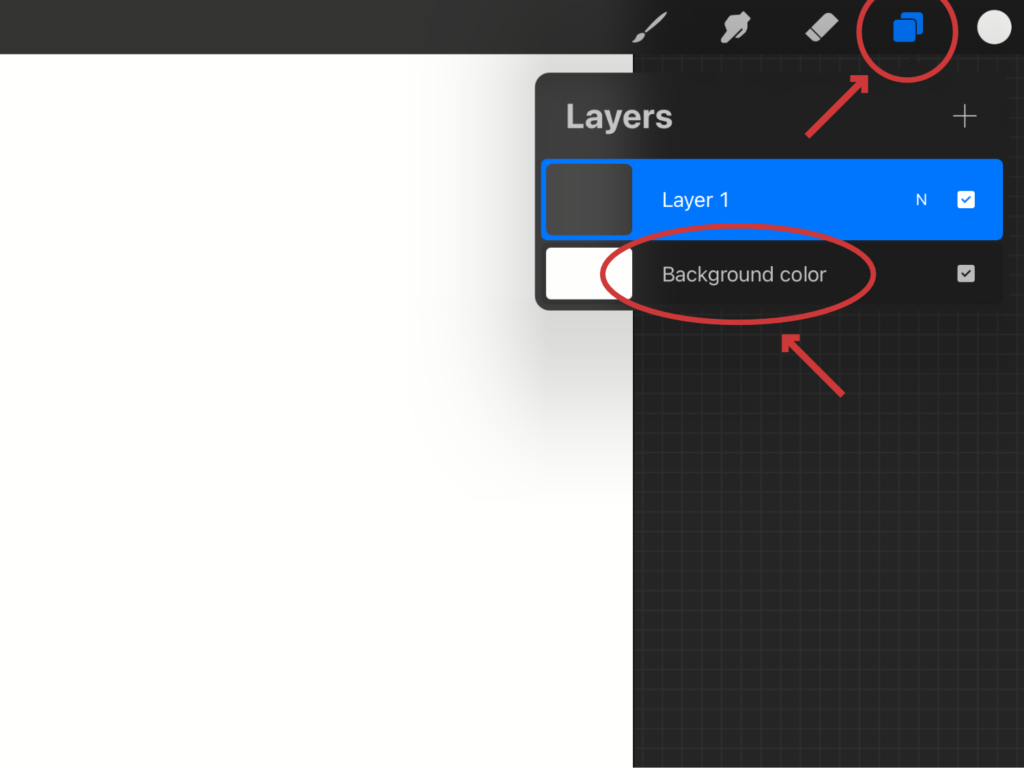
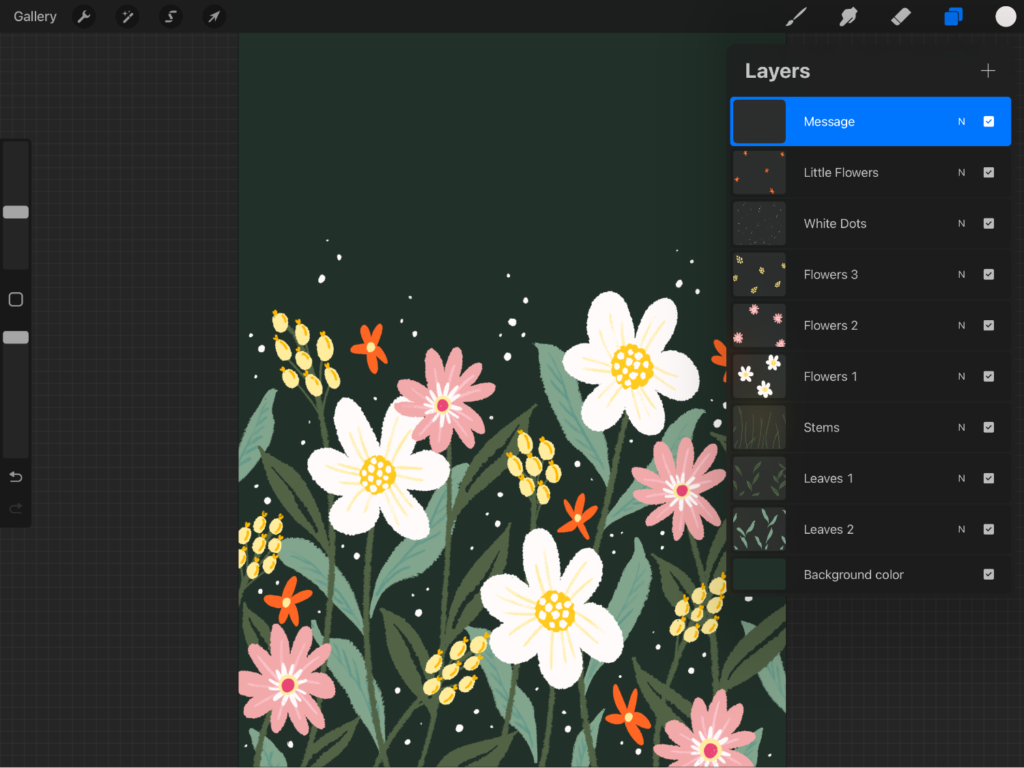
Tap the Layers icon (two overlapping squares on the upper right corner) to open the layers panel and tap the Background color layer to change your background.
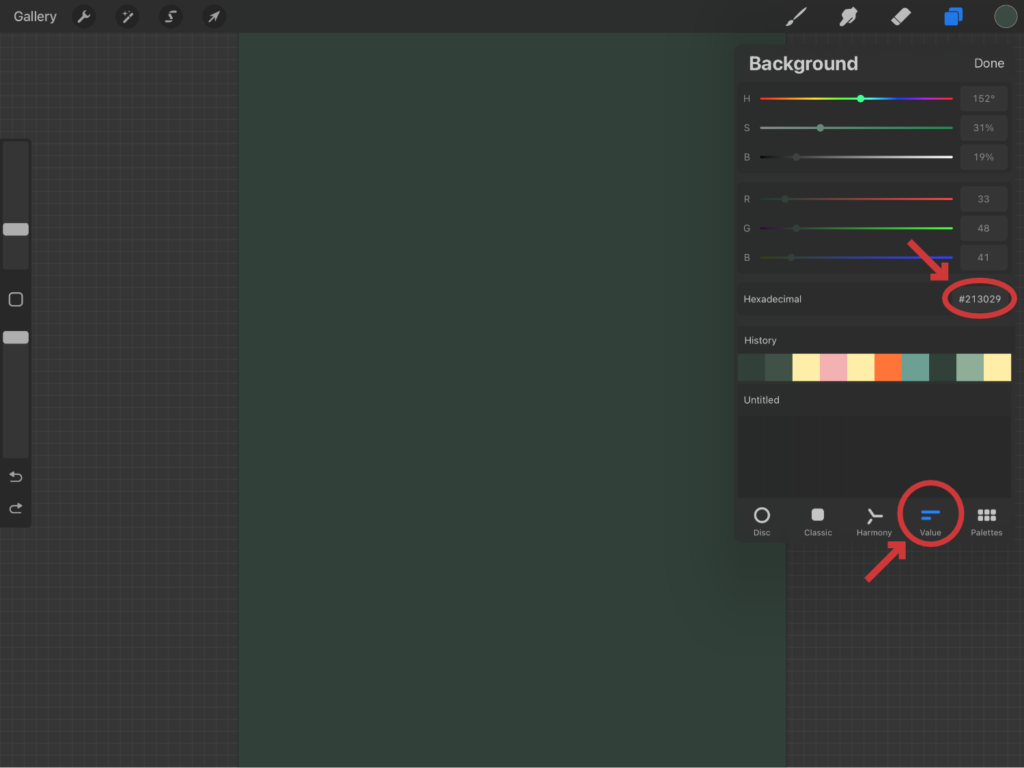
You will see a color wheel that allows you to select any color. If you have a specific color code, go to the Value tab below and enter it.
For this tutorial, I used #213029 for a dark green background. Input this hexadecimal code, and your background will change to this color. Or you can also simply use the Color Disc to pick any color you like.
Step 5: Draw Your First Flower Design
To create a new layer, you can tap the plus (+) icon on the upper right corner of the Layers panel. However, you already have one layer available when you open a new canvas.
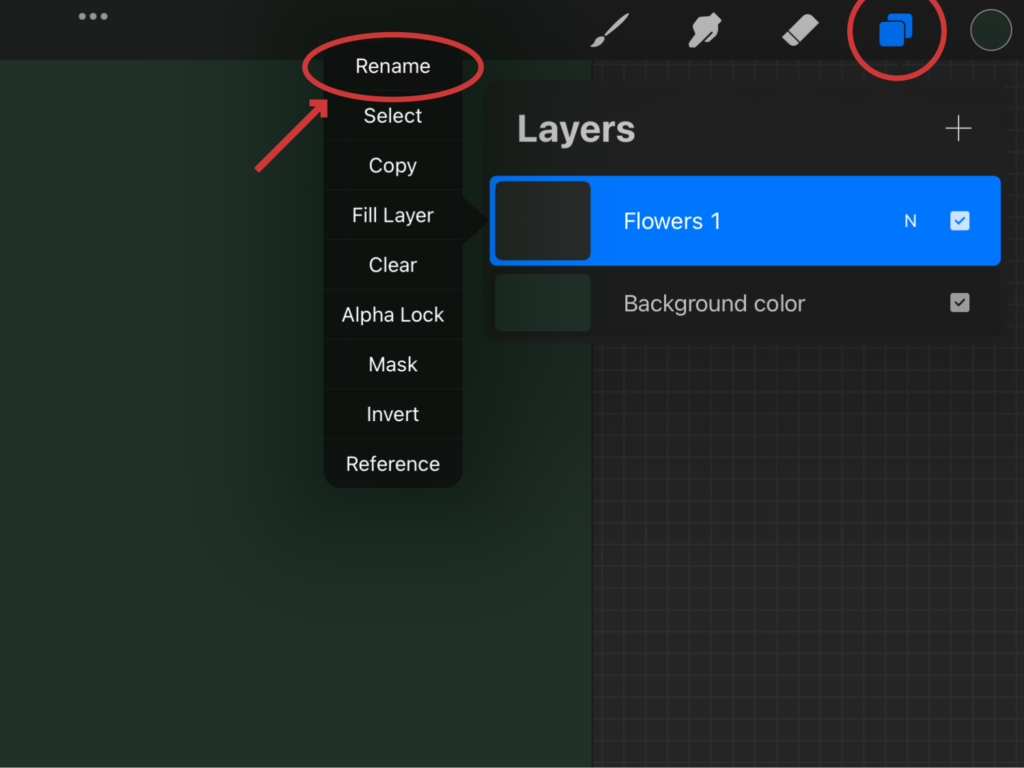
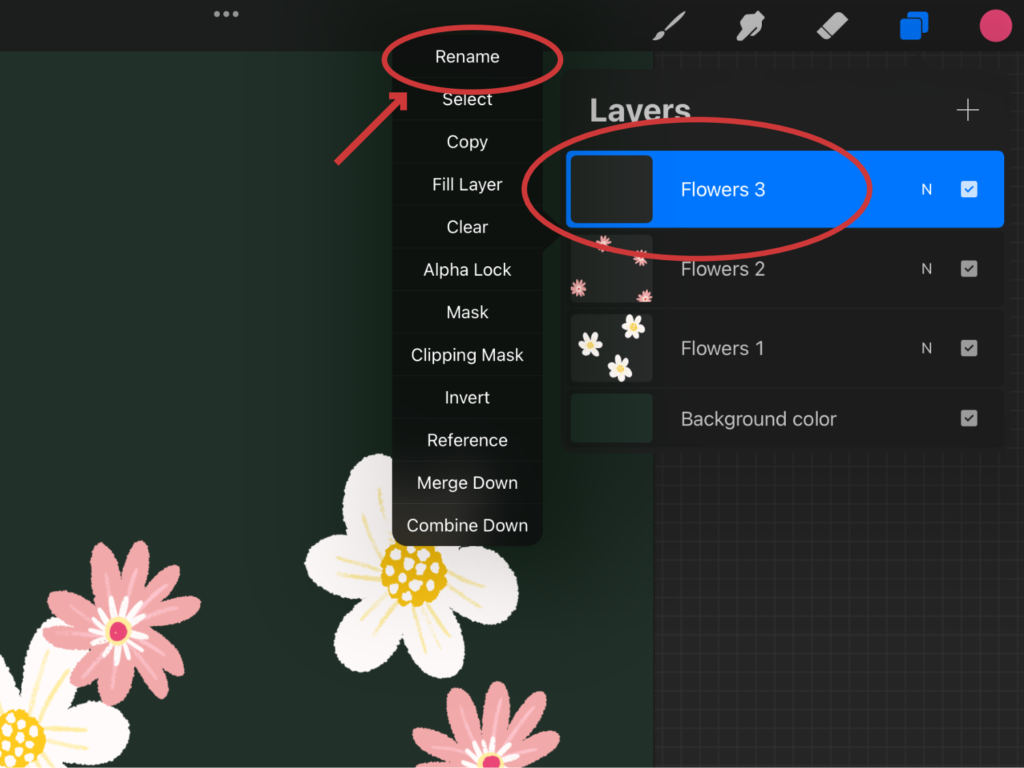
Let’s practice organizing our layers by renaming it. To rename your layer, simply tap the layer and click “Rename” on the little menu. Change the layer name to “Flowers 1.”
With our new layer selected, choose your brush and color.
Let’s use a drawing brush with rough edges for a natural feel. If you’re using the Dry Texture Brushes for Procreate pack, choose the “TH Textured Inker” brush and adjust the size so it’s not too big.
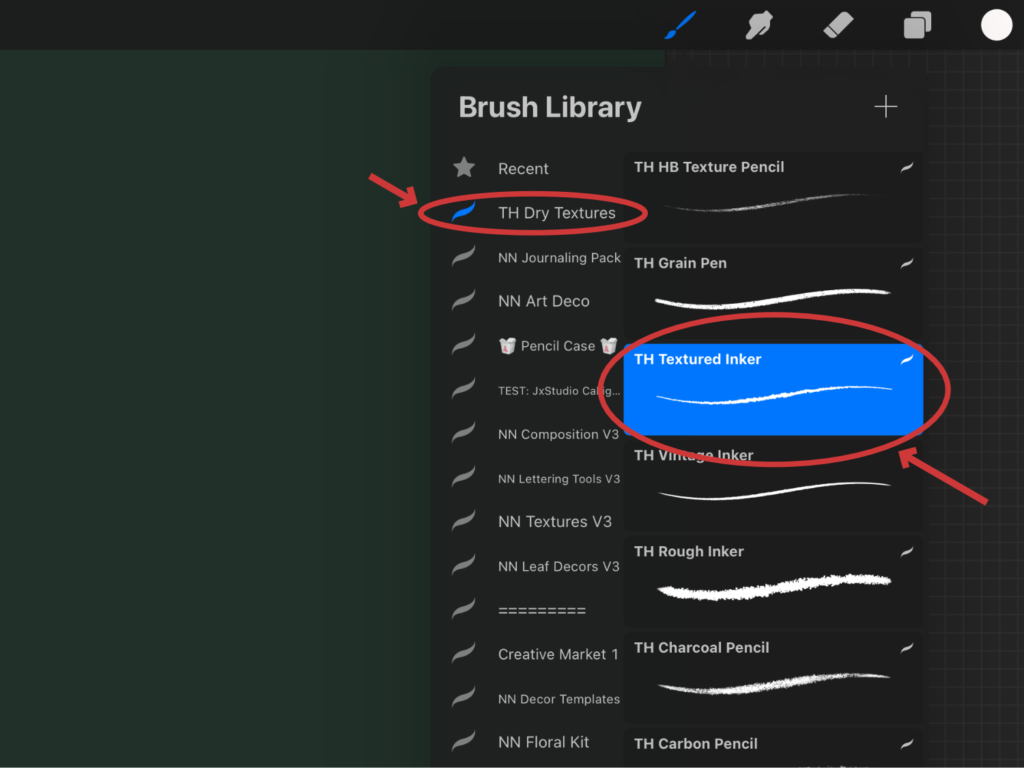
Set your brush color to an almost white color by tapping the color icon on the top-right corner and choosing white (#FFFBFB).
Sketch the Flower
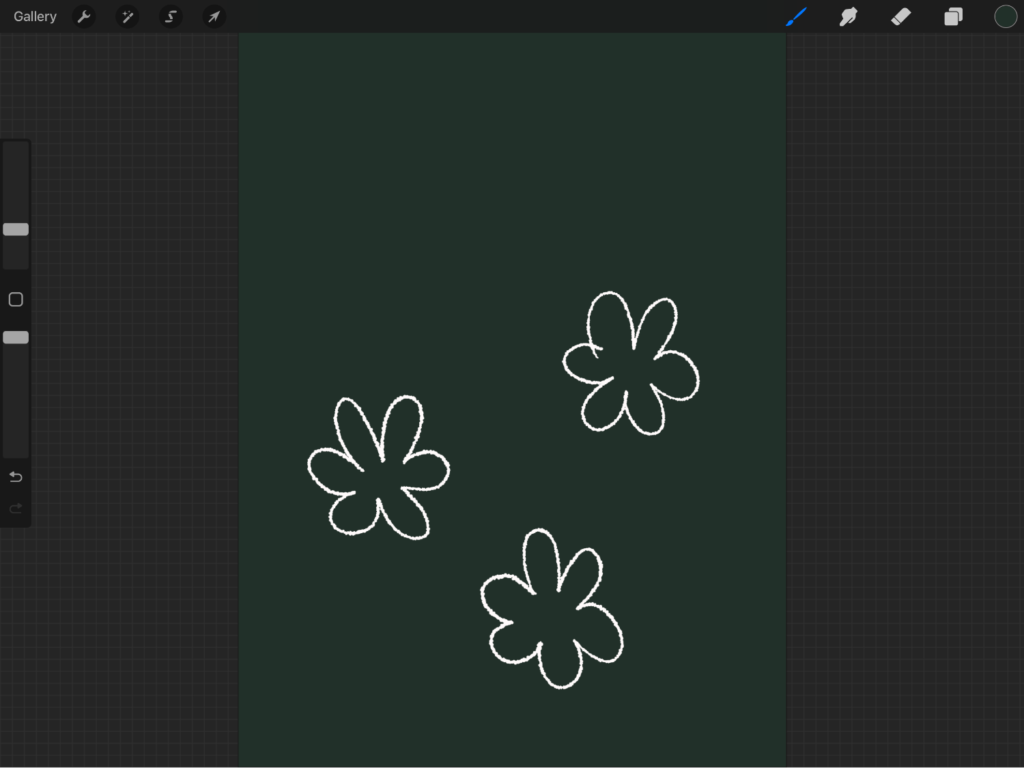
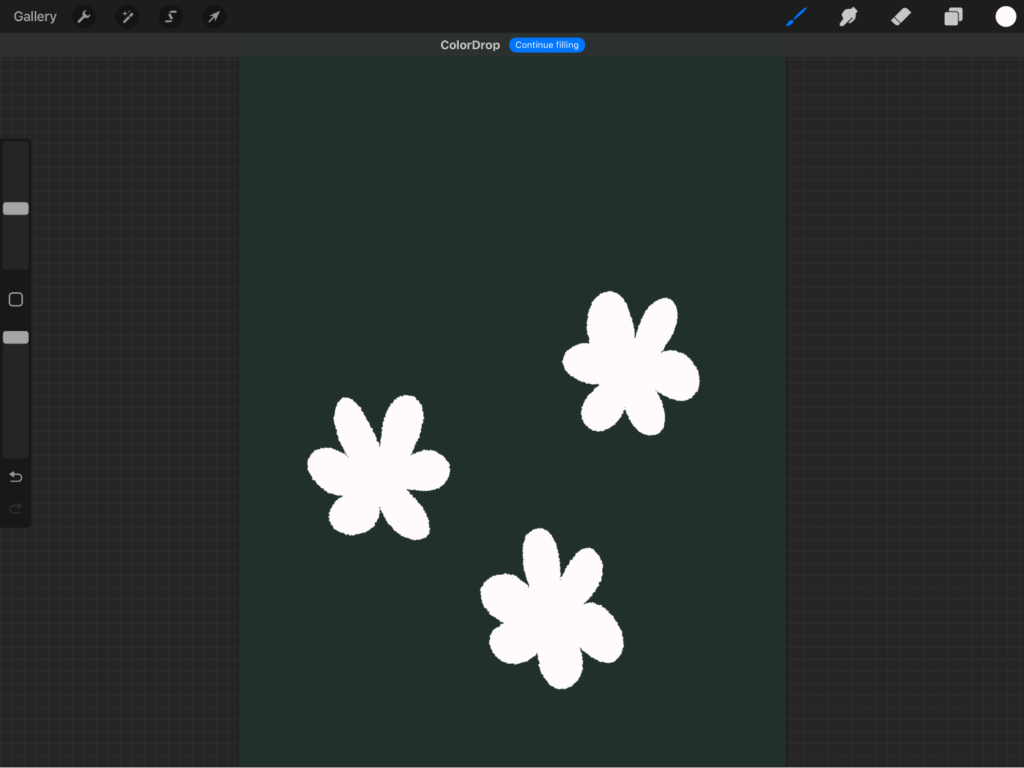
Draw three big, six-petal flowers scattered across the canvas, leaving space on the top for the text greeting. Make sure the petals are closed so we can fill the shape smoothly. Don’t worry if your sketch isn’t perfect, we’re going for an imperfect hand-drawn look for this one! That same style works well for handmade cards that use layered paper, fabric, or small embellishments for a more personal feel. Even when you start digitally, a handmade-looking design can make a lasting impression.
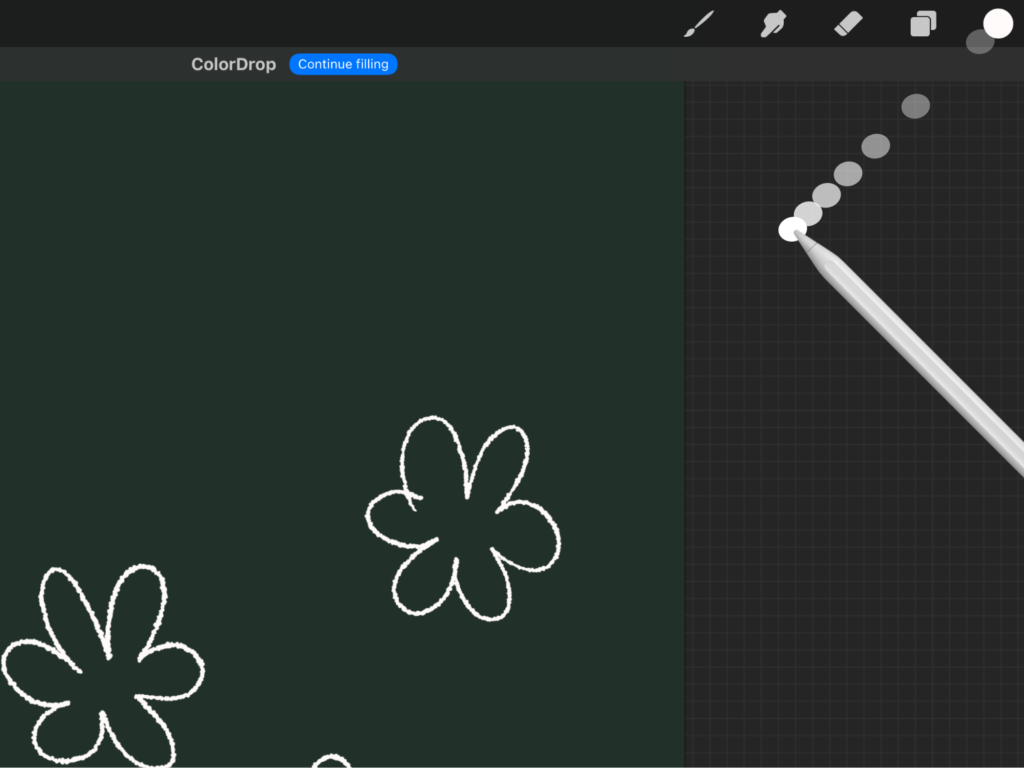
To fill the flower with color, drag the color circle from the top-right corner and drop it inside your shape. This is faster than manually shading in the petals. If the fill isn’t perfect, do not release the pen right away, hold your pen down for a few seconds and slide left or right to adjust the threshold until the fill looks clean.
Add Details
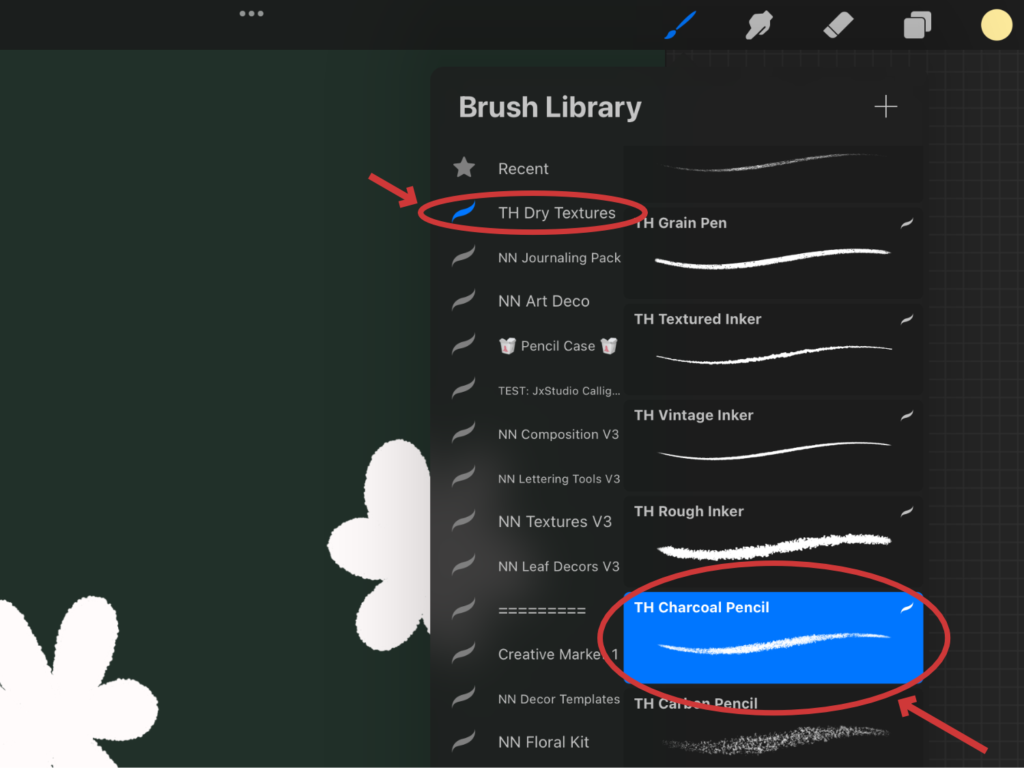
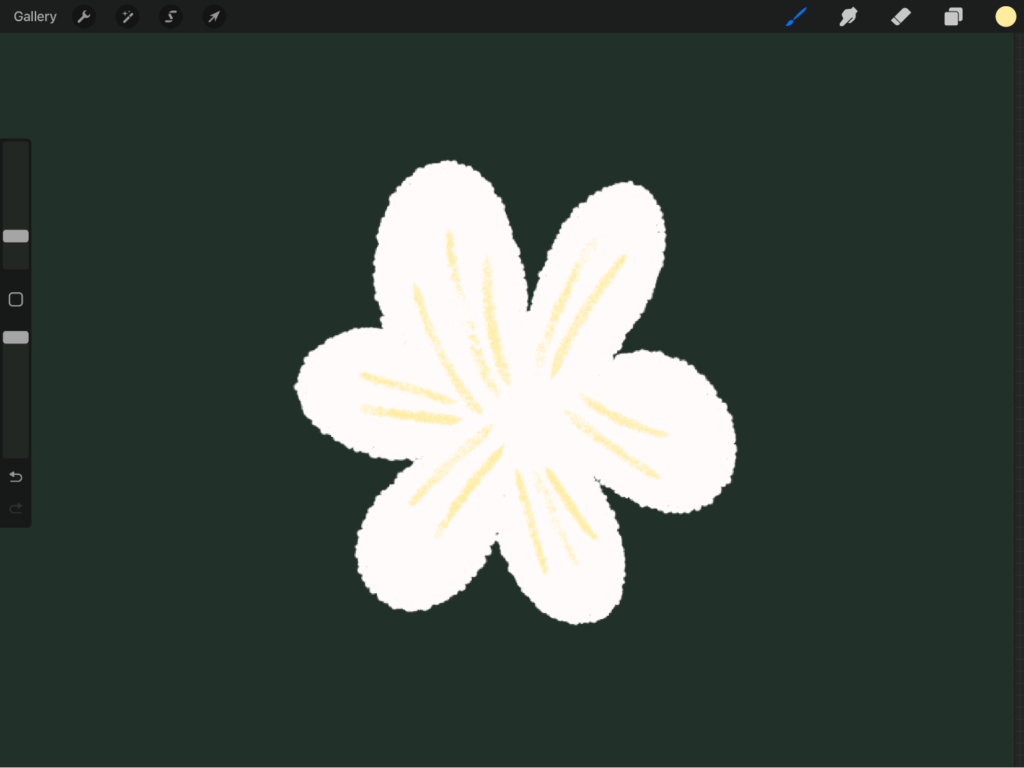
Switch to a rougher/textured brush like the “TH Charcoal Pencil” with pale yellow color (#FFEC9D). From the center, draw two to three lines outward toward the middle of each petal to add some design, echoing traditional paper card styles with an illustrated look and subtle embossing-inspired texture.
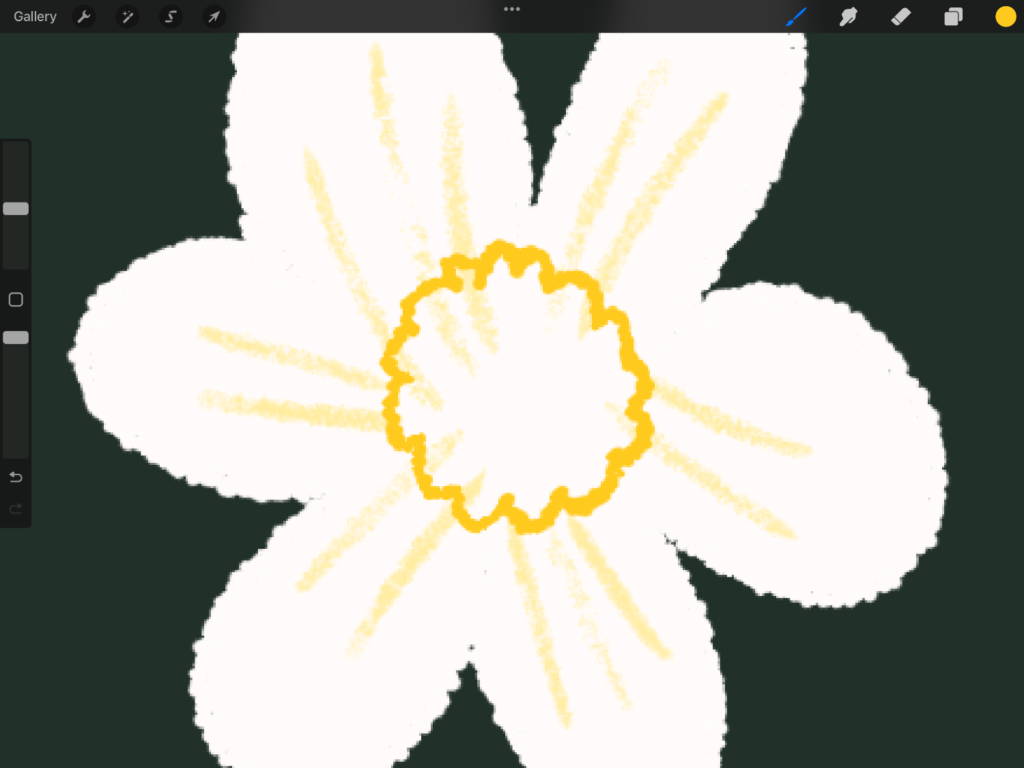
Next, switch back to the “TH Textured Inker” and select golden yellow (#FFCA1E) to draw a cloudy circle at the flower center, then fill the inside completely.
Finally, change the brush color to white (#FFFBFB) and draw small white dots over the yellow center for extra detail.
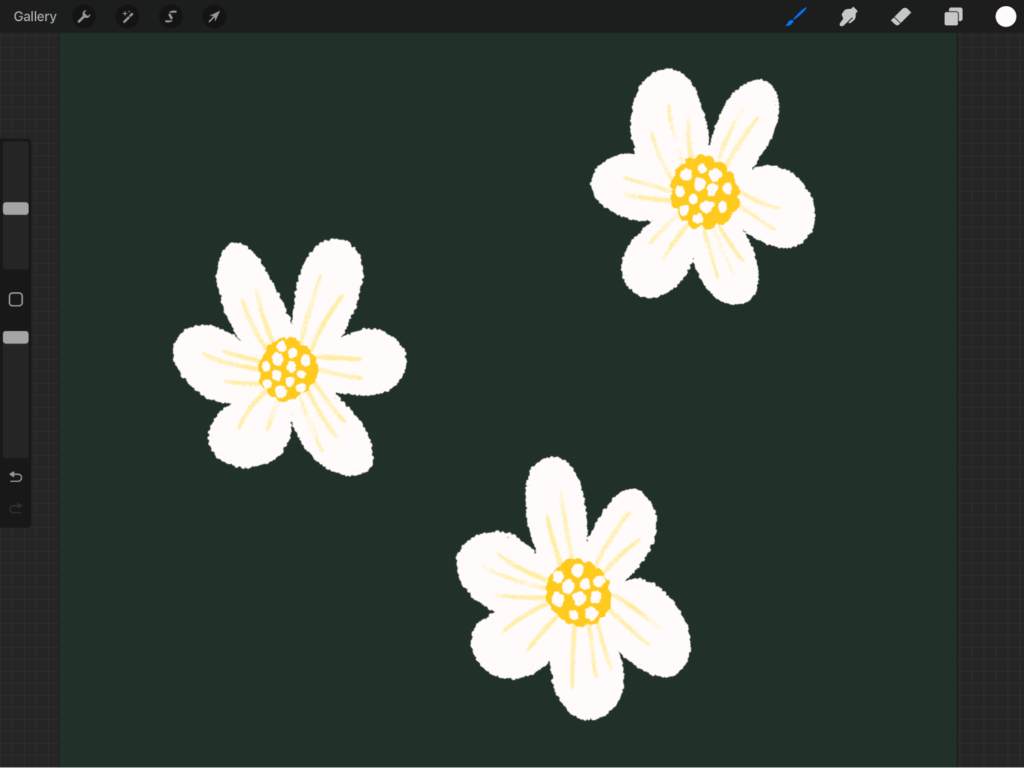
You’ve finished your first set of flowers!
Step 6: Draw Your Second Flower Designs
Create a new layer on the layers panel and rename it to “Flower 2.”
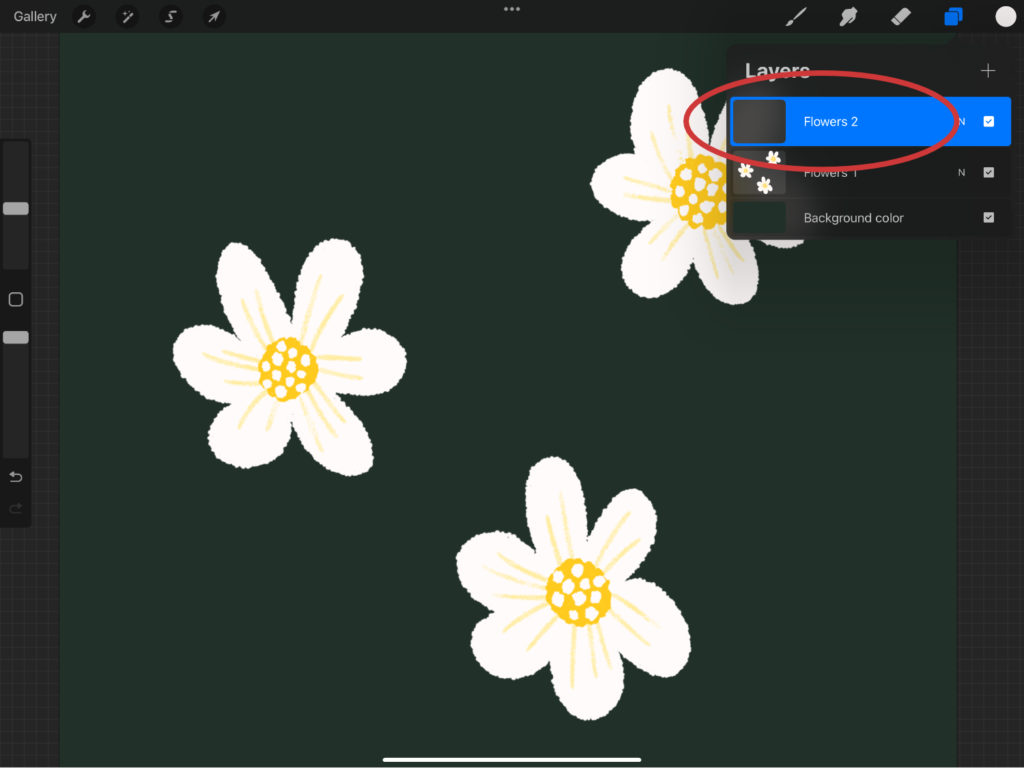
Using the “TH Textured Inker” in light pink (#F2A9A9), draw four ten-petal flowers with long, narrow, rounded petals and fill them.
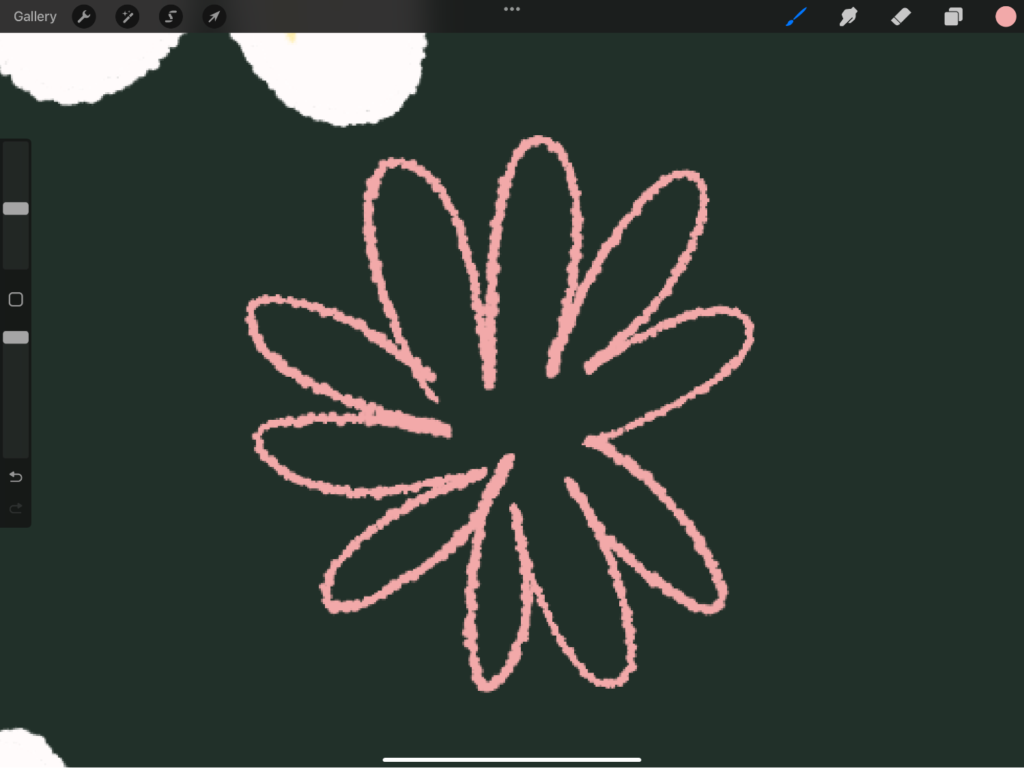
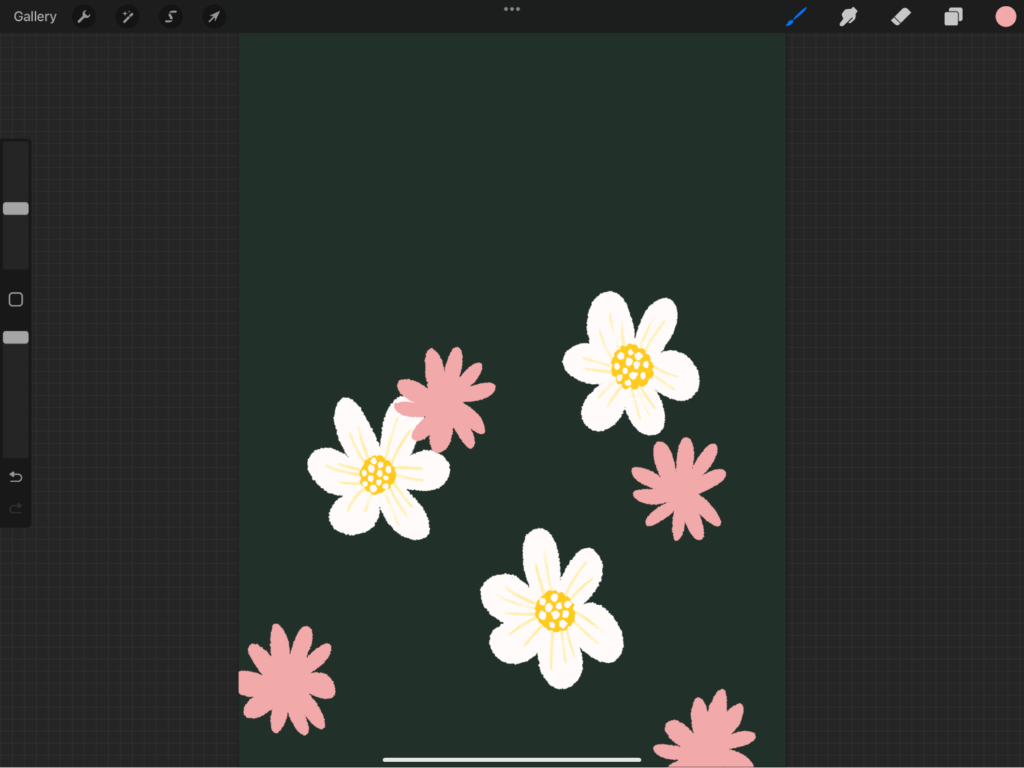
Then draw in some details using the “TH Charcoal Pencil” brush with a lighter pink color (#FDC6CF). Draw one line for each petal from the center halfway toward the petal edges.
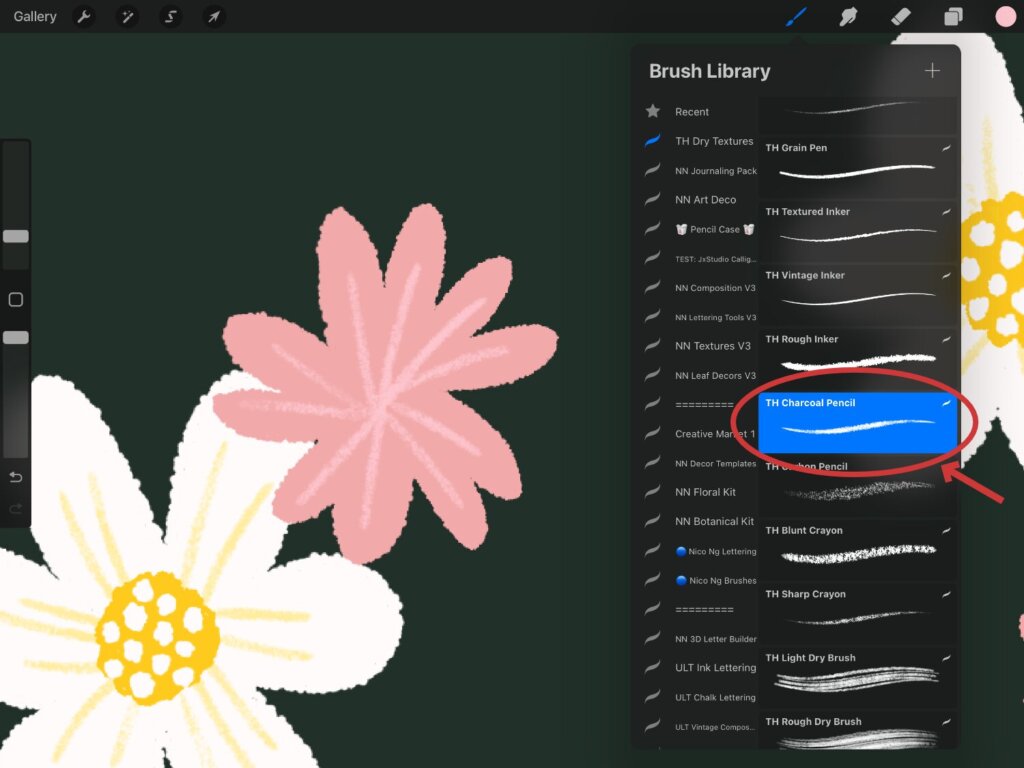
Then switch to a more opaque brush with some grainy texture like the “TH Grain Pen” and draw this spiky shape in the center with the color white (#FFFBFB).
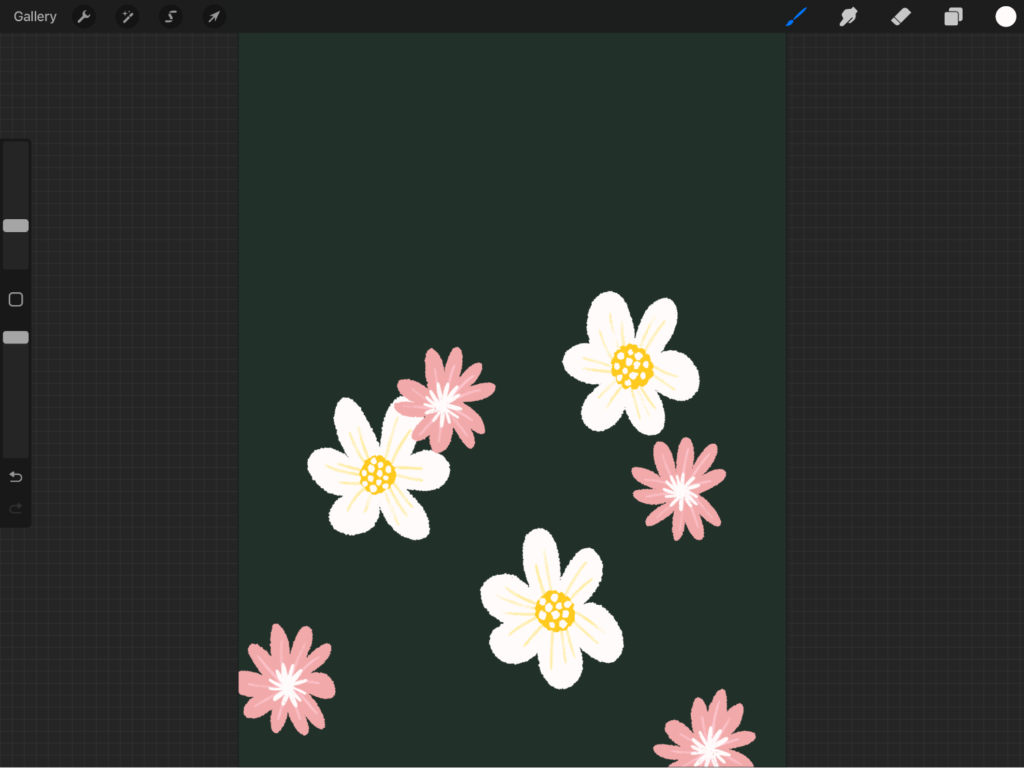
Next, draw a yellow circle (#FFEC9D) over it and another smaller pink circle (#e94576) inside it.
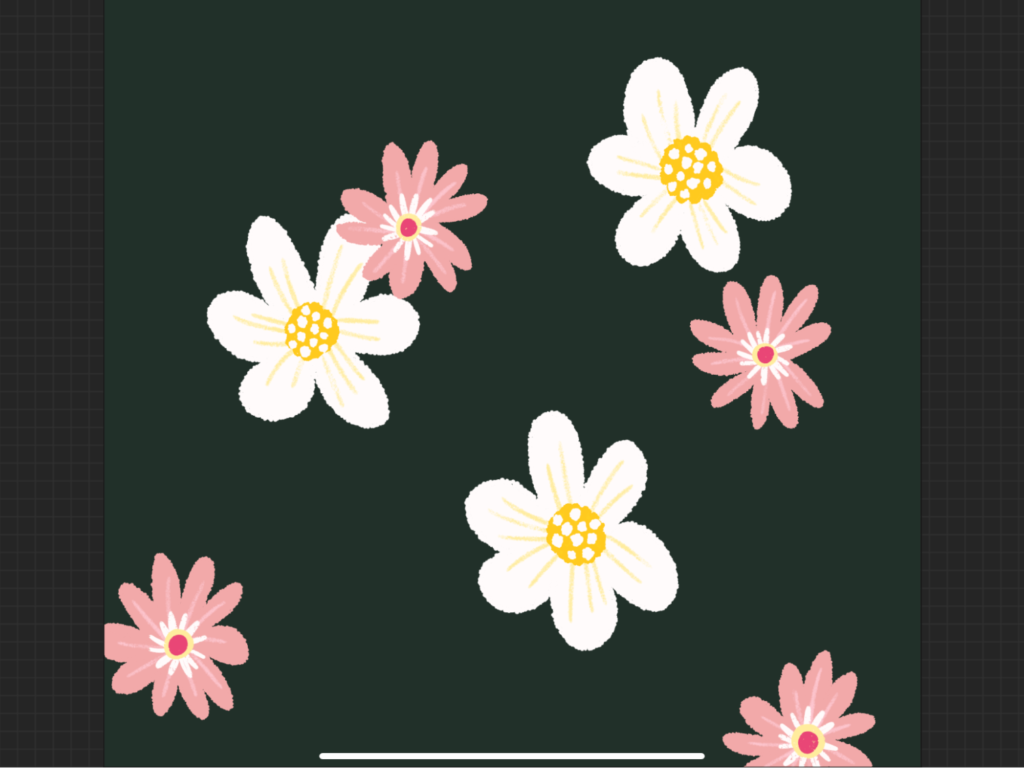
Your second set of flowers is complete, and varying the flower shapes helps give the card more visual styles.
Step 7: Draw Your Floral Buds
Create a new layer and rename it to “Flowers 3.”
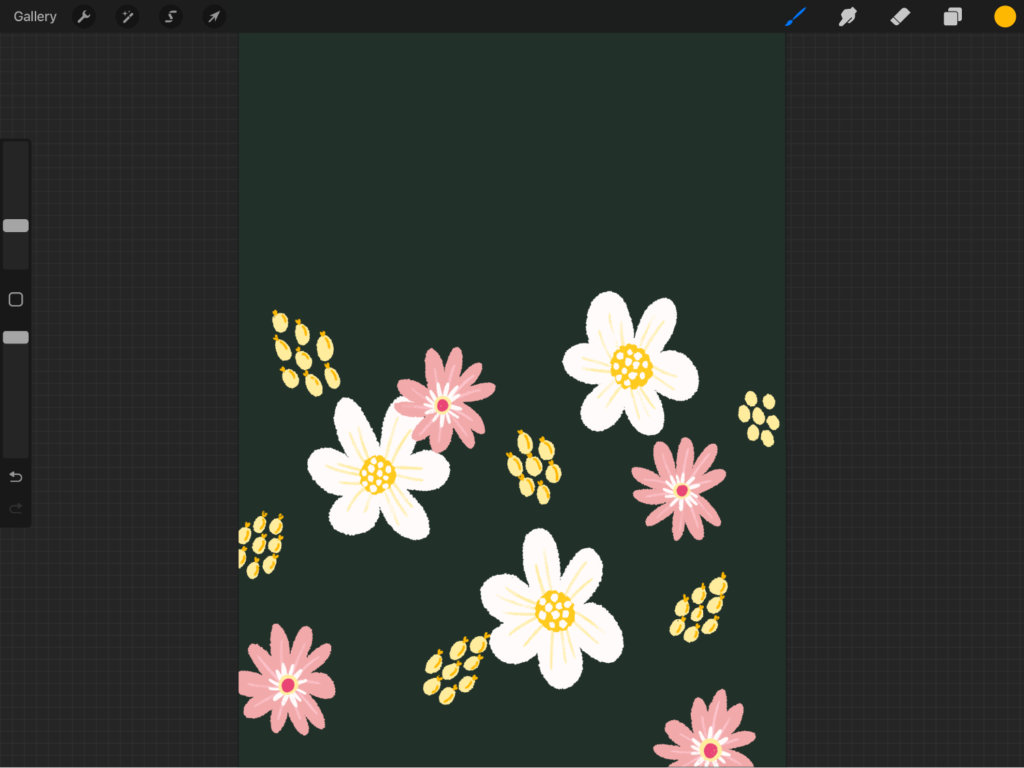
Using the “TH Textured Inker” in pale yellow color (#FFEC9D), draw clusters of seven small ovals across your canvas.
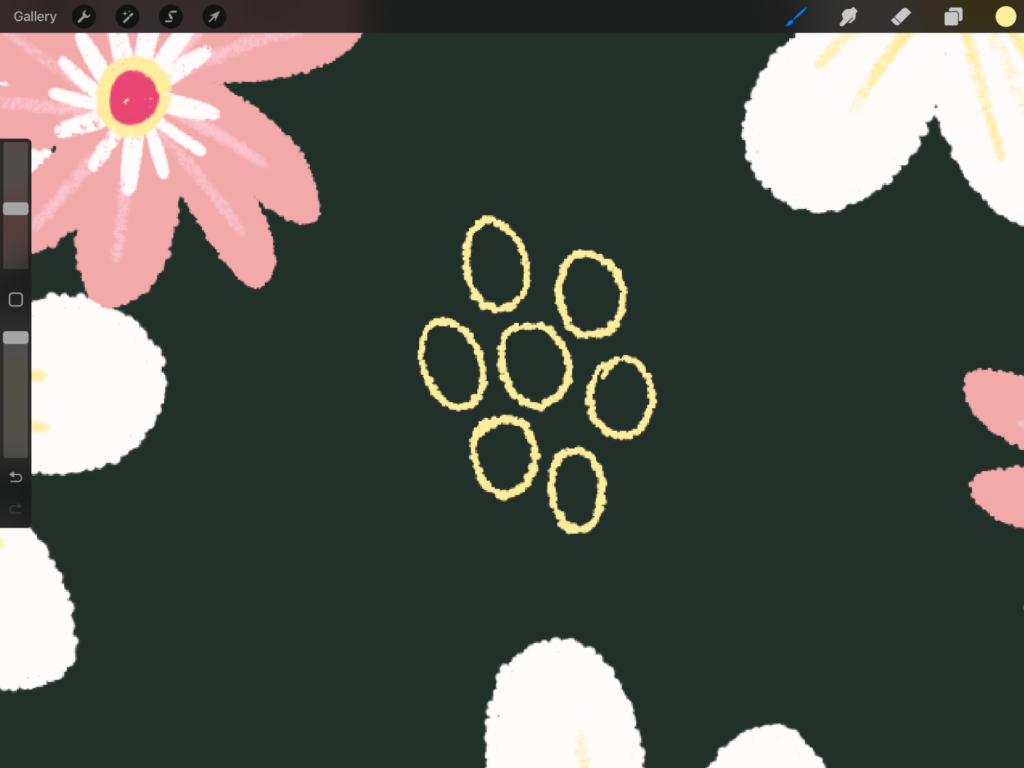
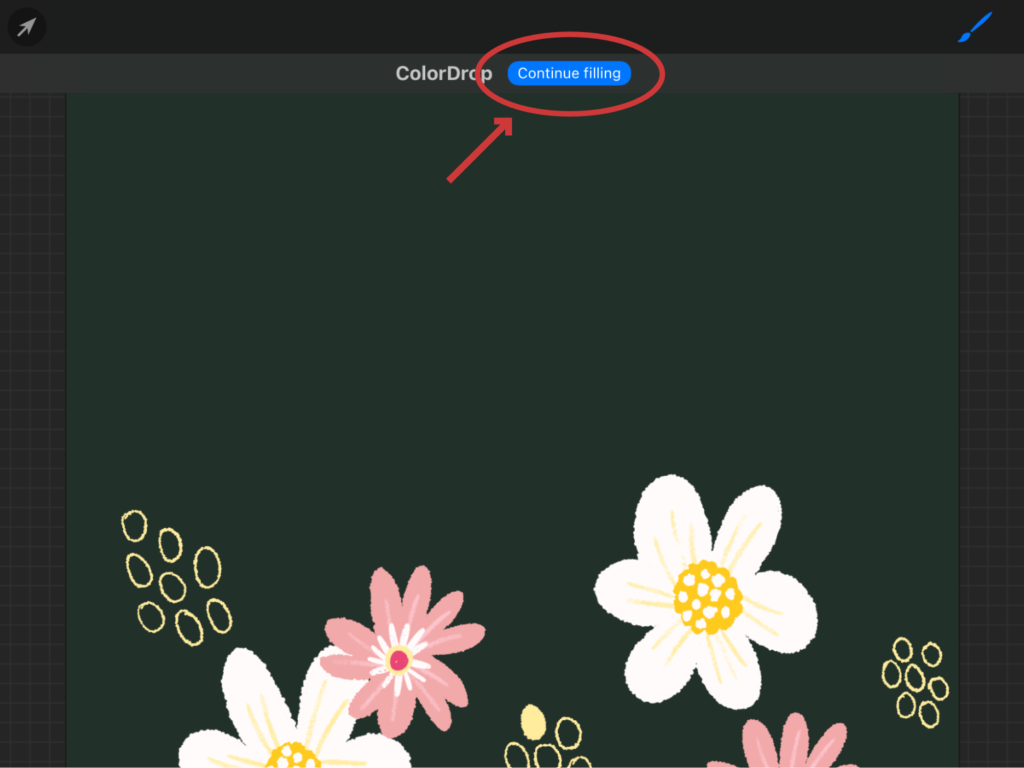
Fill the ovals with the same color. But instead of color-dropping each oval, here’s a shortcut I’d like you to learn. After color-dropping into one shape, a blue “Continue Filling” button will appear on top. Tap it to quickly fill other ovals by simply tapping inside each one.
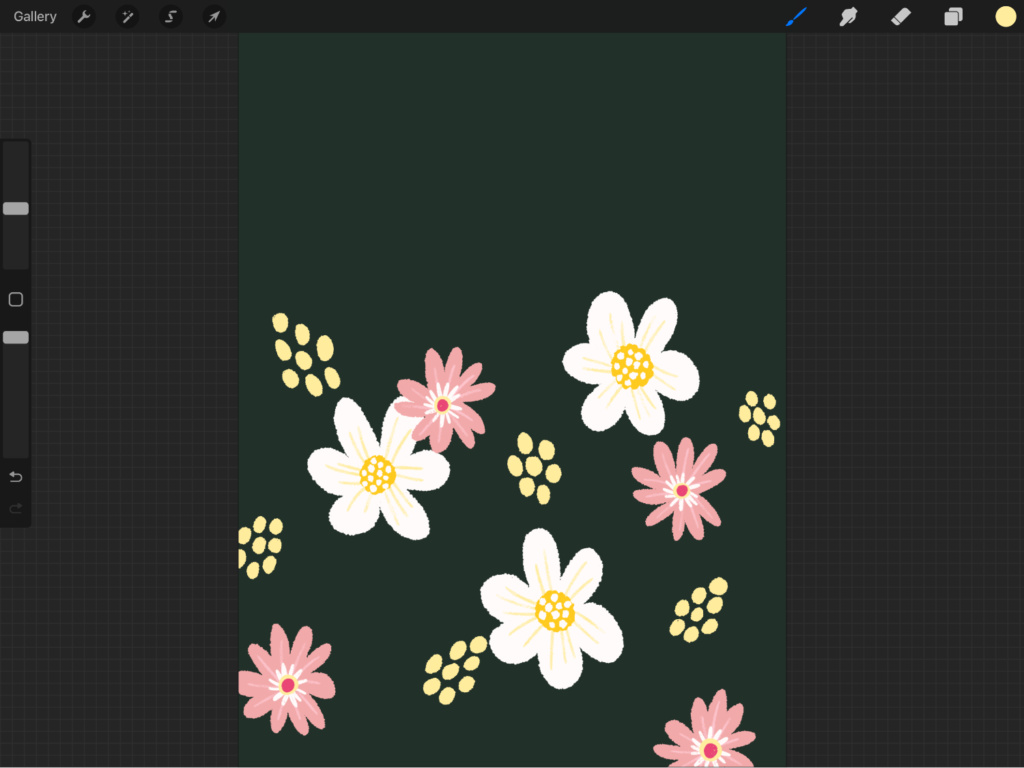
Next, let’s add some golden yellow (#FFB800) details to these floral buds. Draw a small “V” shape on top of each and add a curved line near the right side of each bulb. I’m using the “TH Grain Pen” for these details.
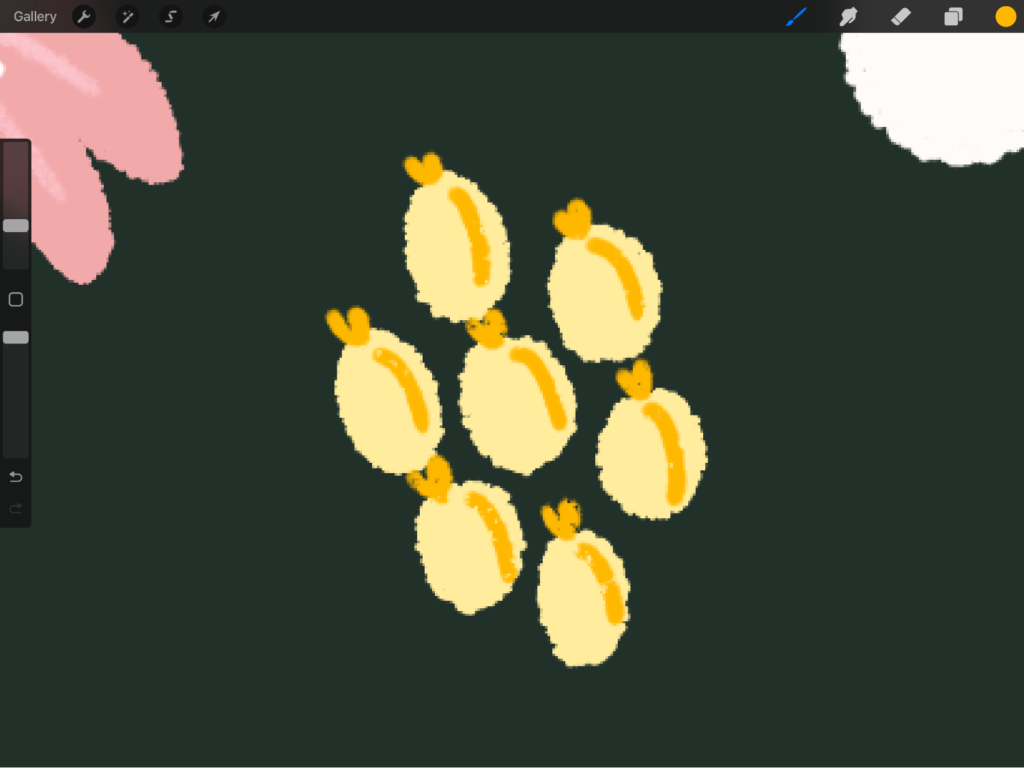
Your floral buds are ready.
Step 8: Add Your Stems
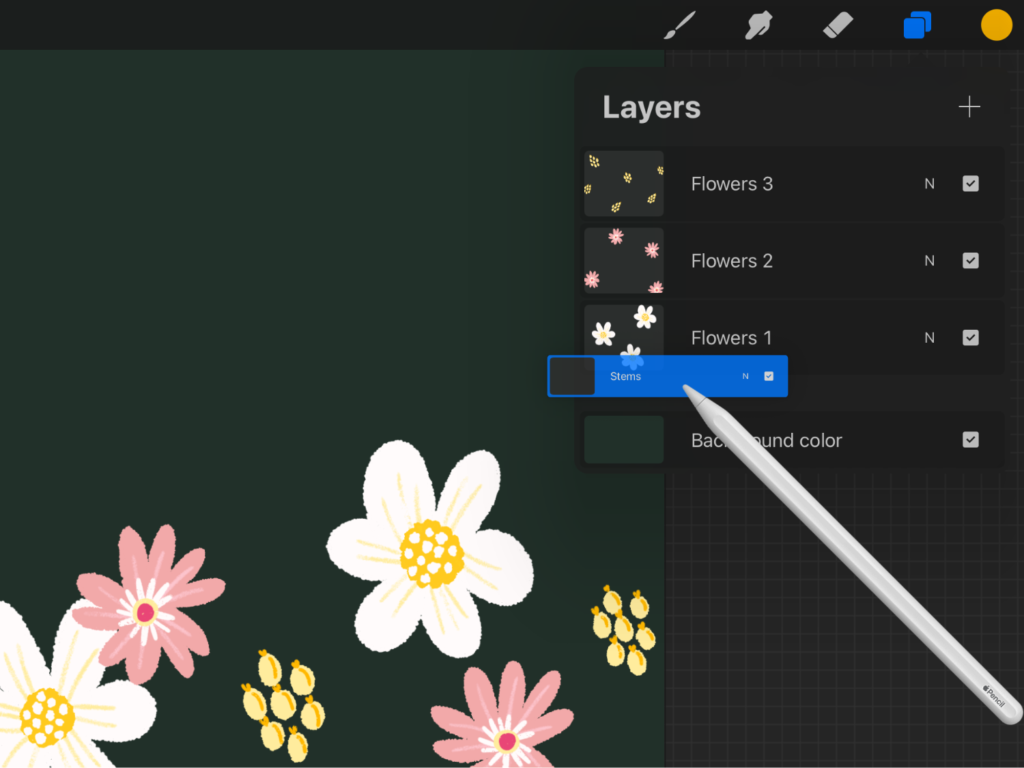
Create a new layer below your flower layers and name it “Stems.” To move your layer, simply press and hold the layer for a few seconds, then drag it to where you want to place it.
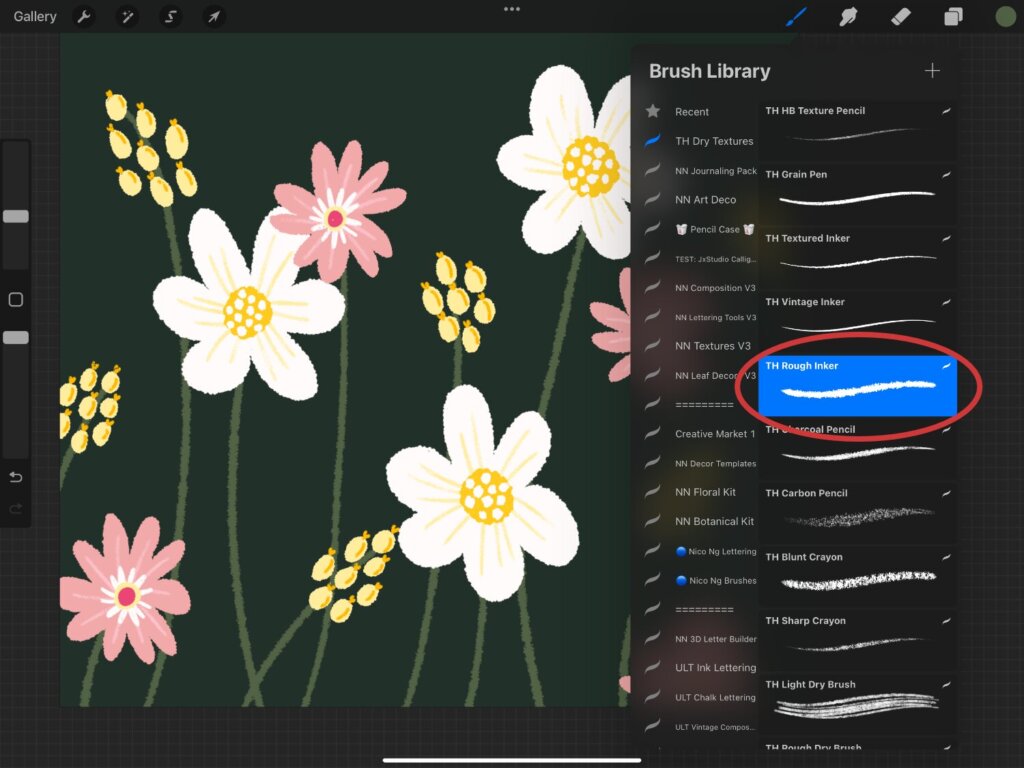
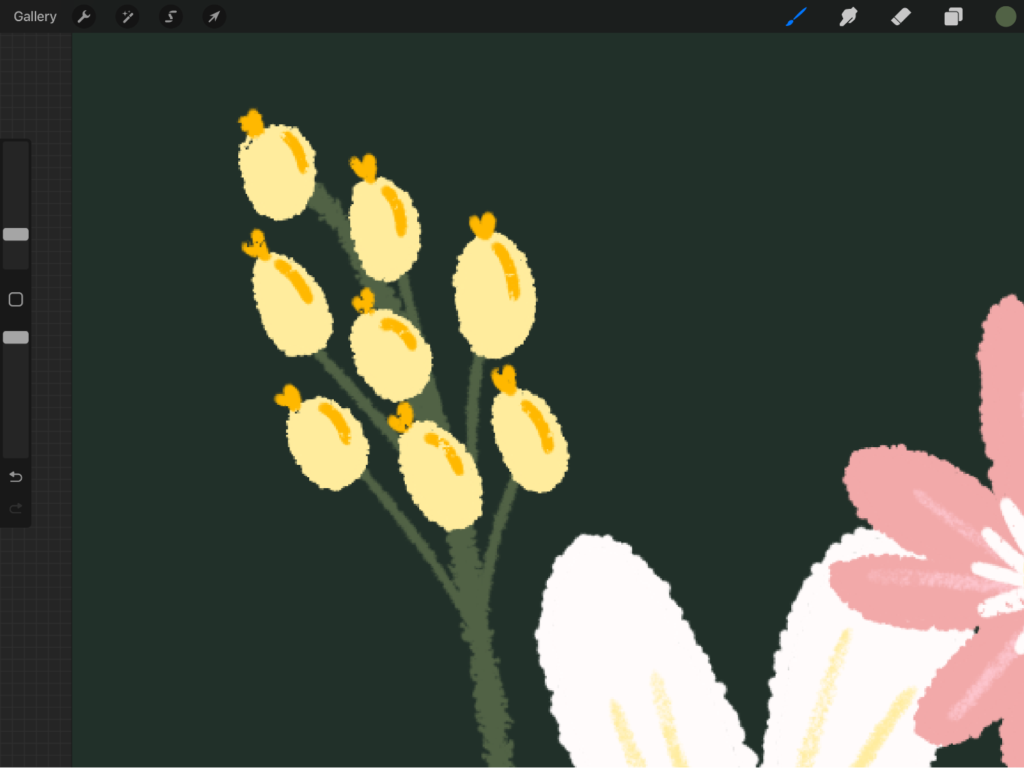
Using the “TH Rough Inker” in olive green (#516245), draw curved lines from your flowers down toward the bottom of your canvas. For buds, draw a main stem from the topmost bulb down to the bottom, then draw small stems from each bulb connecting to the main stem.
Step 9: Add Your Leaves
Create two new layers and rename them “Leaves 1” and “Leaves 2.” Drag and move these layers below the “Stems” layer.
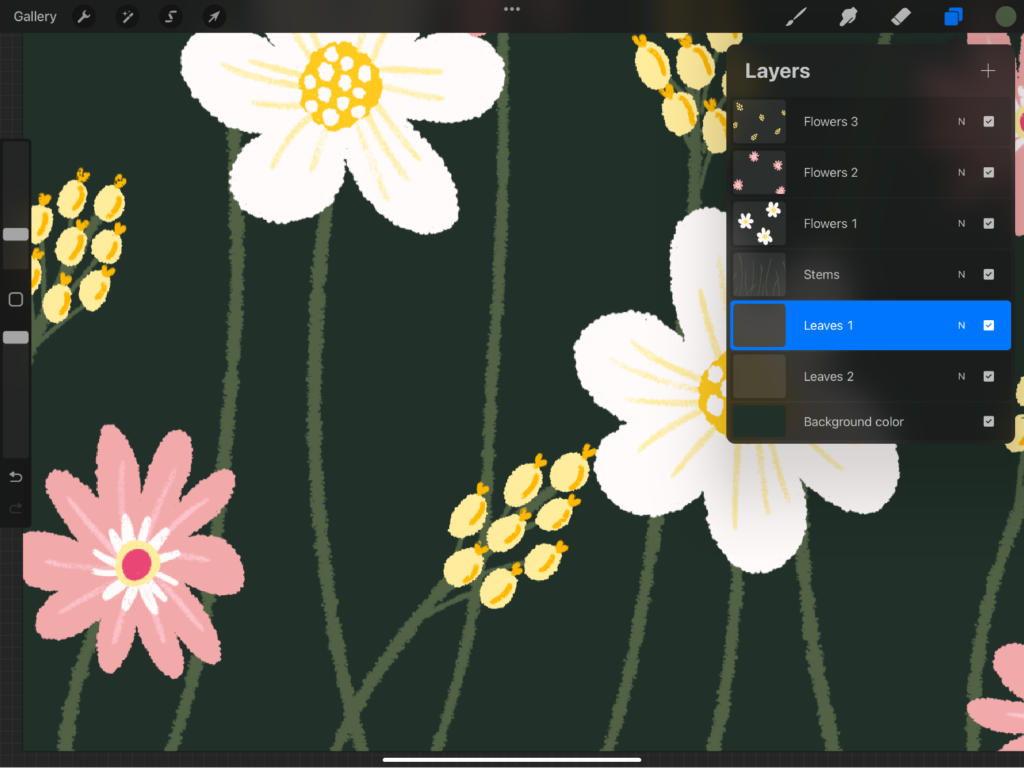
Leaves 1 Layer
Select the “Leaves 1” layer. Using olive green (#516245) and the “TH Textured Inker,” draw long, pointy leaves extending from the stems. Then color drop with the “Continue Filling” button to quickly fill each leaf.
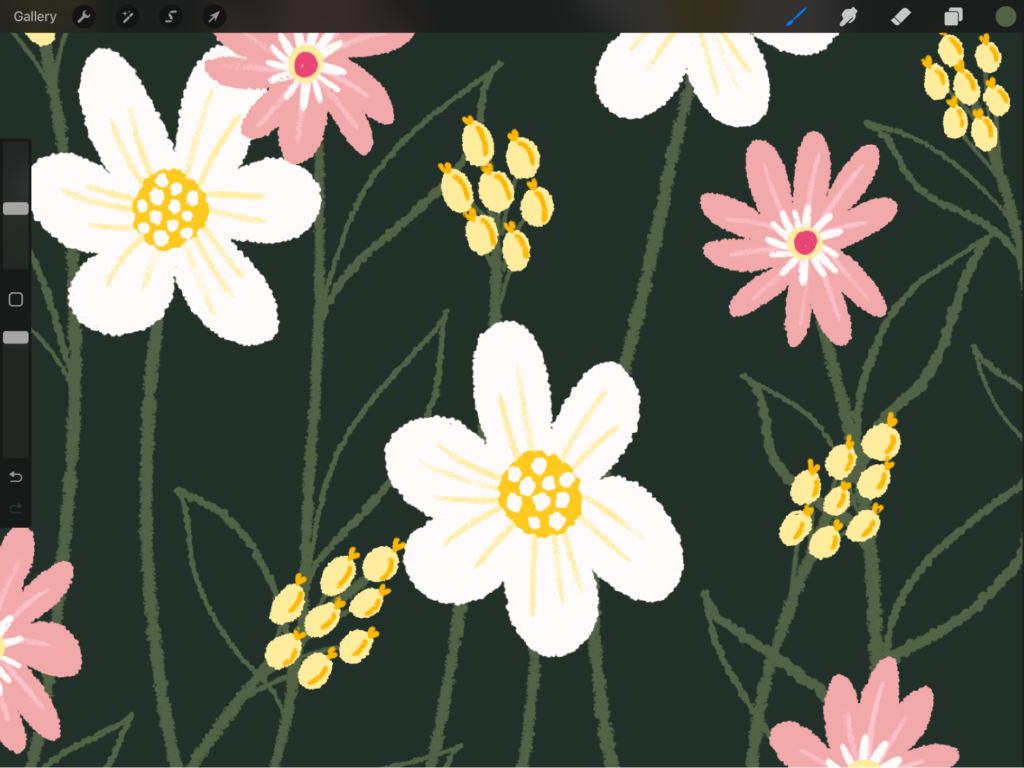
Leaves 2 Layer
Select the “Leaves 2” layer to start adding in your second leaves. Another way to draw leaves is to use a pressure-sensitive brush (like the “TH Heavy Ink” brush) with light pale green (#82A58D) to brush in pointed, tapered leaves in a single stroke.
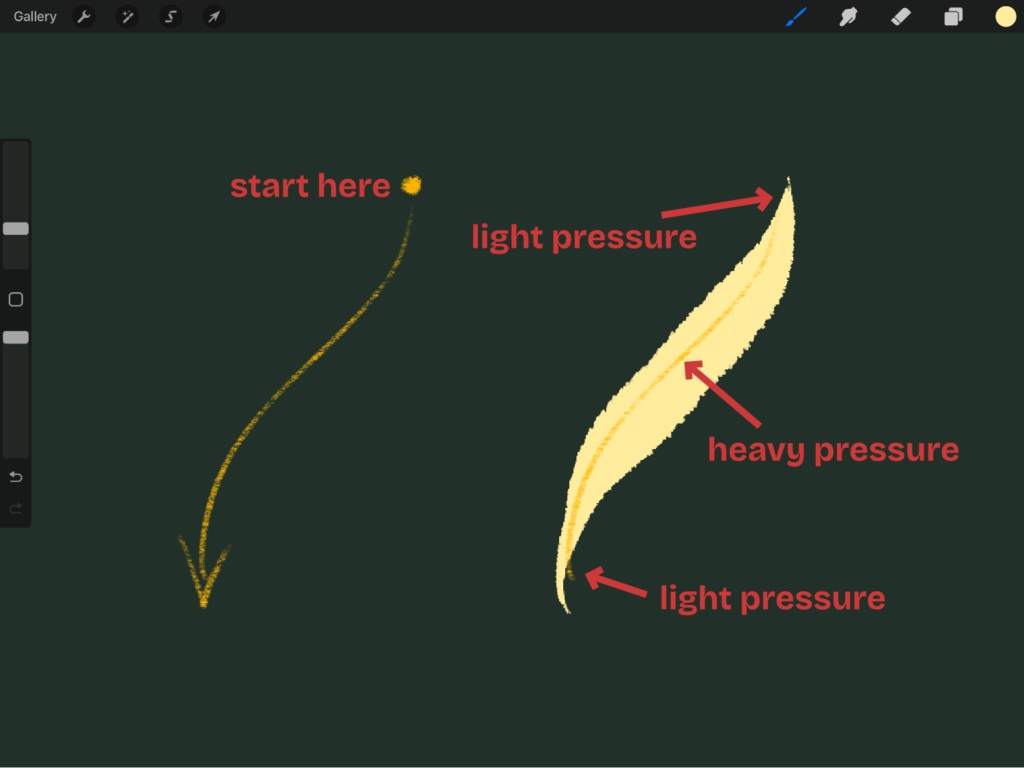
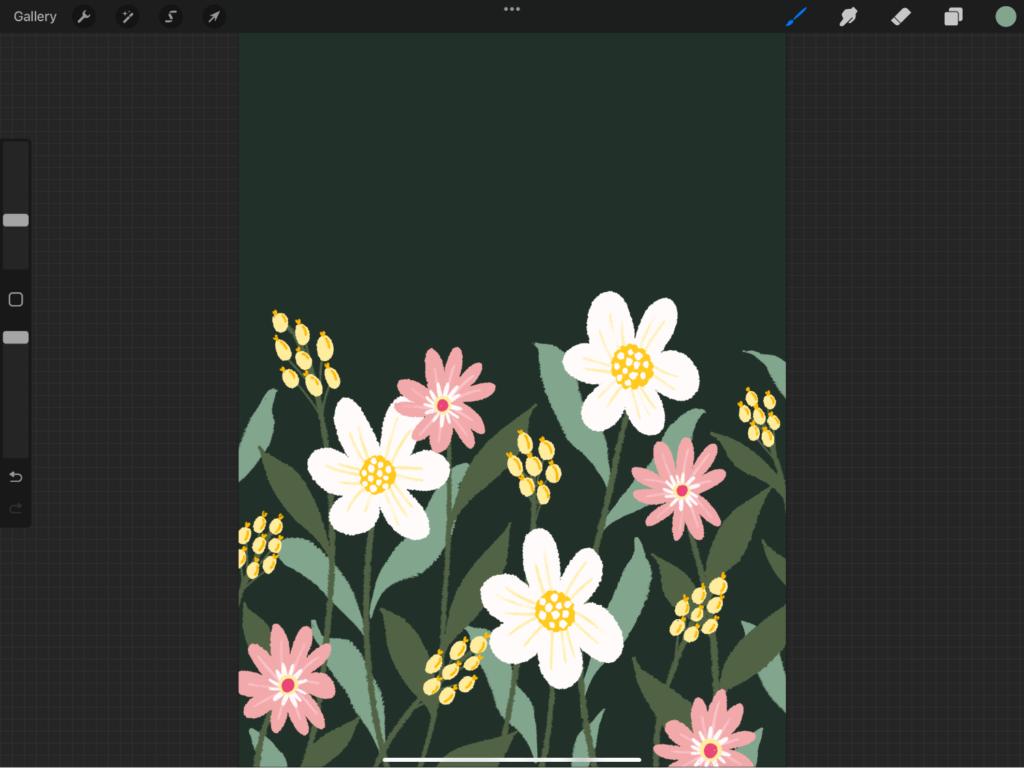
Practice controlling the pressure to get thin-thick-thin strokes for your leaves, but if it’s tricky, you can switch back to your textured brush and draw the leaves manually.
Add Leaf Details:
Going back to the “Leaves 1” layer, use a darker green color (#213029) to add a thin-thick-thin center line down each leaf with the “TH Textured Inker” brush. These center lines and the shading you add next help create depth and a stronger sense of perspective in the leaves.
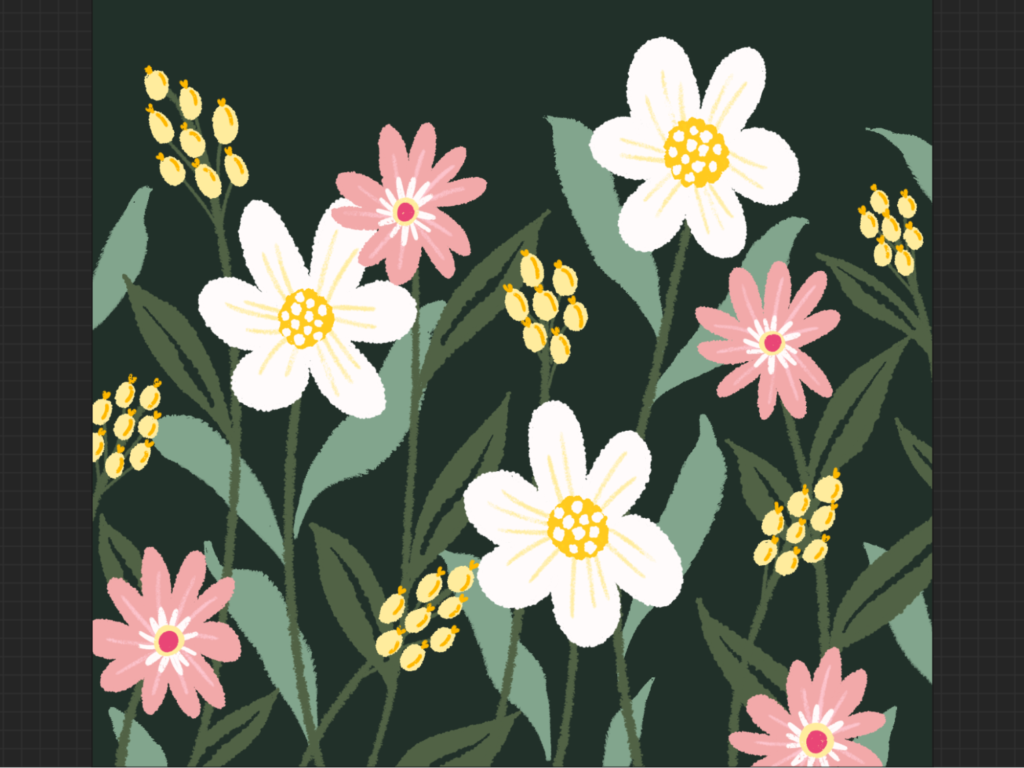
Then, for the “Leaves 2” layer, use the “TH Charcoal Pencil” brush with a slightly darker green (#5E968A) to draw a center vein with diagonal shading lines. Make sure to add these details to all of your leaves.
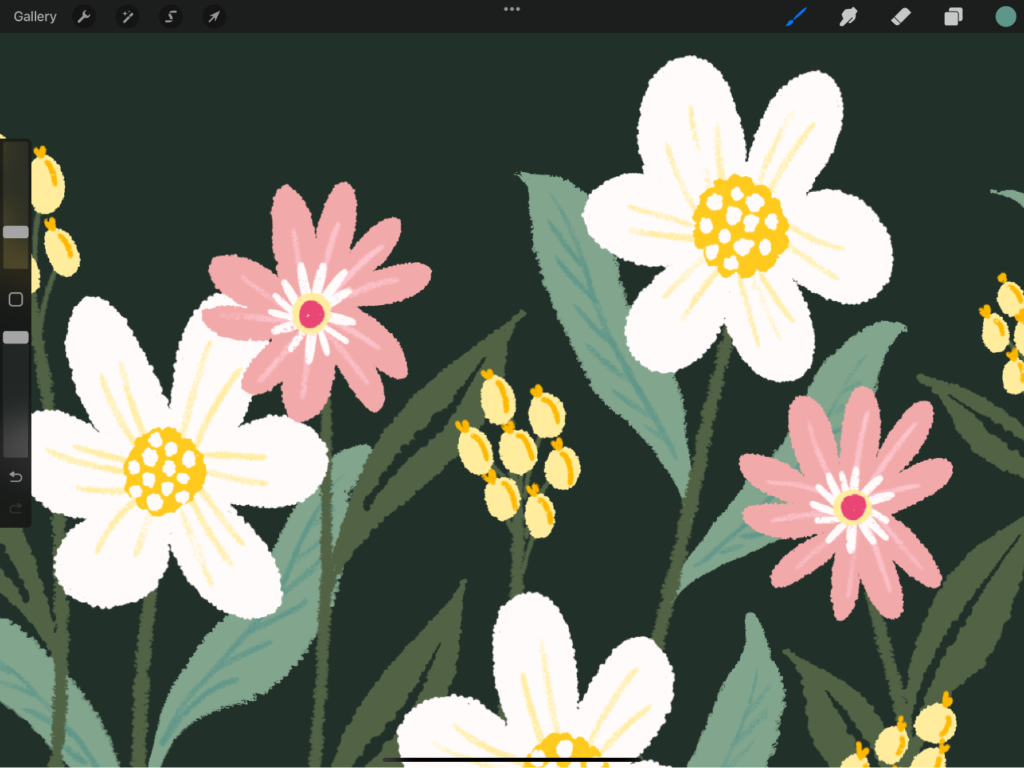
Step 10: Add Filler Flowers and Dots
To balance your composition, we may need to fill in empty spaces with smaller filler flowers. Create a layer named “Little Flowers” and, using a cleaner drawing brush like the “TH Vintage Inker,” draw tiny five-petal orange flowers (#FF6523) in the empty spaces, then add a yellow center (#FFEC9D) to each.
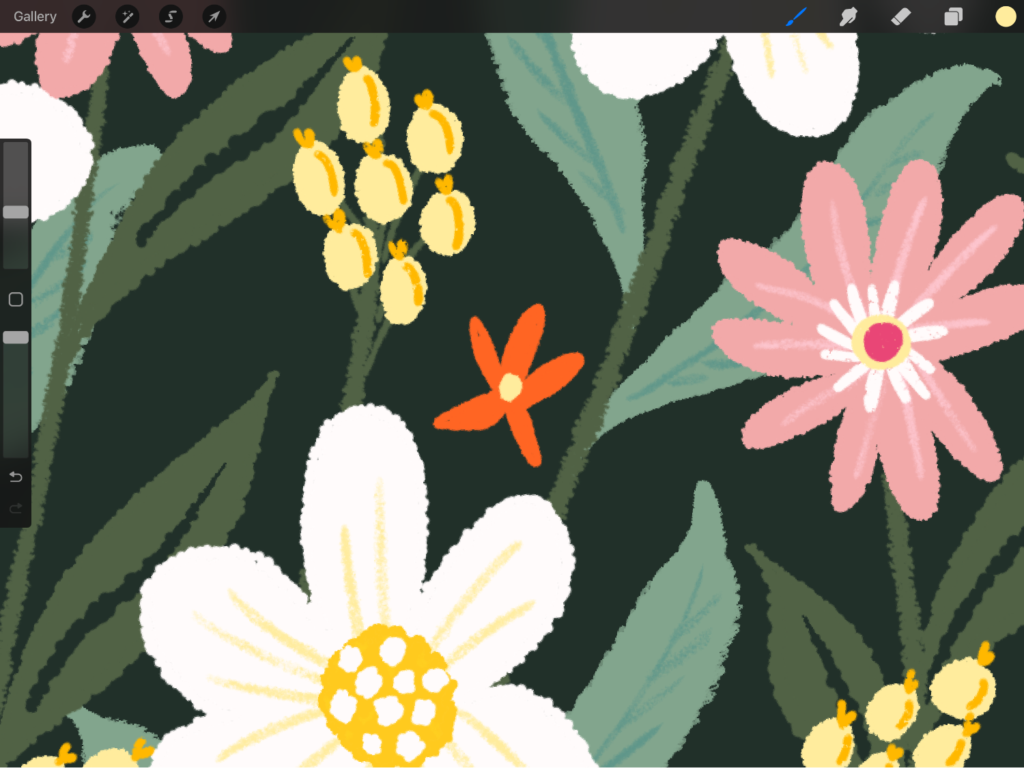
As a finishing touch, create a layer named “White Dots” and draw clusters of tiny white dots in groups of two or three in empty spaces.
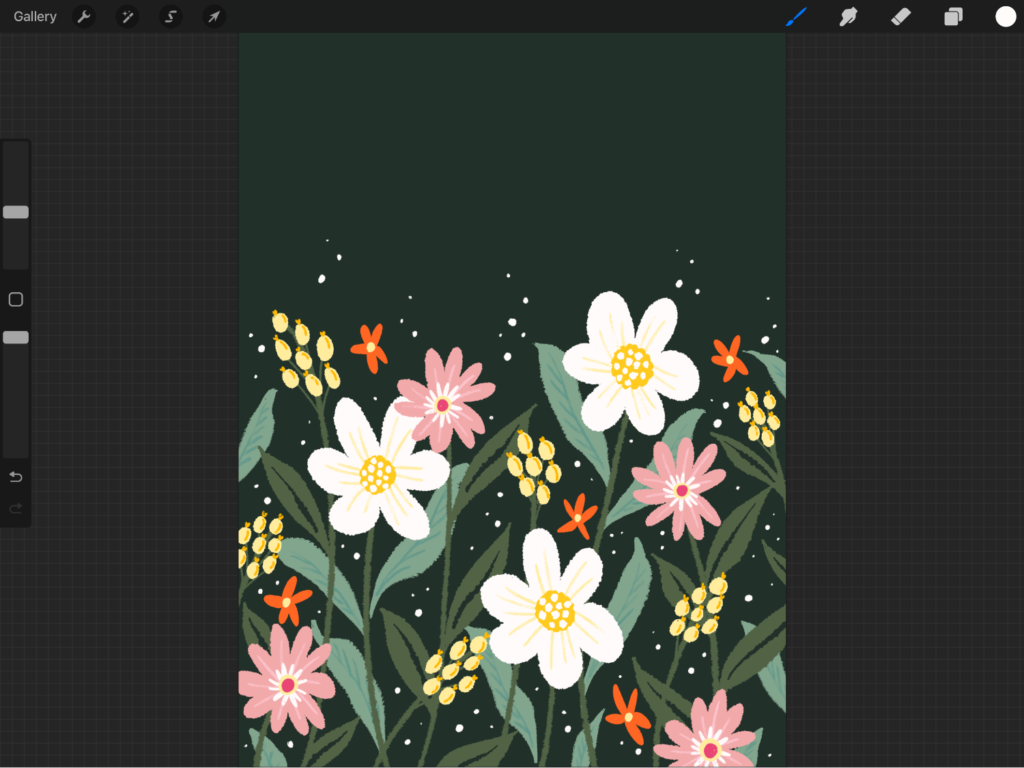
Step 11: Add Your Lettering Message
Now, let’s add our message to this greeting card. For now, we’ll write a simple “hello” for this tutorial, but you can take the message in other directions too, such as thank you cards that express gratitude after receiving gifts or support, or sympathy cards that provide comfort and support during times of loss.
Create a top layer named “Message.”
Using a rough, opaque brush like the “TH Rough Inker,” write “hello” in a fun script.
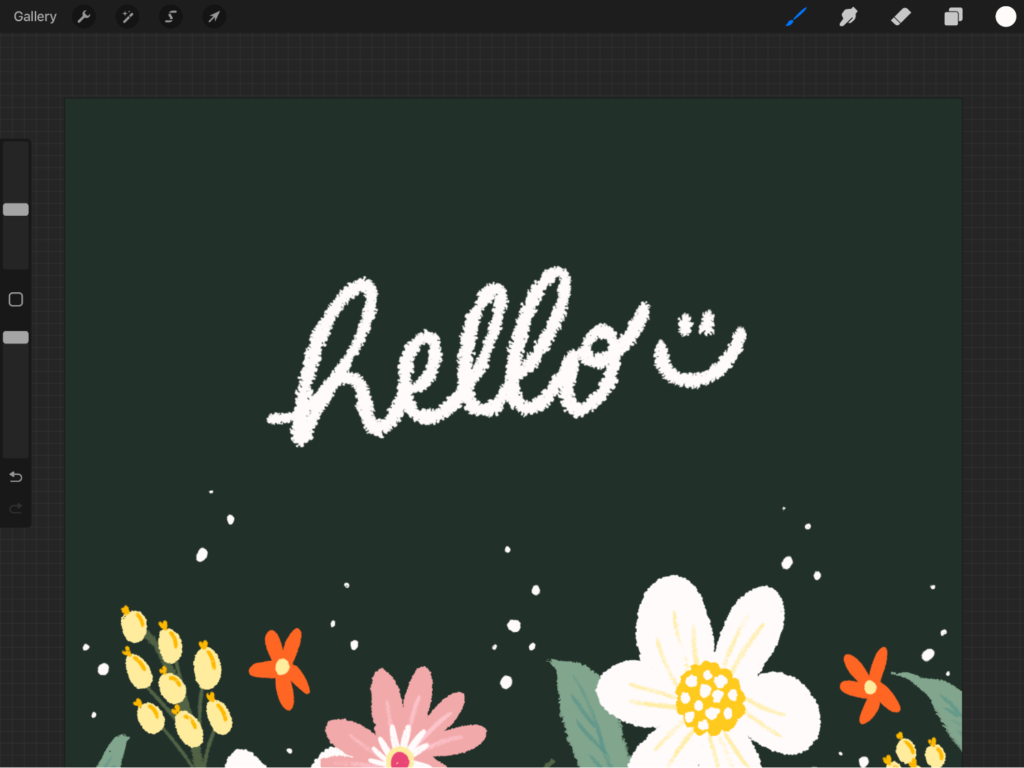
For a playful look, let’s write each letter in different colors sampled from your artwork. If you want to start over, simply undo and re-pick your colors.
To grab colors, you can use the color history in the color panel, tap the square icon on the left panel, or tap and hold the screen with your finger on any color in your artwork to instantly grab the color.
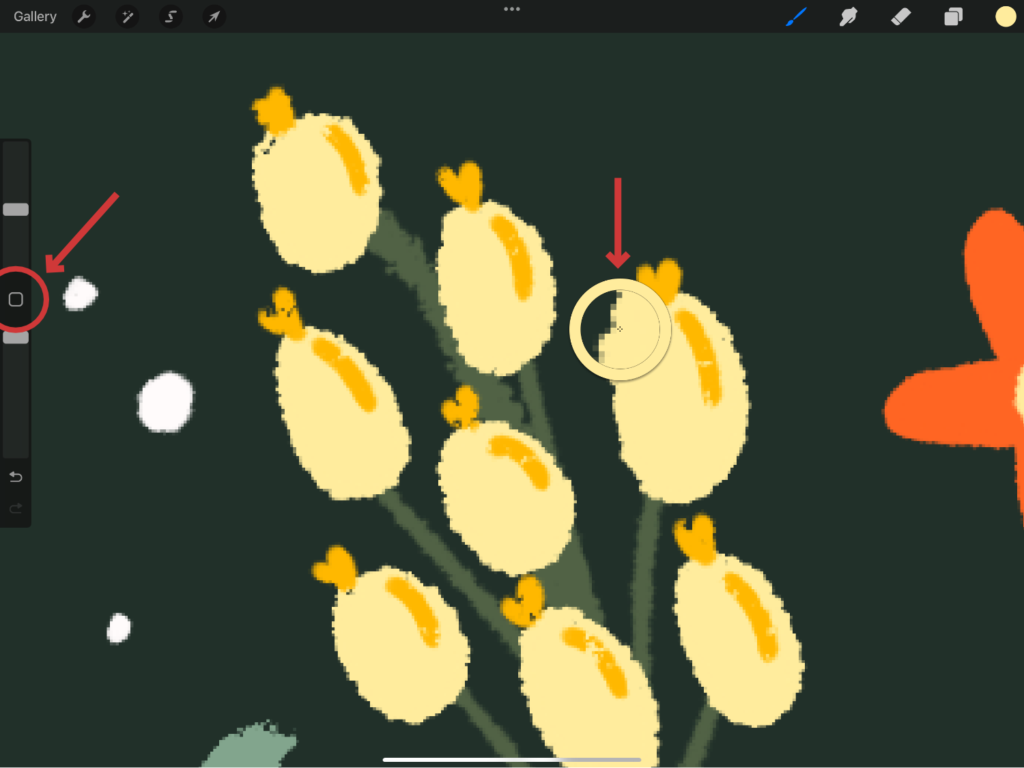
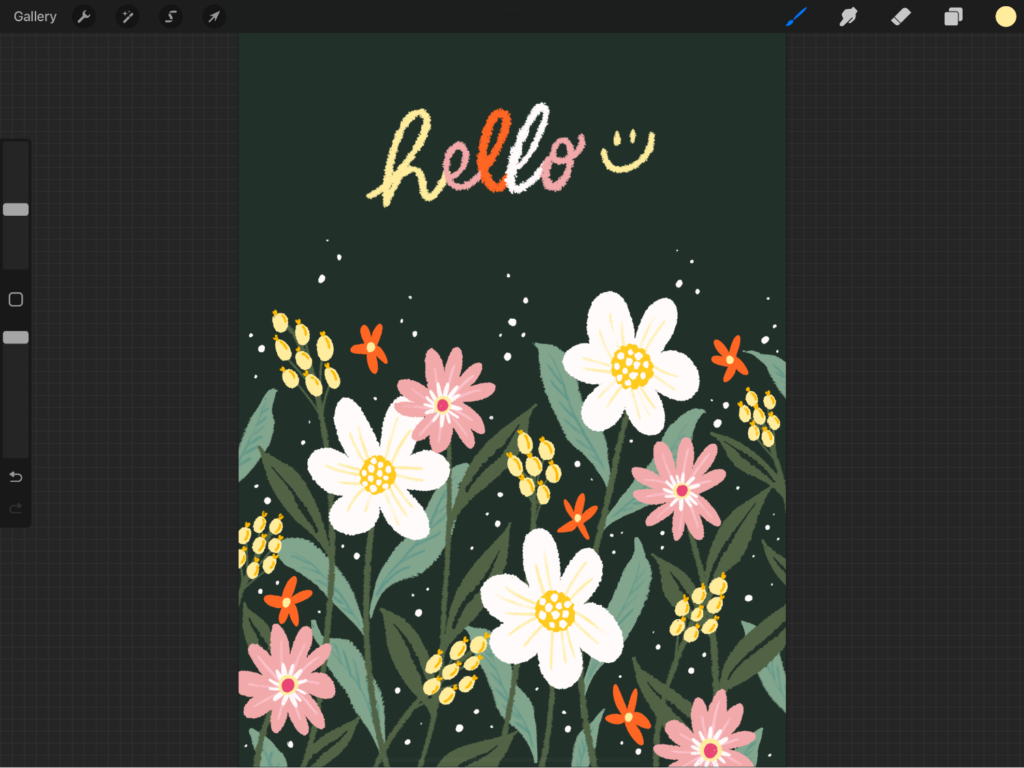
Start by color picking the light yellow color to write the first letter. Then color-pick the pink from the petals for the next letter, orange from the small flower for the following letter, and so on until you complete the word “hello” with a smiley at the end.
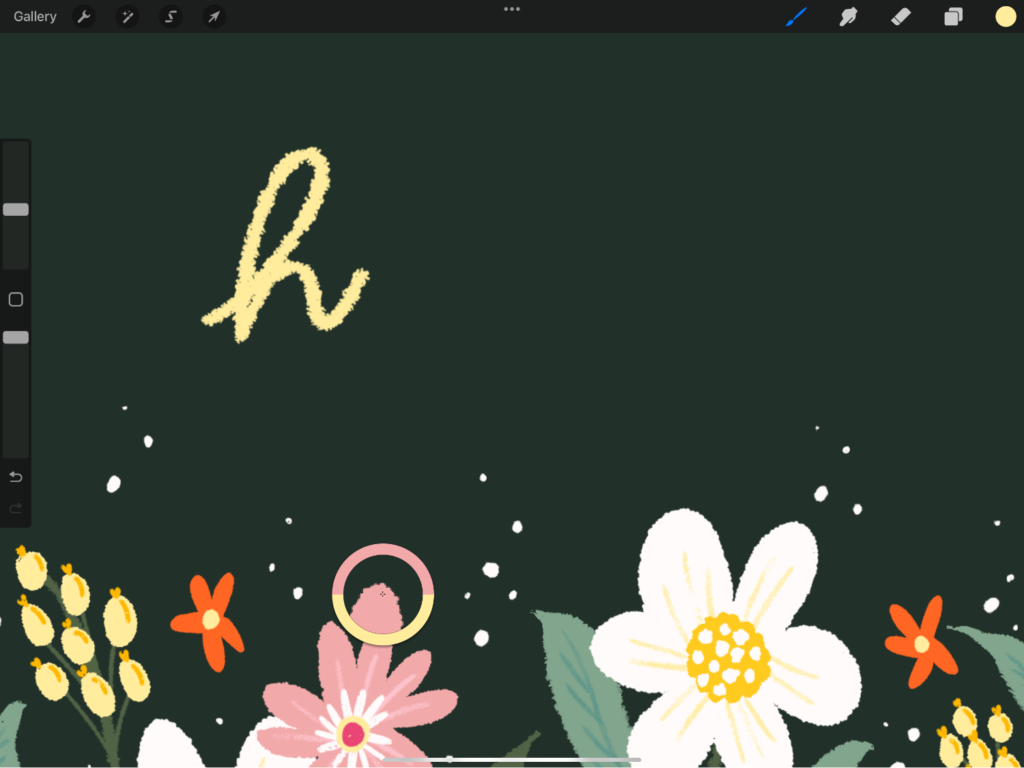
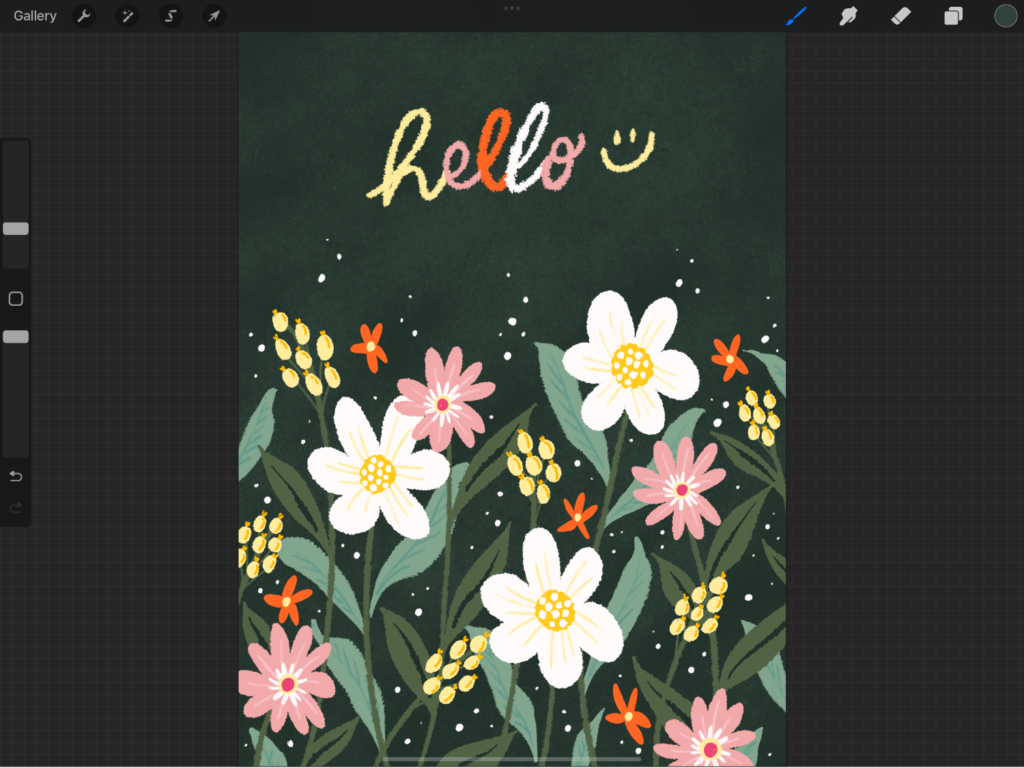
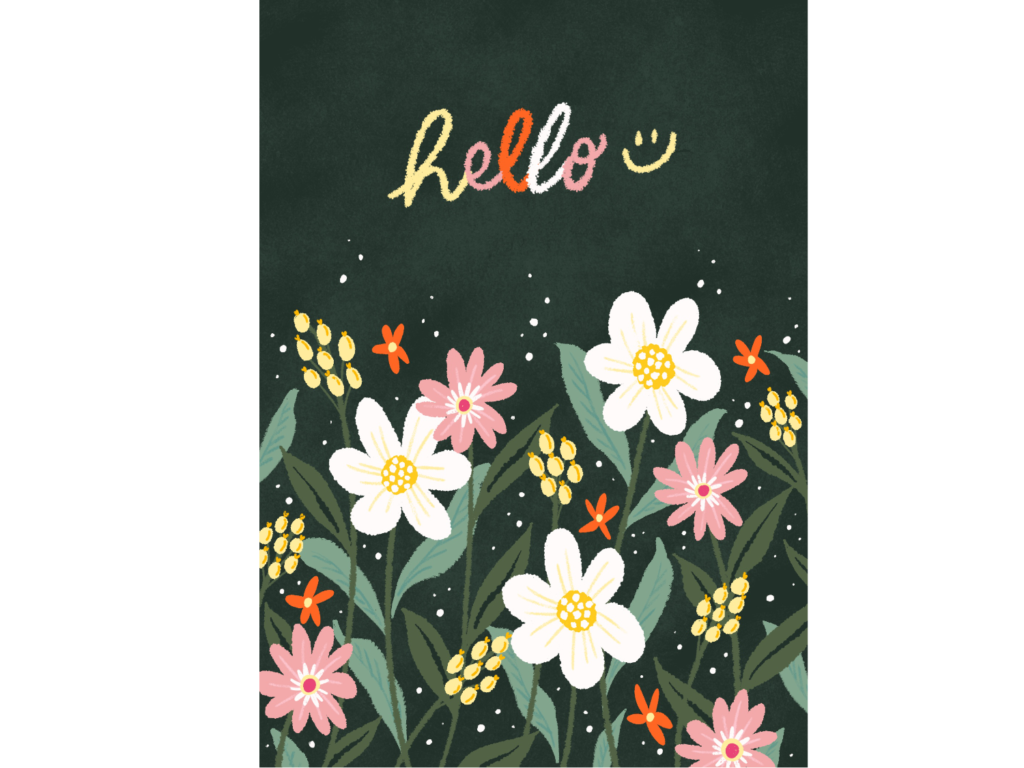
Your greeting card is now done, and the right words should match the occasion and the recipient.
Pro Tip: Add Background Texture
Before we wrap up, here’s a quick tip to easily elevate your artwork and personalize the finished greeting card: add texture!
Since your flowers already have texture, let’s add some to your solid green background.
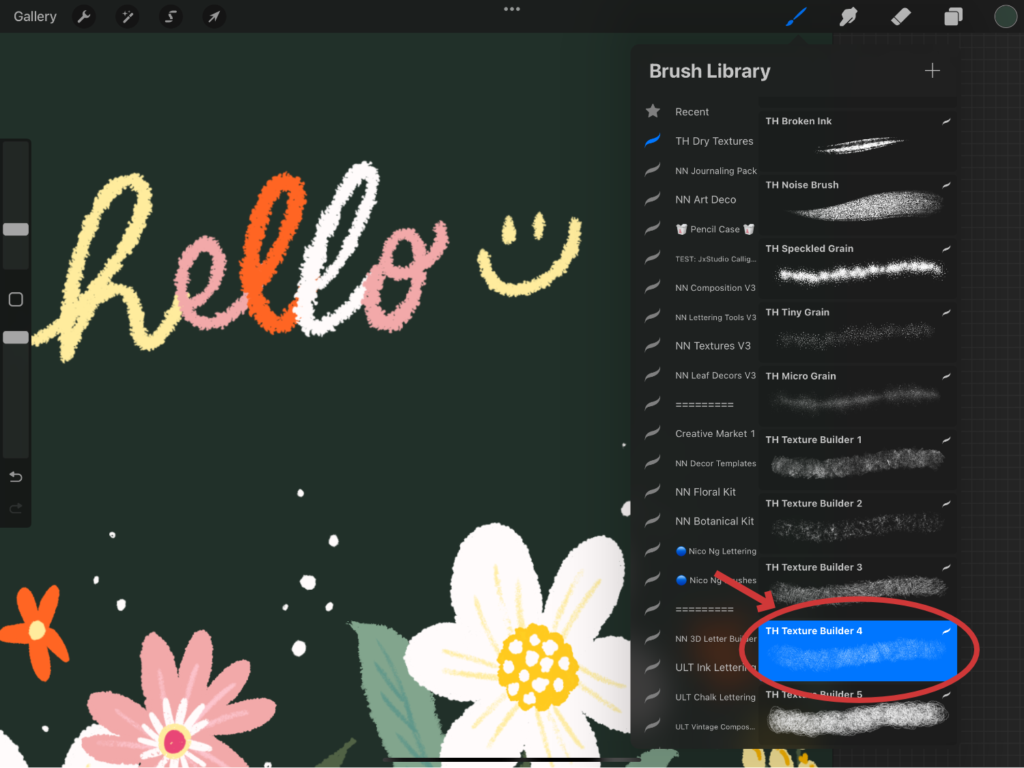
Create a layer above your background named “Background Texture.” Use a texture brush like the “TH Texture Builder 4” with a slightly lighter green (#304239) than your background, brushing in random texture across the canvas.
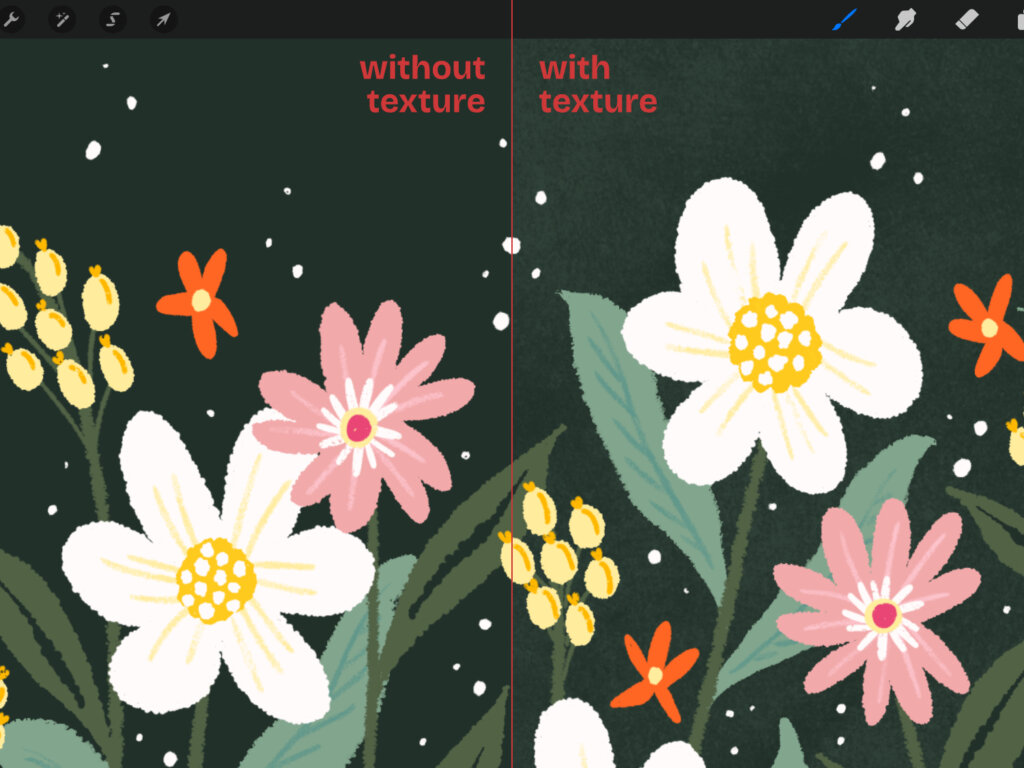
This step will improve your card’s overall look quickly and easily.
Step 12: Export Your Artwork
To save your work, go to Actions by tapping the wrench icon in the upper left corner, click on the “Share” icon, and choose JPEG or PNG. Then select “Save Image” to save it to your Photos app.
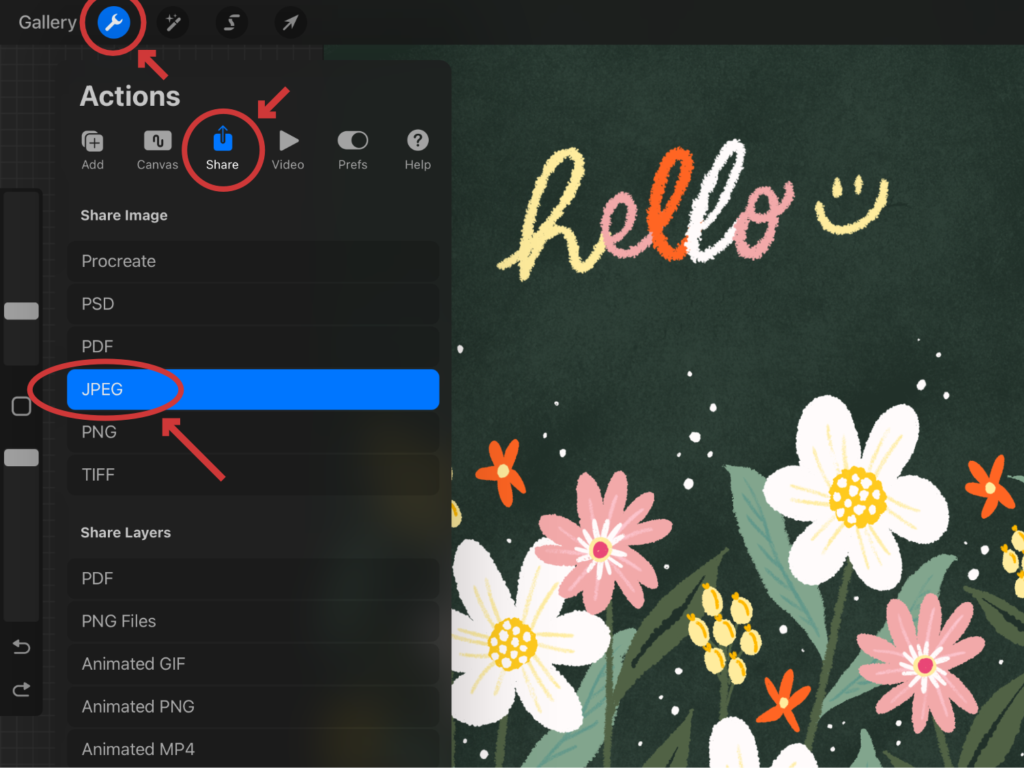
You can now print your floral greeting card, share it online, or use the exported design as a reference when you personalize cards through online services like hallmark.
Hallmark also offers online ordering for greeting cards and can ship cards directly to the recipient.
Allow 7 to 10 days for delivery when ordering online, so plan ahead if you want to mail a finished design.
Watch Your Time-Lapse!
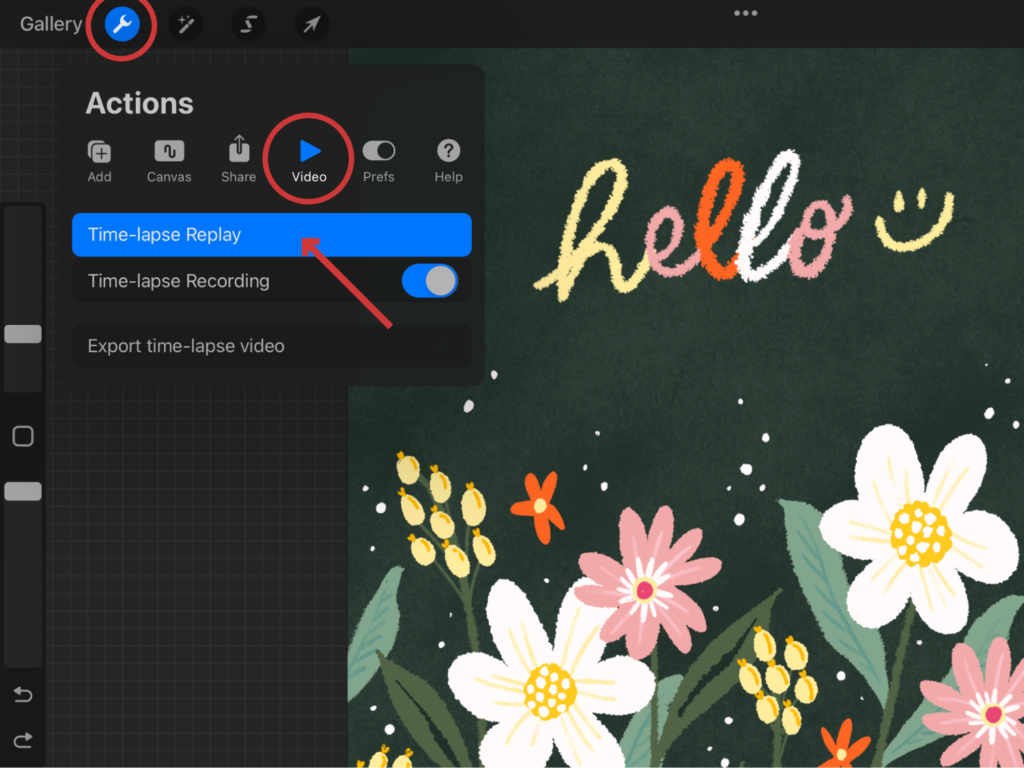
To watch your drawing process, go to Actions, select the Video icon, and tap on Time-Lapse Replay to view your artwork from start to finish. This is a fun bonus feature of Procreate!
Congratulations! You’ve completed Part 1 of the Procreate crash course! You now know how to:
- Navigate the Procreate interface
- Use essential tools and shortcuts
- Draw on layers
- Add texture
- Export your artwork
Creative Market has an amazing selection of Procreate brushes you can try! From illustration brushes and textures that bring your art to life, to design elements you can easily import into your projects, and even fonts to create personalized designs. There’s plenty to explore and add to your toolkit.
Learning how to draw a greeting card in Procreate is about more than mastering digital tools—it’s about creating something personal to help people celebrate birthdays, holidays, friendships, and other milestones. Greeting cards are commonly split into everyday occasion and seasonal cards, and birthday cards are the most popular; Hallmark, for example, offers cards for birthdays, anniversaries, and sympathy.
It’s also a format with a long history: the custom dates back to ancient China, the oldest known Valentine card was sent in the 15th century, the first printed Christmas card appeared in London in 1843, printing advances made cards more affordable by the 1850s, humorous cards rose in the late 1940s, and niche companies expanded the industry in the 1980s. Even now, approximately 6.5 billion greeting cards are bought annually in the U.S., while the average person sends 55 greeting cards annually in the UK—showing how meaningful a handmade design can still be to share, print, frame, or gift.
This is just the beginning! Procreate has many more features you can explore, like advanced layering, blending modes, and even animation!
Stay tuned for Part 2 of this Procreate Crash Course Series to continue learning new skills and techniques while working on exciting projects. Be sure to save this tutorial for easy reference and practice anytime you like.
Nico Ng
Yes. Procreate makes it easy to design digital greeting cards using customizable brushes, layers, and Apple Pencil support. Finished artwork can be printed, shared digitally, or turned into professional-quality cards.
Procreate is ideal for hand-drawn illustrations and digital painting on iPad, while Photoshop offers more advanced photo editing and print production tools. Many artists use both depending on their workflow.
Absolutely. Procreate artwork can be exported as high-resolution files suitable for home printing or professional print services, and printed designs can work especially well for traditional paper cards that feature illustrations or embossing.
Textured ink brushes, watercolor brushes, and pencil brushes are popular choices for creating natural-looking floral artwork in Procreate.
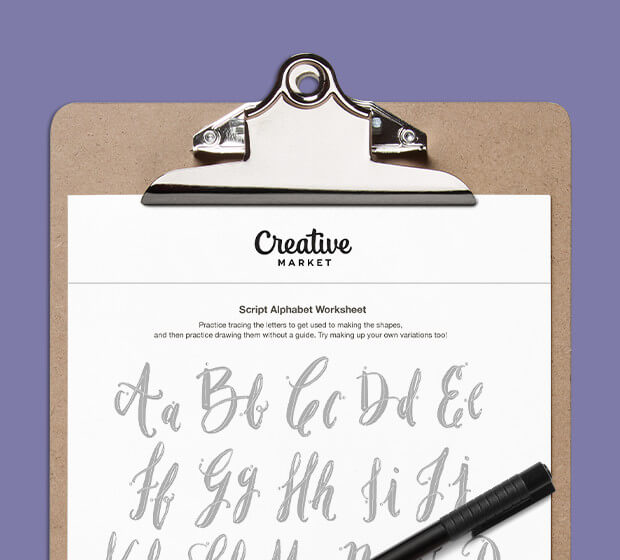
Download these worksheets and start practicing with simple instructions and tracing exercises.
Download now!





I’m Nico, a lettering artist and designer from Manila. I create beginner-friendly tools and templates for artists and creatives. Check out my free tutorials in the articles tab or join my Patreon for monthly workshops and creative inspiration. :)
View More Posts



2 Comments