


Welcome to Part 3 of the Procreate Crash Course Series!
If you missed Part 1 and Part 2, be sure to check them out first, where we covered setting up your canvas and getting familiar with Procreate’s interface, features and shortcuts – everything you need to feel comfortable before jumping into a project like this.
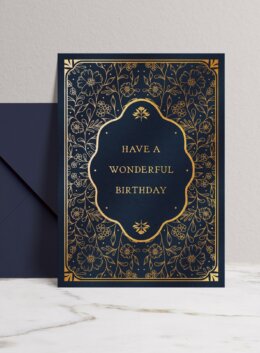
In this final part, we’re going to make a vintage-style floral greeting card that looks like it is stamped with gold foil. Think of those beautiful ornate, old book covers with detailed borders and florals.
By the end, you’ll have a greeting card design you can use for any occasion, and along the way you’ll learn how to use one of my favorite Procreate features: the Drawing Assist and Symmetry Guide to build complex mirrored botanical illustrations easily.
What You’ll Need
You’ll need an iPad with Procreate installed. Don’t worry if you don’t have the exact brushes and assets I’m using, you can substitute with whatever you have. For this tutorial, I’ll be using:
- Decorative frames and borders set #1
- Florish Decorative Vector Collection
- Grand Baron – A Vintage Typeface
- Summer Floral Patterns and Vectors (optional, if you’d rather use pre-made florals)
- Ultimate Lettering Brush Toolbox Ink & Retro
- 440 Gold & Metallic Textures Bundle
Again, these are optional. You can sketch your own florals, create your own borders, or pull from similar brush sets you already own.
You can also download the Procreate working file to follow our steps more closely.
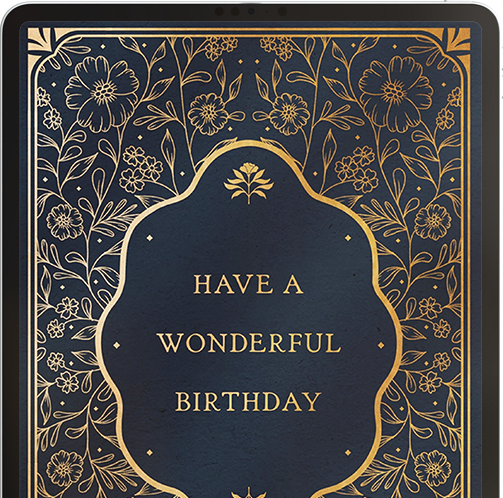
Download this free Procreate template and create your own version of this floral greeting card for loved ones!
Get the fileStep 1: Set Up Your Canvas
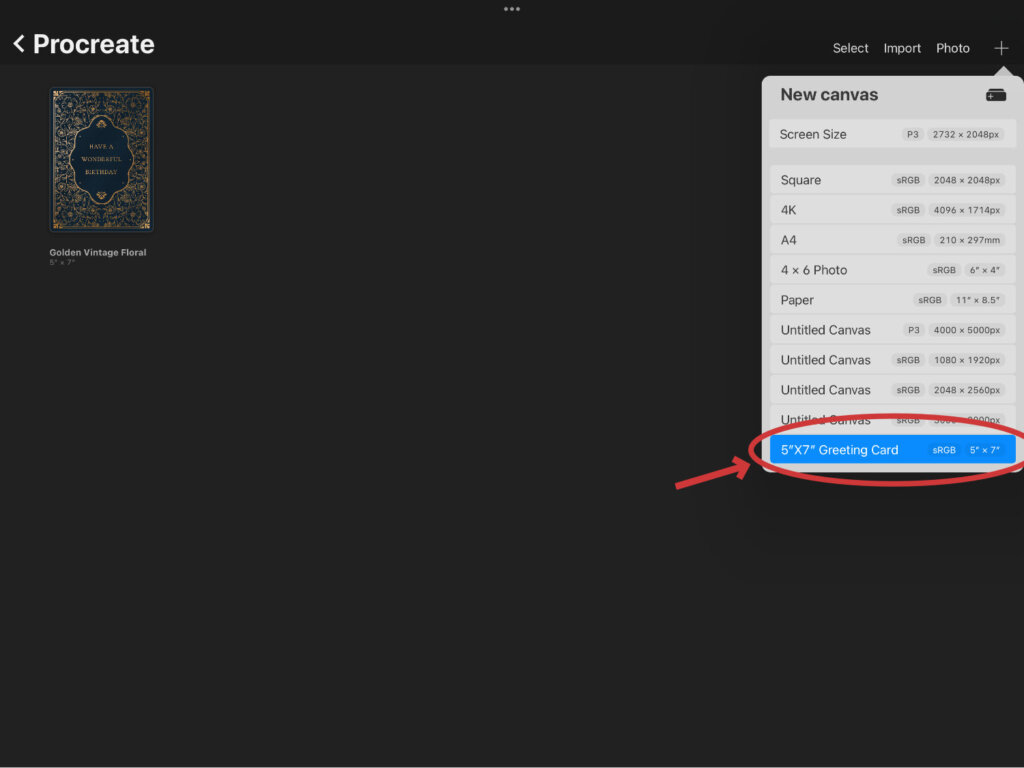
Start by opening a new 5” x 7” canvas in Procreate. If you don’t have that size saved as a preset, you can check [Part 1] of this series where we set that up.
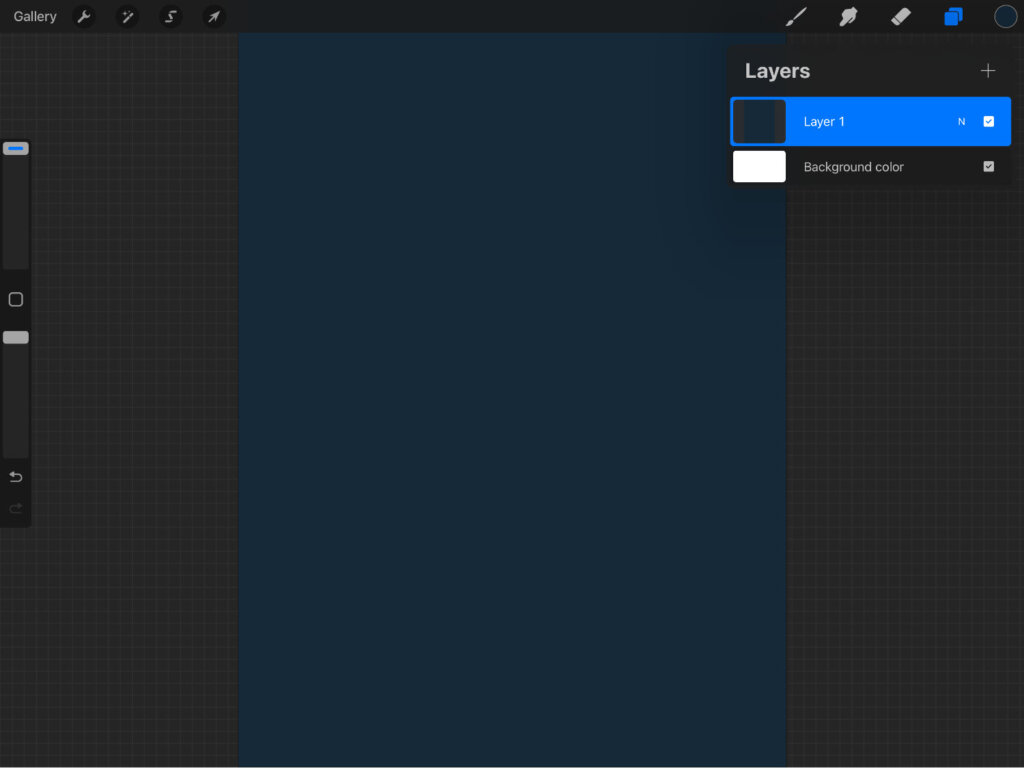
Once your canvas is ready, fill the background with a dark blue color (#152939). This will give your card a rich base that pairs beautifully with a gold metallic finish. You can always change the color later if you want to try other color combinations.
Step 2: Add the Border
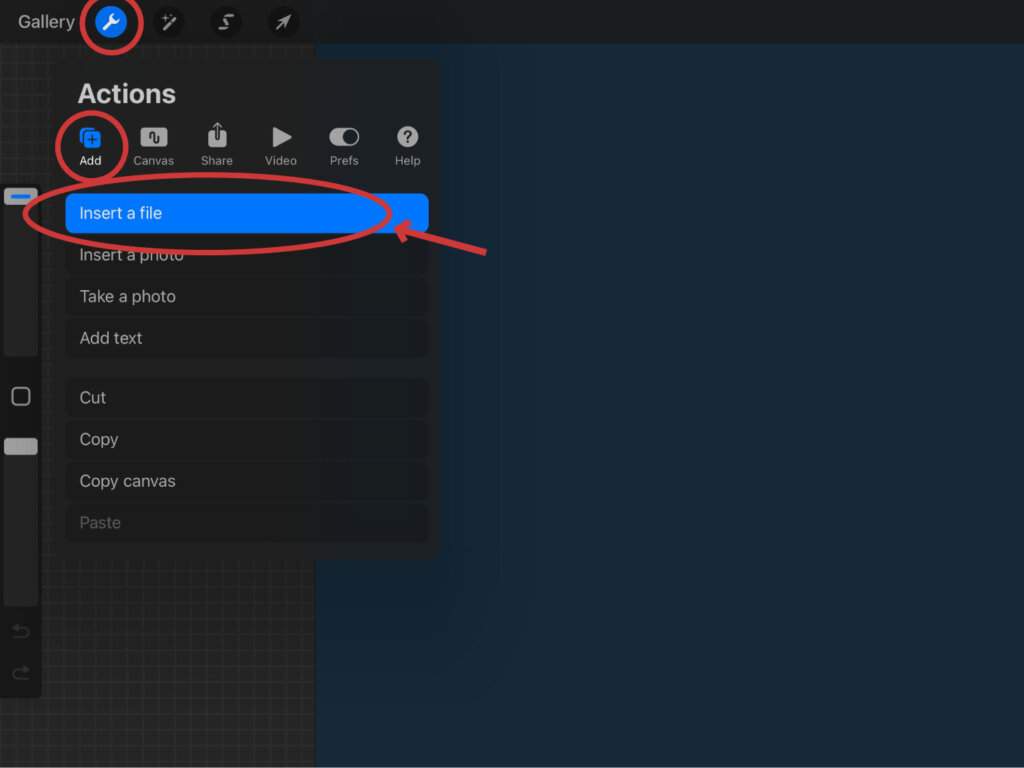
Now let’s add a border. You can either sketch your own geometric border or import a pre-designed border by going to Actions > Add > Insert a File, then choose the frame design called “CMFrames04” from the Decorative frames and borders set #1.
Resize it to fit the proportions of your canvas. Make sure to select the “Uniform” when resizing the border to avoid deforming it.
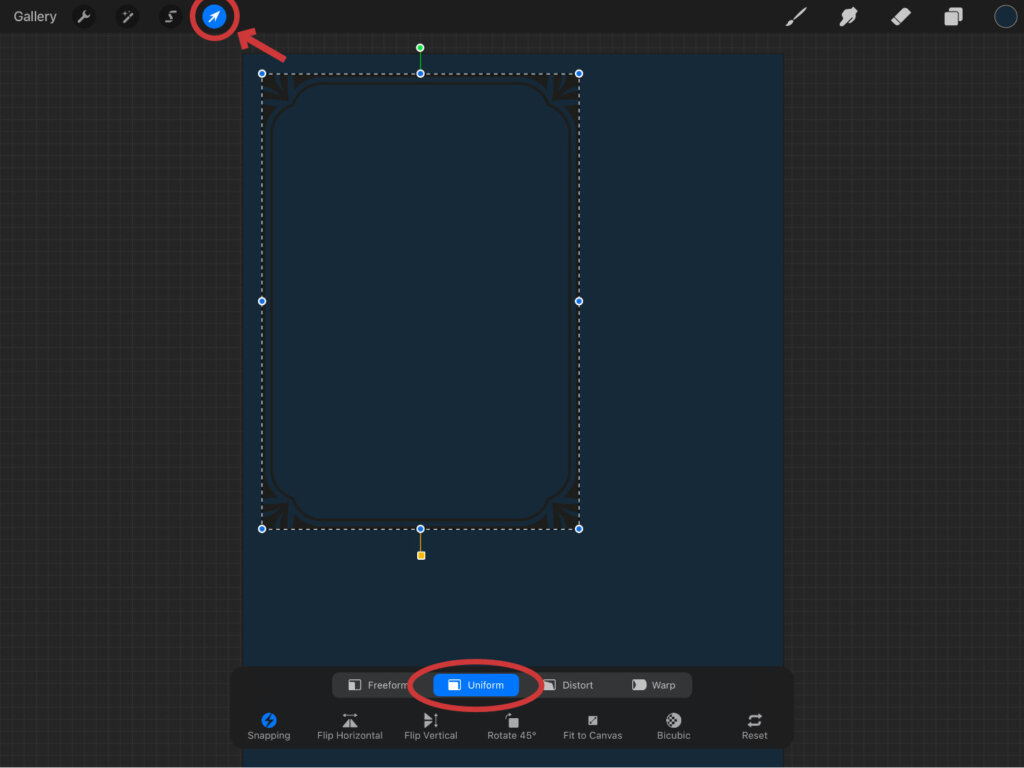
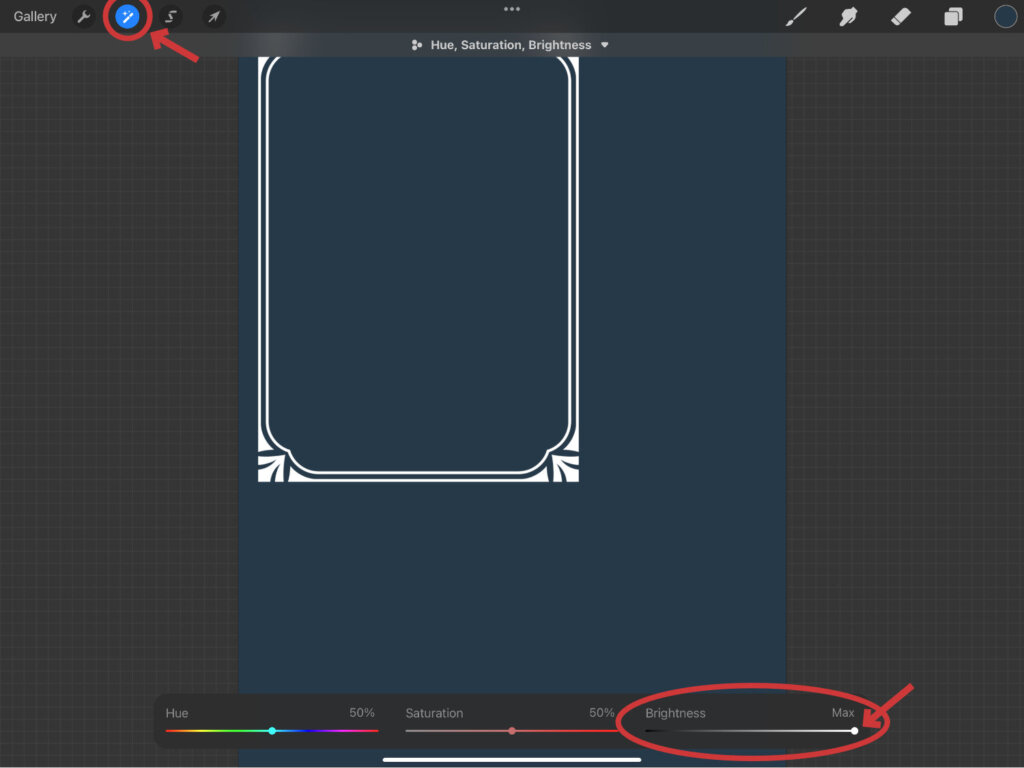
To make it visible against the dark background, recolor it to white. Go to Adjustments > Hue & Saturation and drag the Brightness slider all the way to 100%.
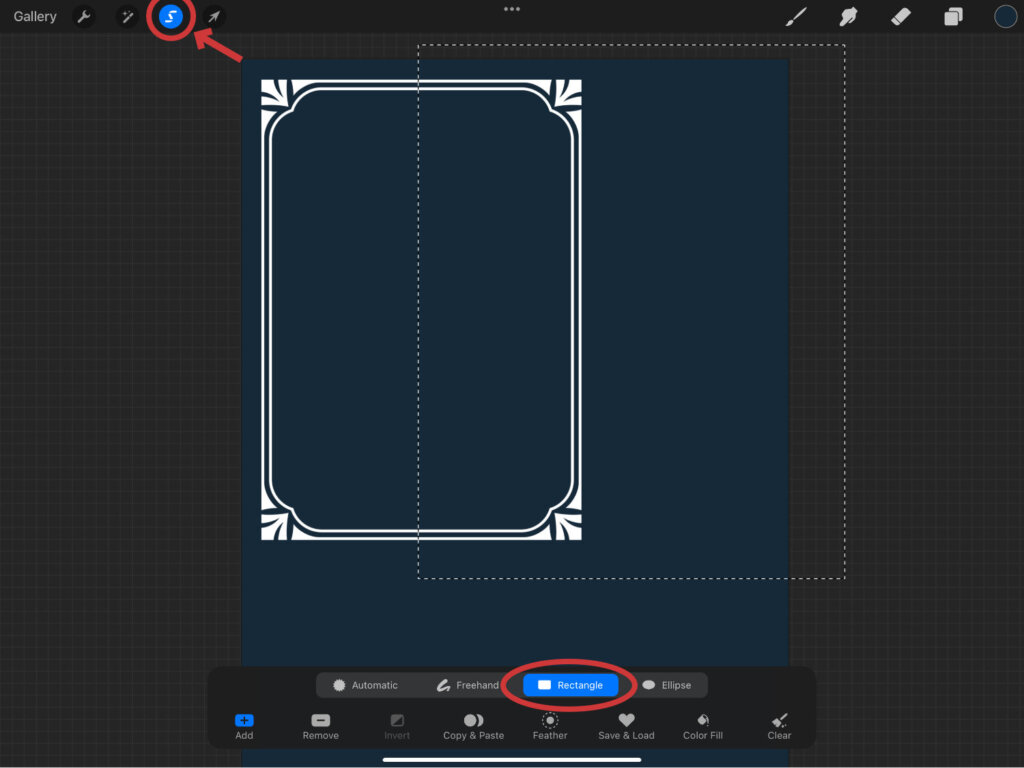
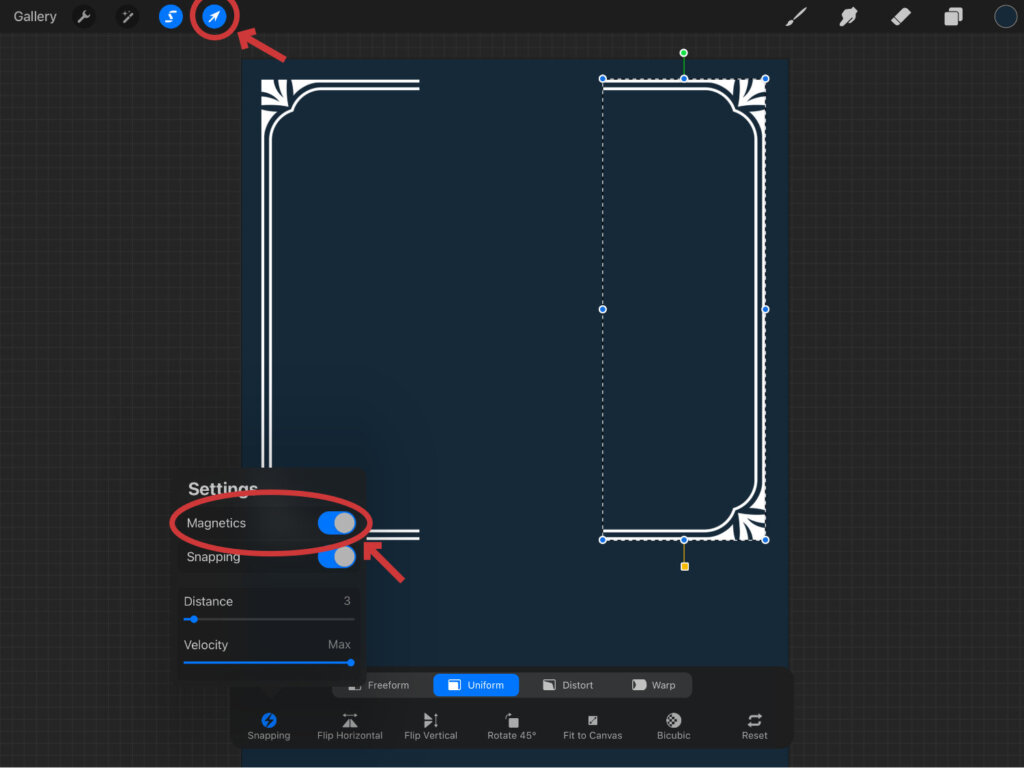
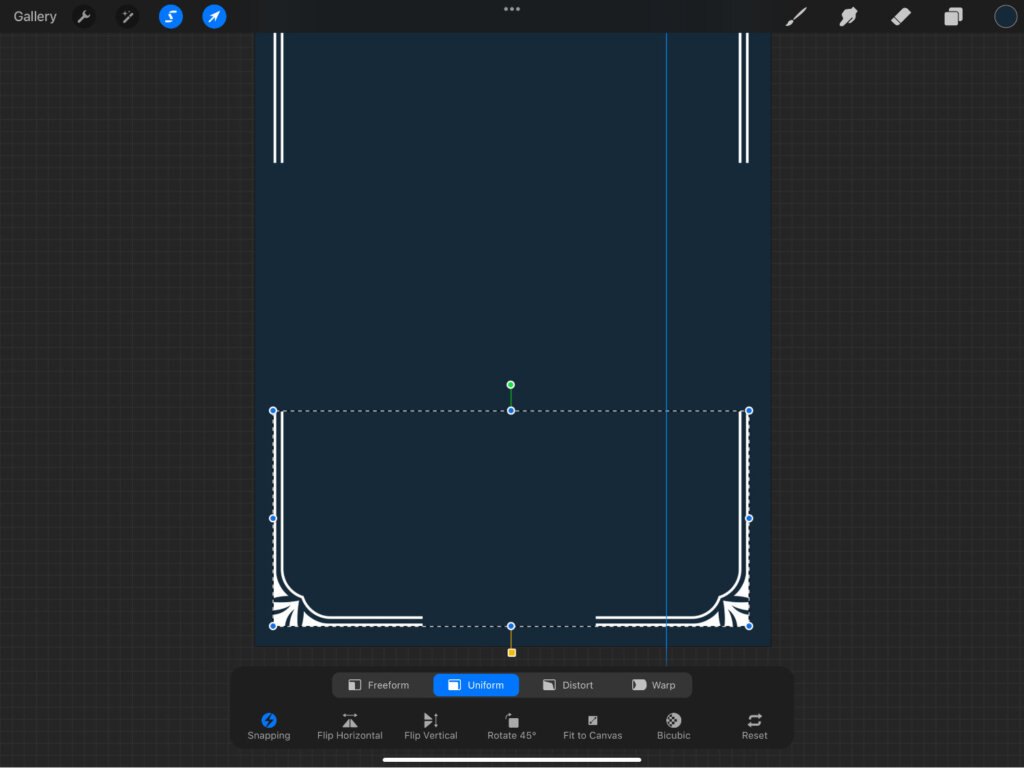
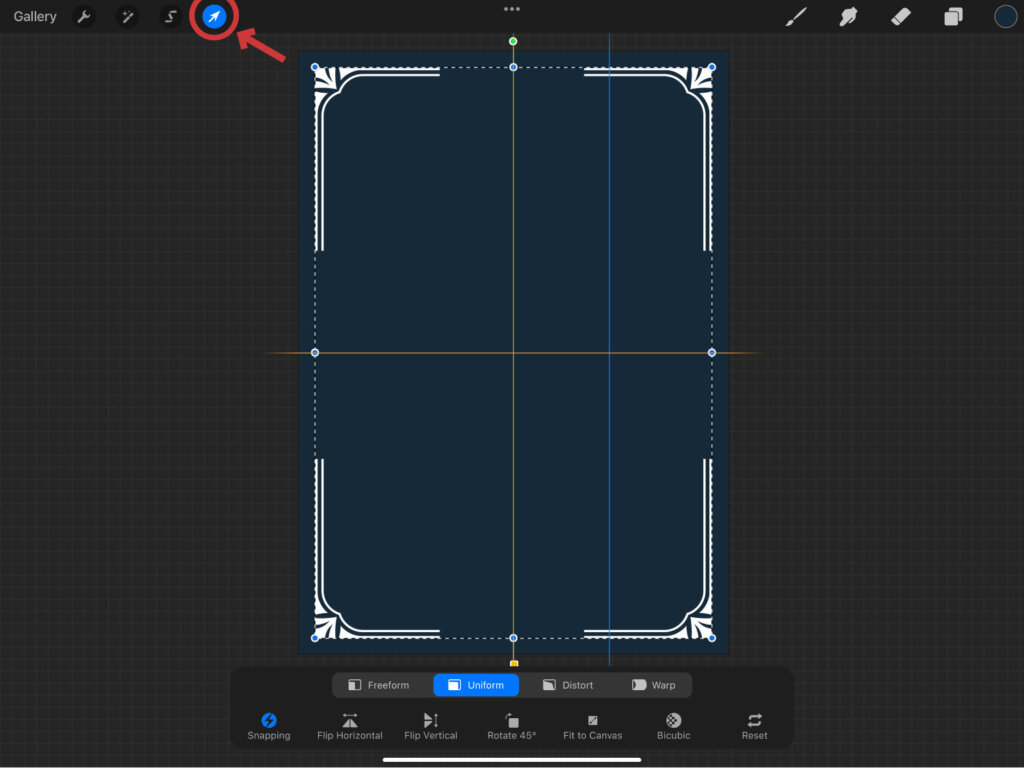
Position the border to the upper left corner with margins from the top and left edges. Then move the right half of the border to the right side by selecting the part with rectangle selection, and transform to move it to the side with margin from the edge. Tip: turn on Magnetics under Snapping to lock the movement to a horizontal direction.
Now, select and move the lower half to the bottom part of your canvas.
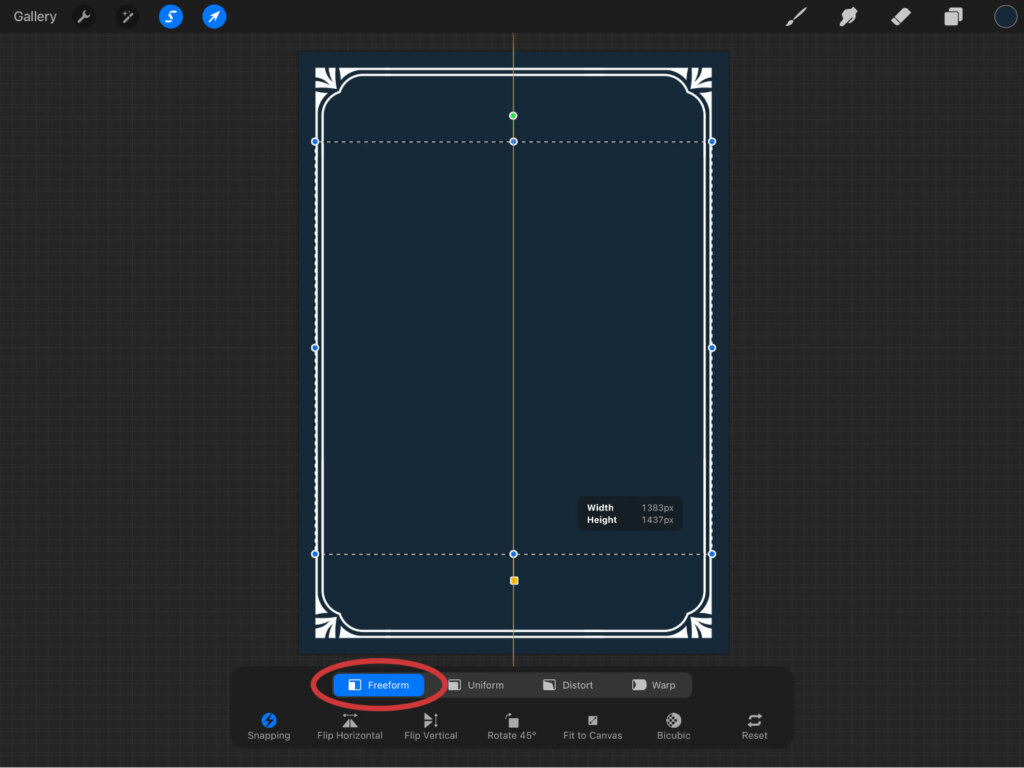
Center the border with Snapping turned on.
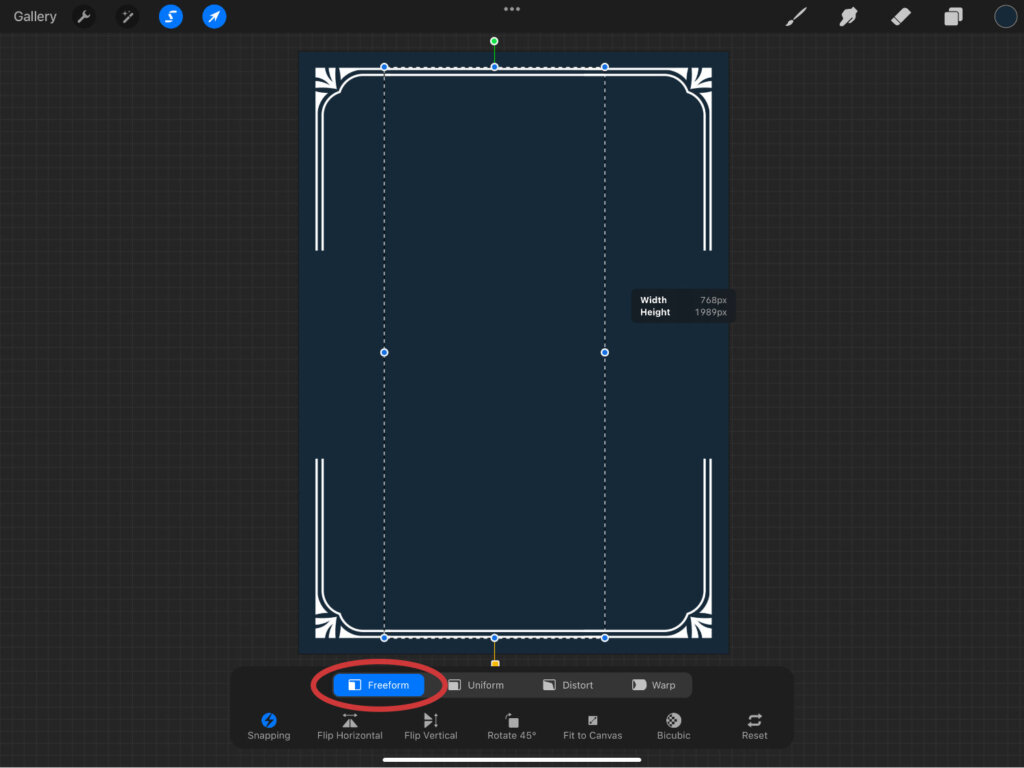
If you notice small gaps,select and stretch the border slightly using Freeform Transform to close them.
Step 3: Add the Inner Frame
Next, import the wavy frame from the Florish Decorative Vector Collection. Place it right in the center and resize it to leave enough room inside for your greeting text.
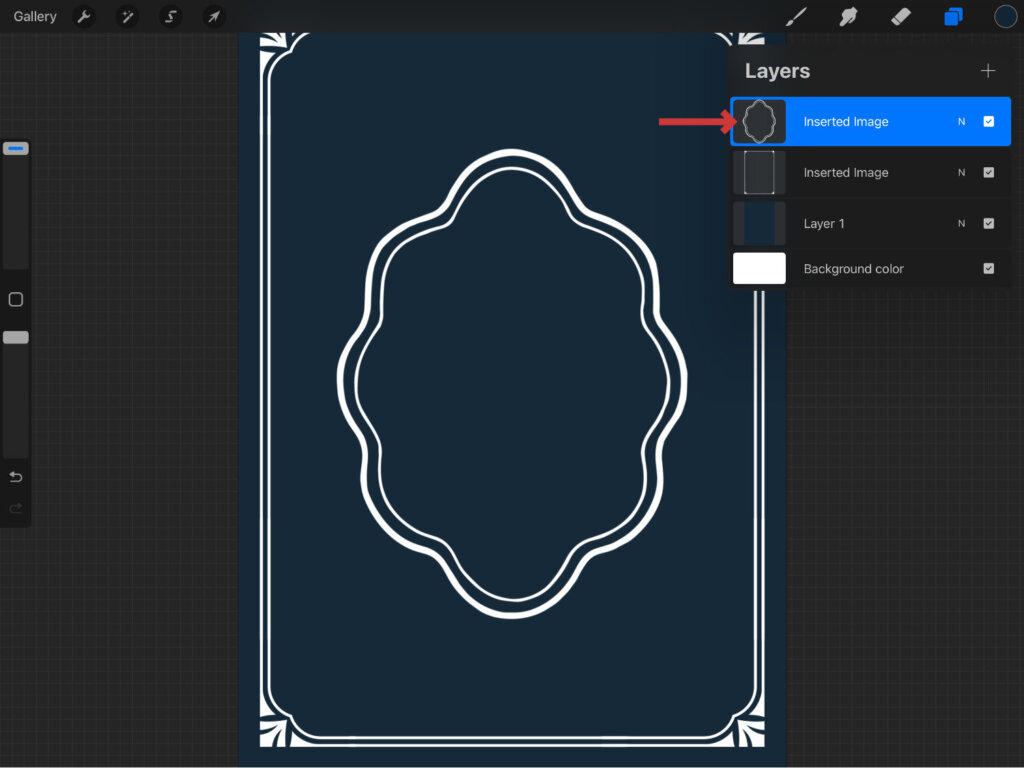
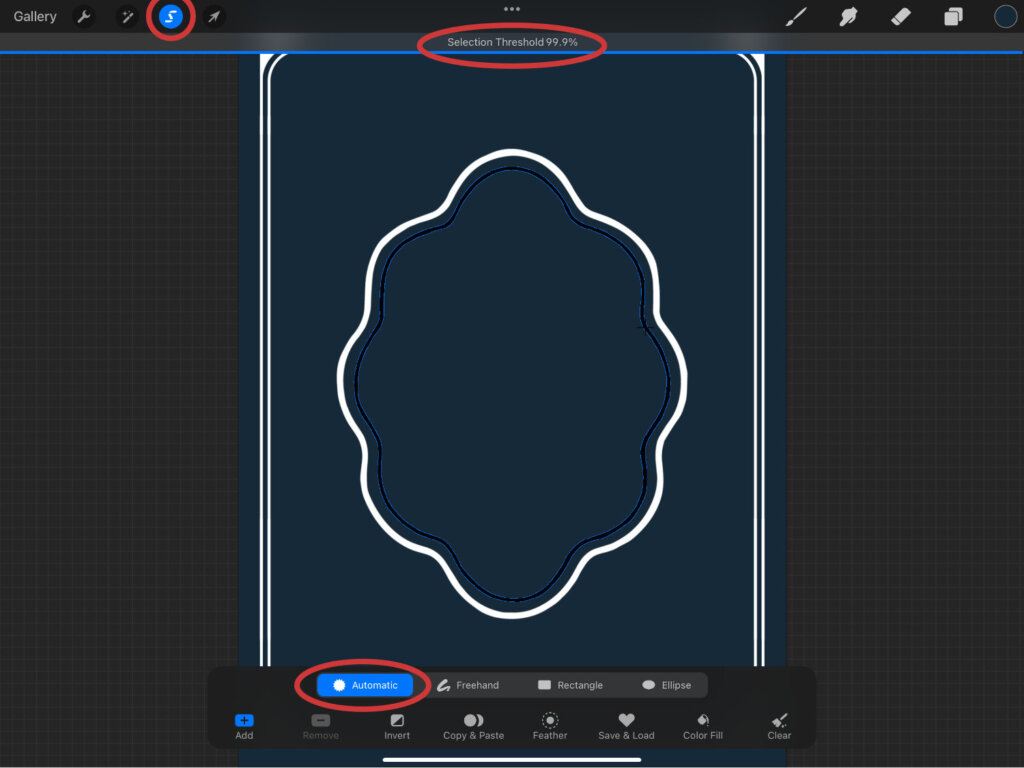
Since we only want the outer frame, use the Selection tool set to Automatic, tap on the inner outline, and clear it with the three-finger scrub gesture.
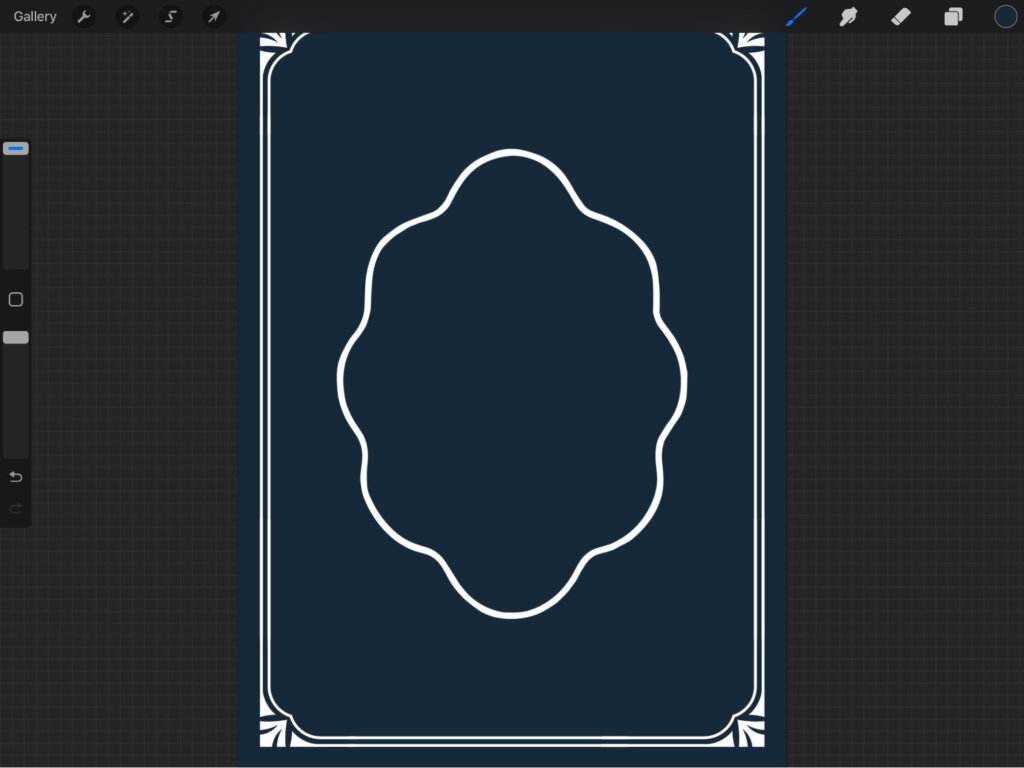
Now you’ll have a clean, open frame in the middle.
Step 4: Turn On the Symmetry Drawing Assist Feature
Here’s where the fun starts. Go to Actions > Canvas > Drawing Guide, switch it on, and tap Edit Drawing Guide.
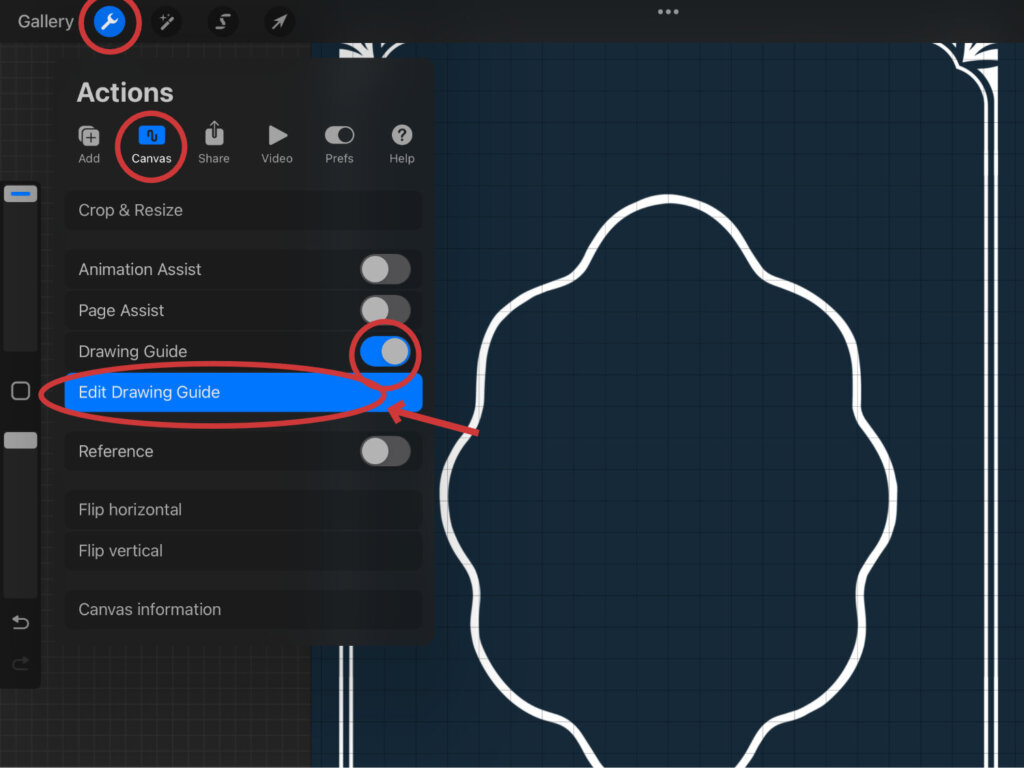
Choose Symmetry, then under Options select Quadrant. This way, whatever you draw in one quadrant (e.g. the upper-right section) will automatically mirror across the other three (e.g. upper-left, lower-left, and lower-right sections).
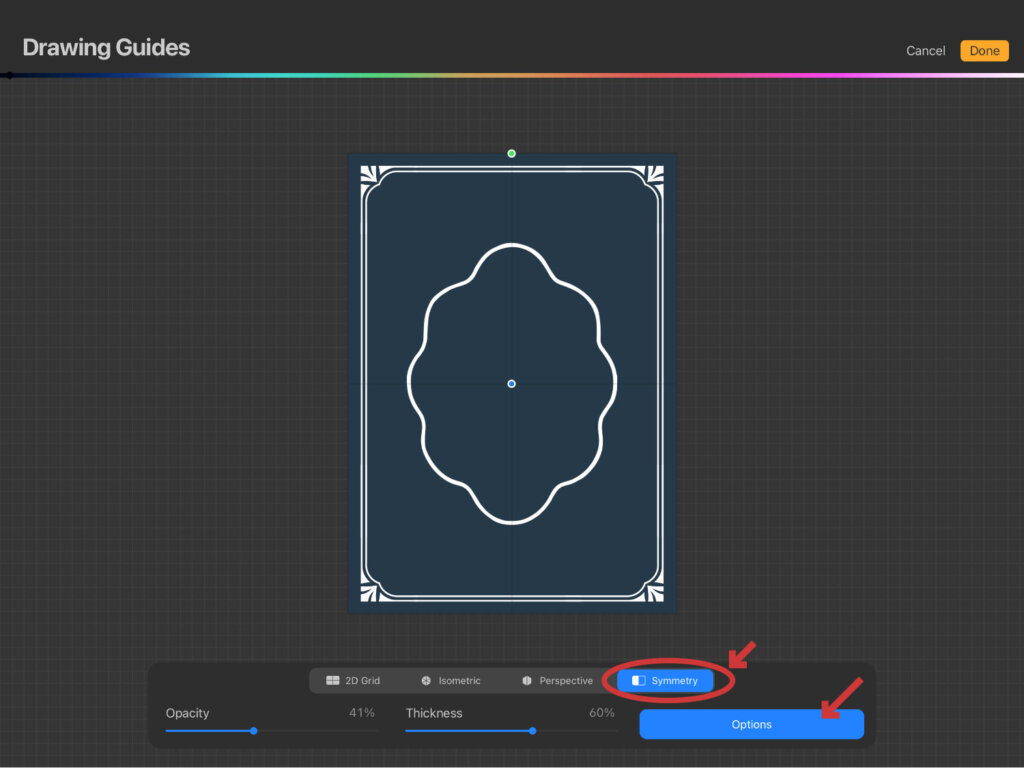
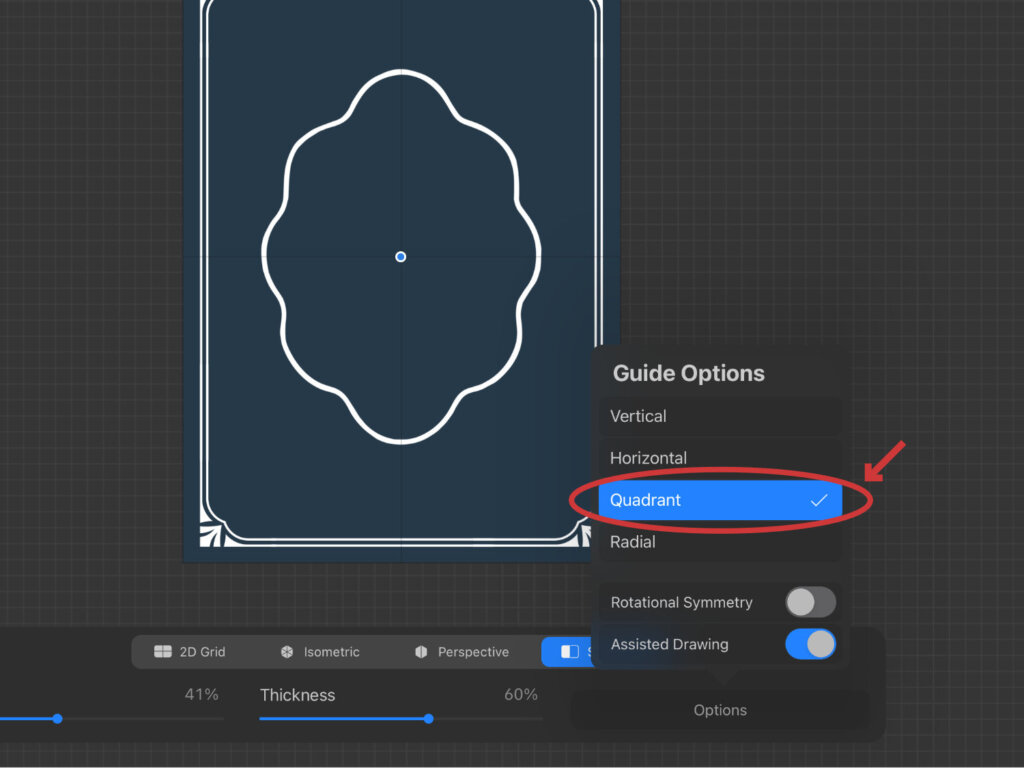
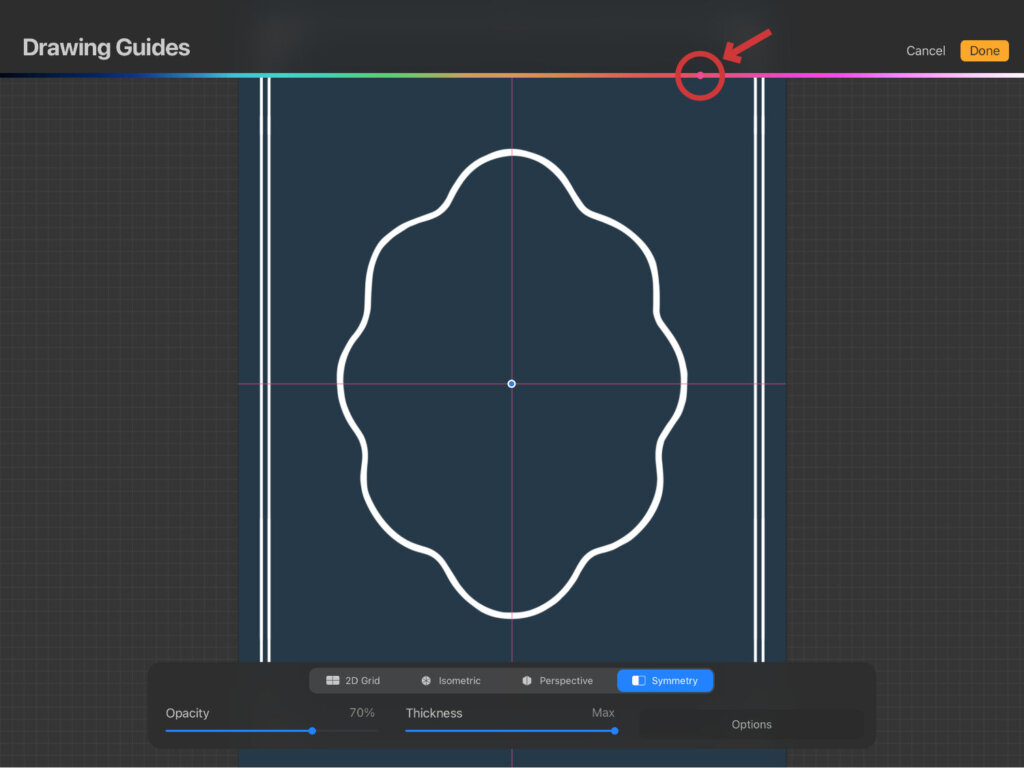
You can adjust the guide line’s color and thickness if you like, then tap Done.
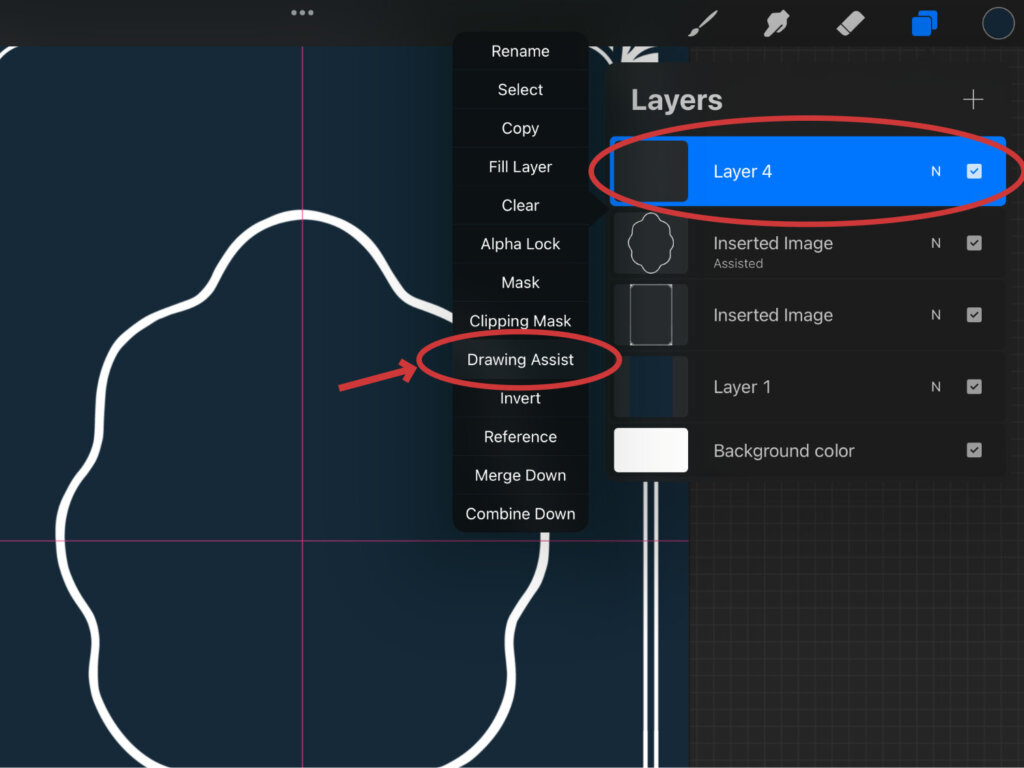
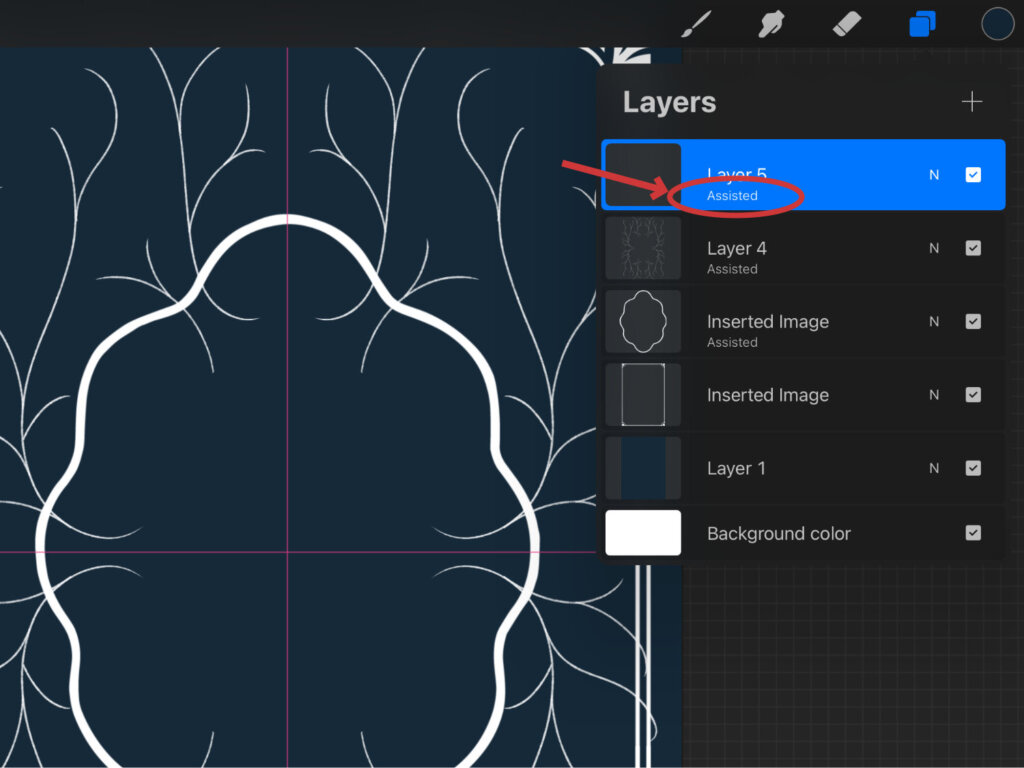
On a new layer, turn on Drawing Assist by tapping the layer and click on Drawing Assist. You’ll see the word Assisted appear under the layer name.
Step 5: Sketch the Botanical Guide
On your assisted layer, sketch some curved paths in one quadrant. These will form the structure of your floral arrangement. As you draw, you’ll see the lines mirror across the other quadrants, giving you an instant symmetrical design.
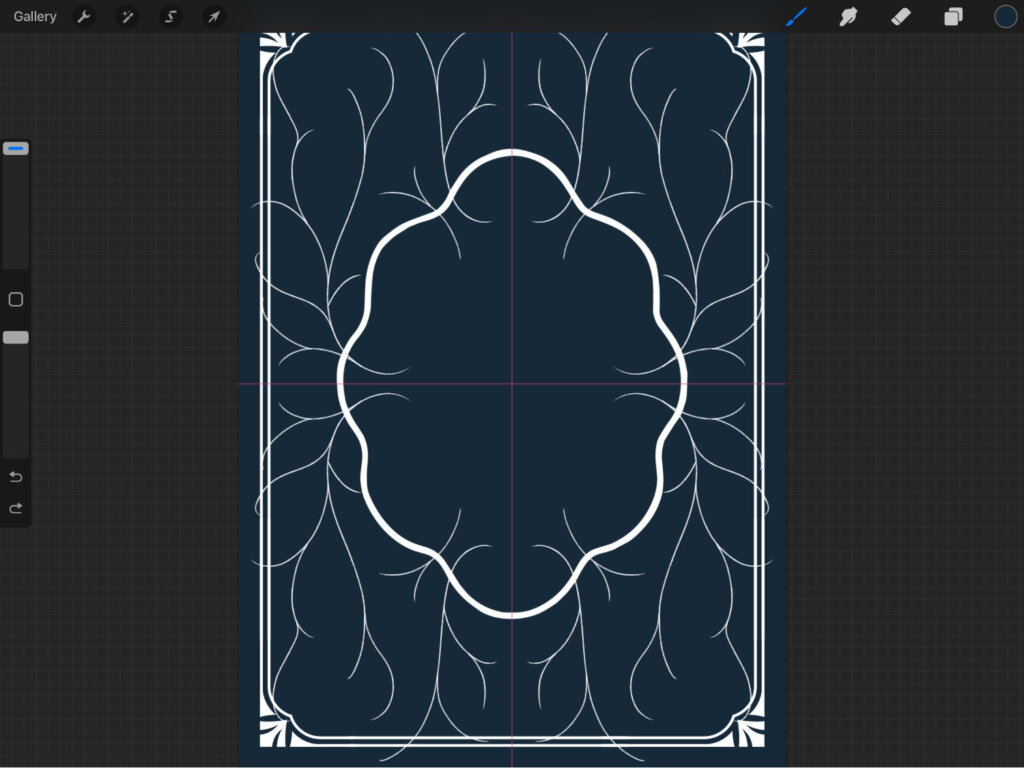
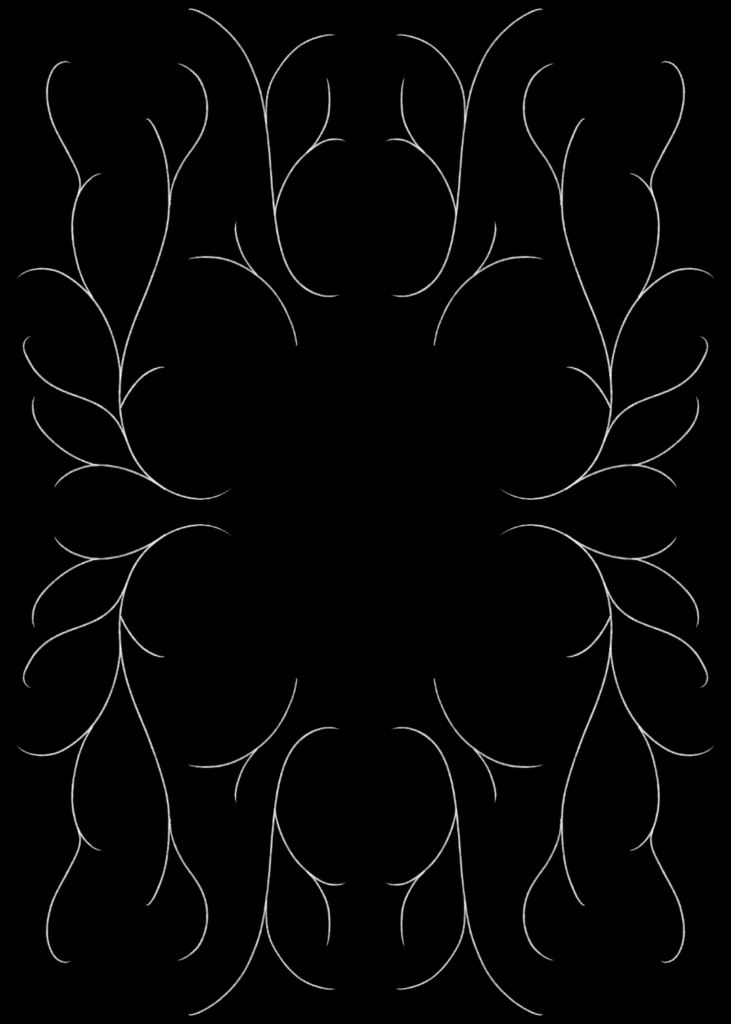
If you’d like some help with placement, you can download and import the botanical guide PNG I’ve included. This is just for reference, you’ll build on it in the next steps.
Step 6: Add Flowers
Now let’s bring in the florals. There are two ways you can do this: sketching them by hand or importing pre-drawn outlines.
If you want to sketch, create a new layer with Drawing Assist turned on.
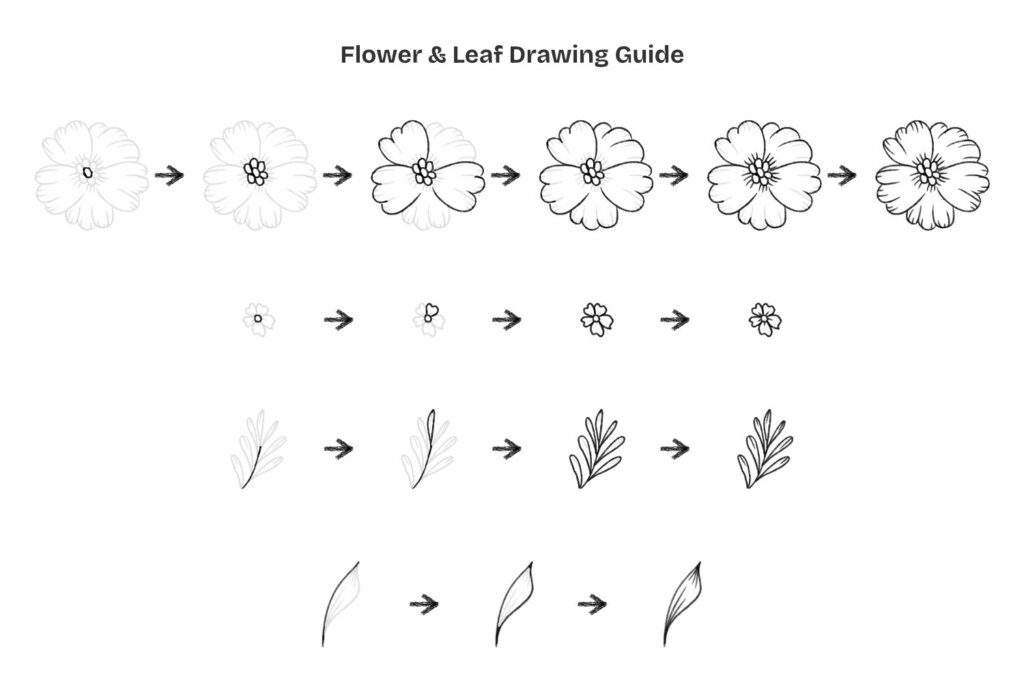
Start with one large flower on the upper right, then add two smaller main flowers on the left and bottom of the upper-right quadrant.
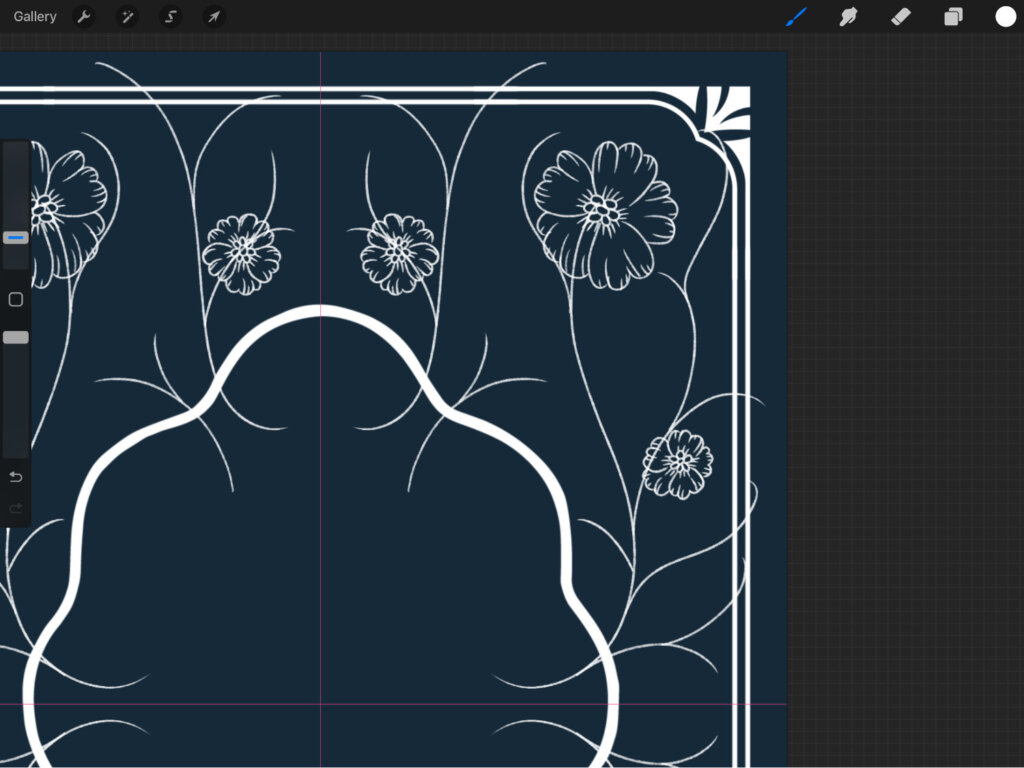
After that, scatter a few smaller secondary flowers to balance the design.
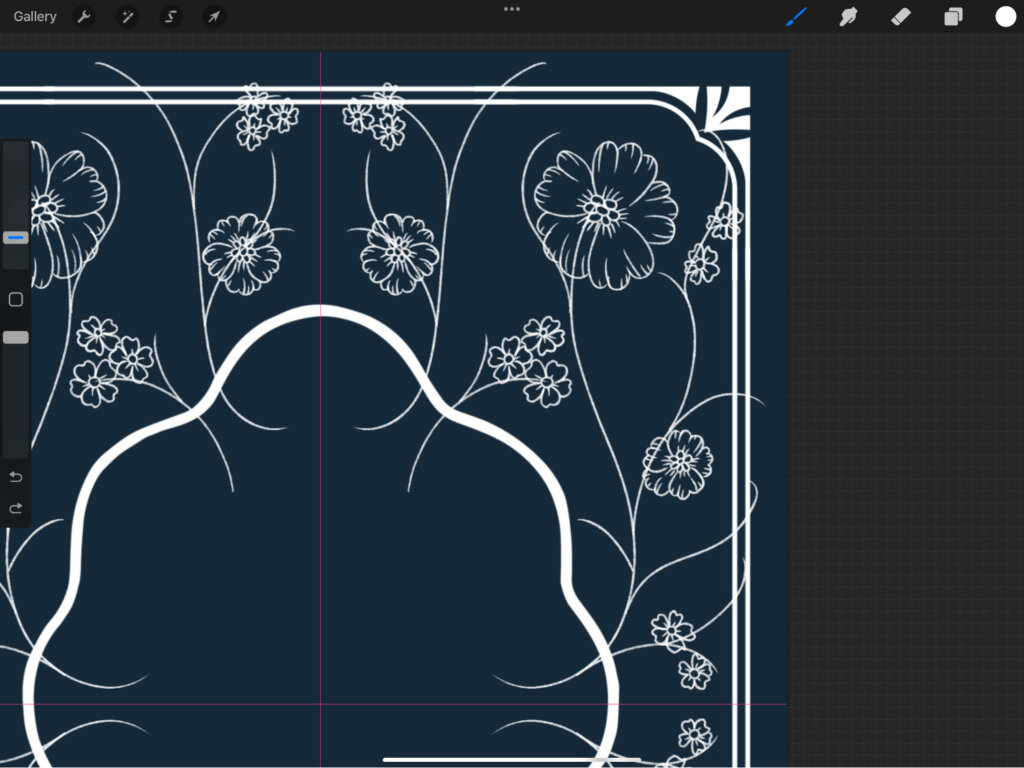
For sketching, I’m using the Graphite Liner Brush from the Ultimate Lettering Brush Toolbox Ink Pack, but any liner brush will work. Don’t stress about making them identical, small differences make the illustration feel more natural.
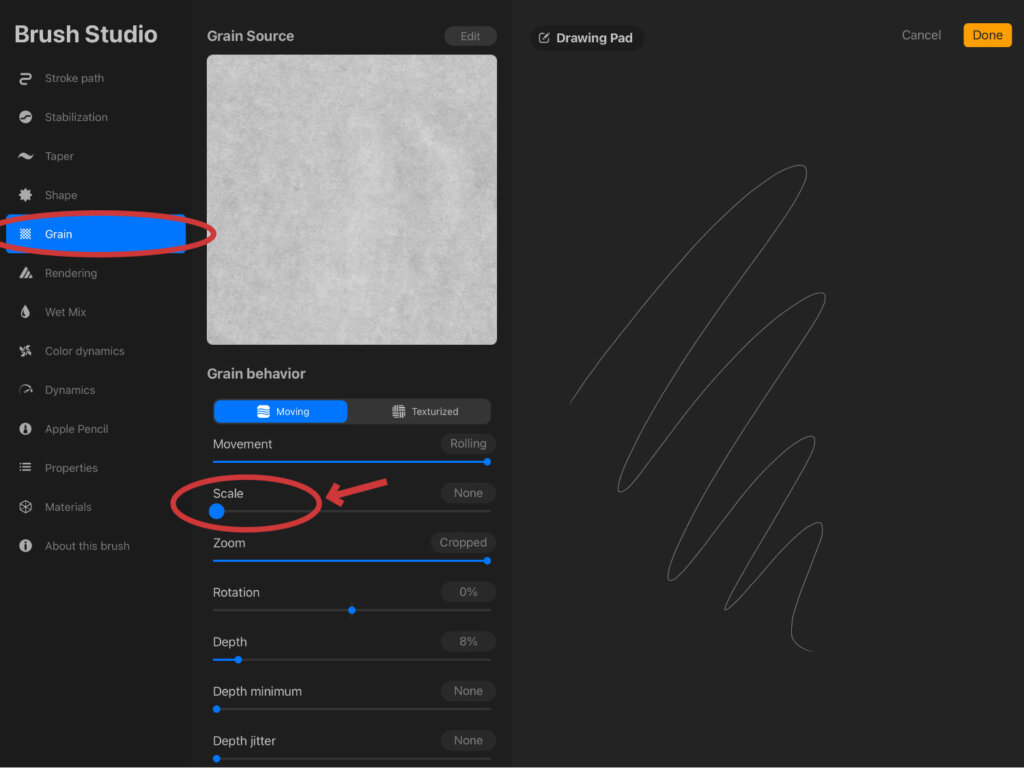
Pro Tip: Want smoother lines? Open Brush Studio by tapping on the brush, go to the Grain section, and set Scale to 0% to remove texture. Slide it back up later if you want the texture to return.
If you prefer to save time, you can import outlined florals from packs like the Summer Floral Patterns and Vectors.
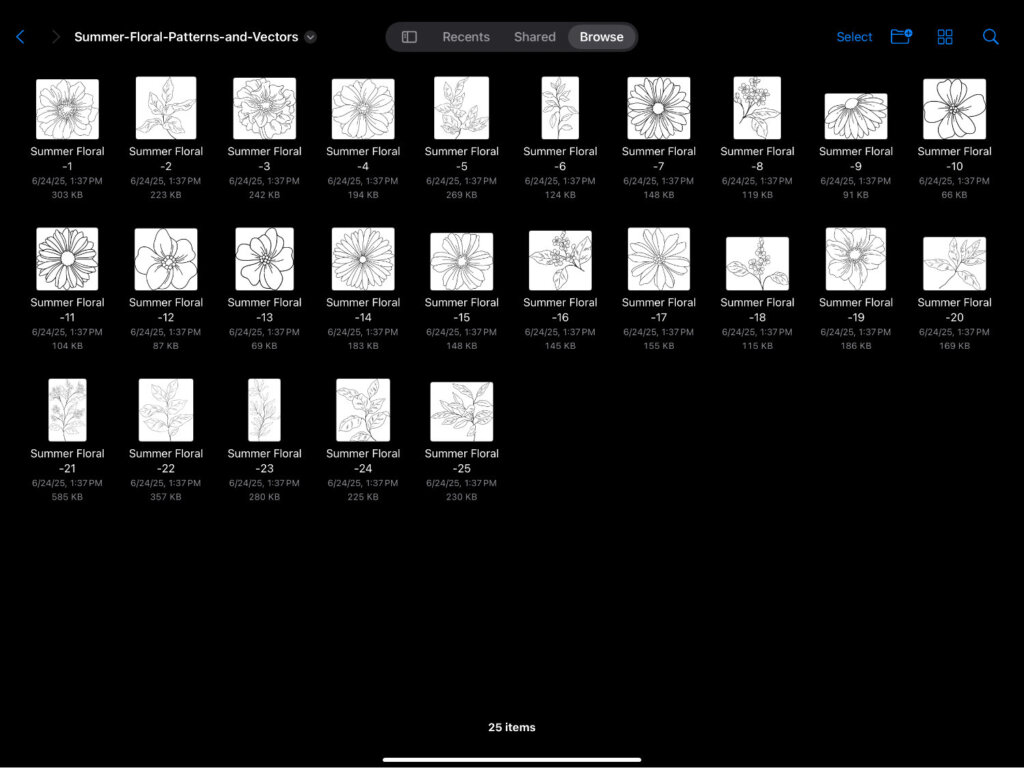
Once they’re on your canvas, rotate, flip, and resize them so they don’t look like exact duplicates.
Step 7: Add Stems and Leaves
Lower the opacity of your botanical guide so it’s faint in the background.
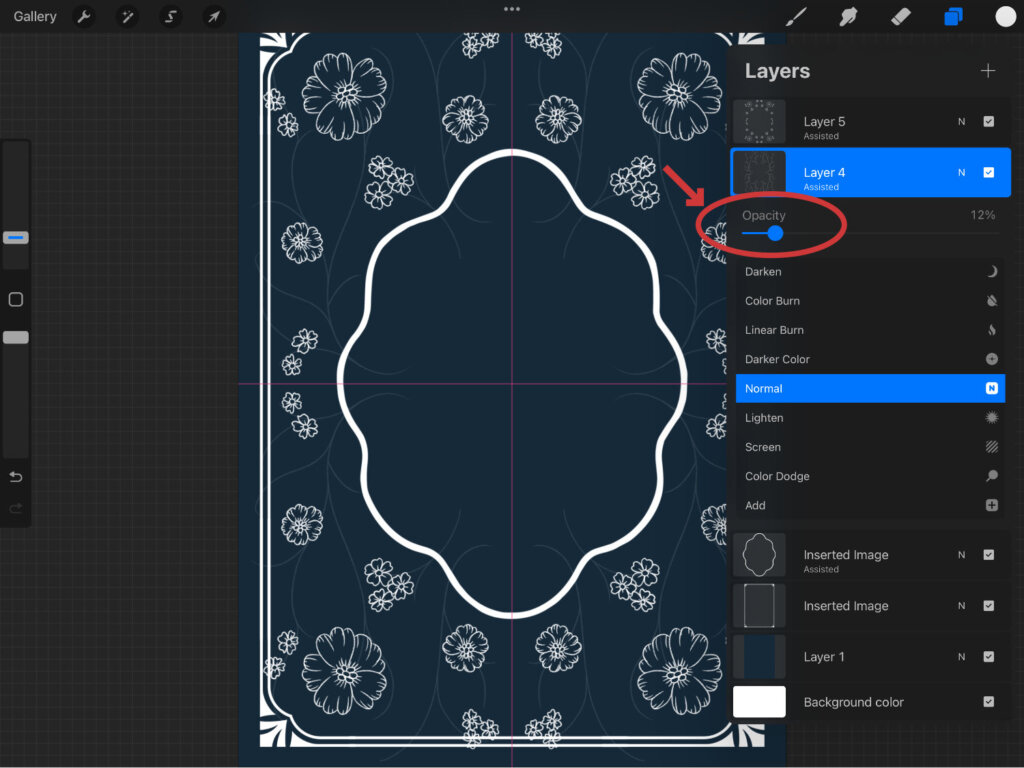
Then on a new assisted layer, draw stems to connect your flowers following the lighter guides.
Create another new assisted layer for leaves. Draw pointed leaves with little line details along the stems.
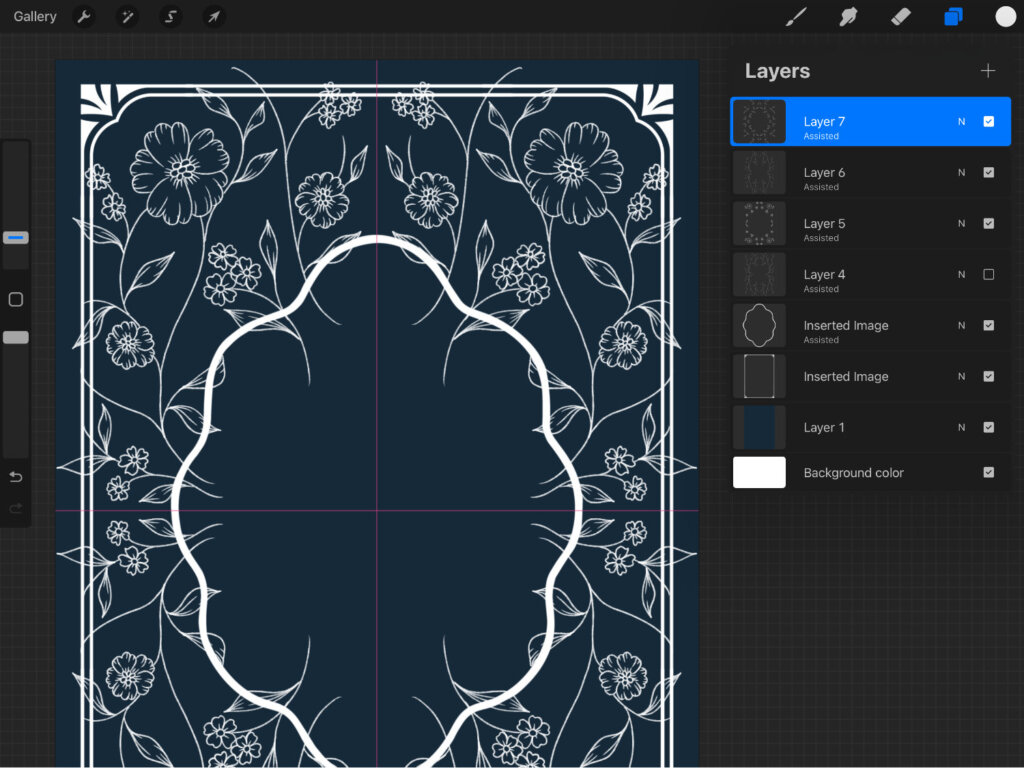
Then mix in some taller rounded leaves for variety and some droplet-shaped leaves along the stems to fill in the empty spaces.
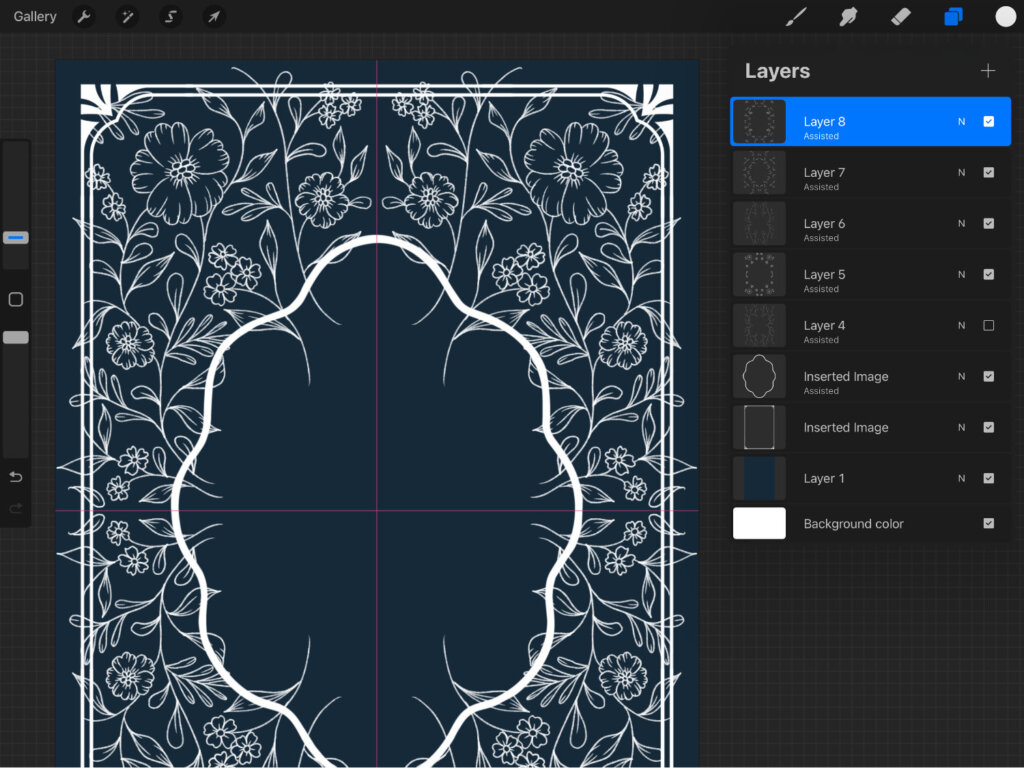
Don’t worry if the leaves or stems cross over the borders, we’ll clean everything up later.
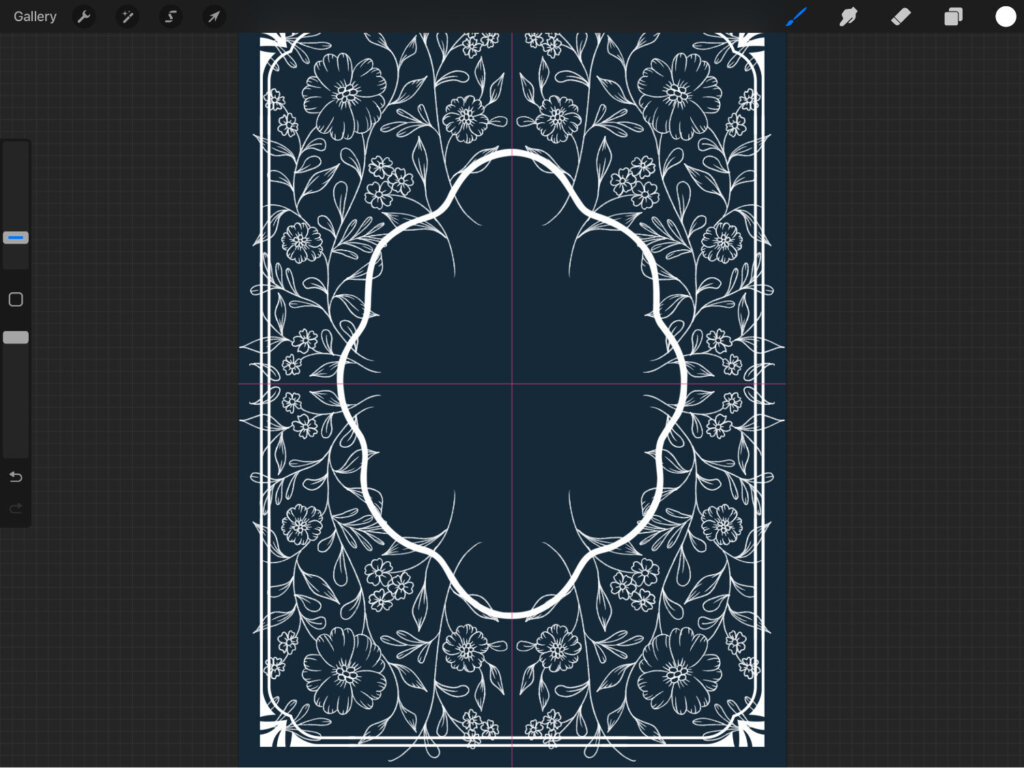
Step 8: Fill Empty Spaces
If the design looks sparse, add some small diamond or circle shapes to balance it. I like using the diamond stamps from the Ultimate Lettering Toolbox – Retro Pack, but you can also just draw simple shapes by hand.
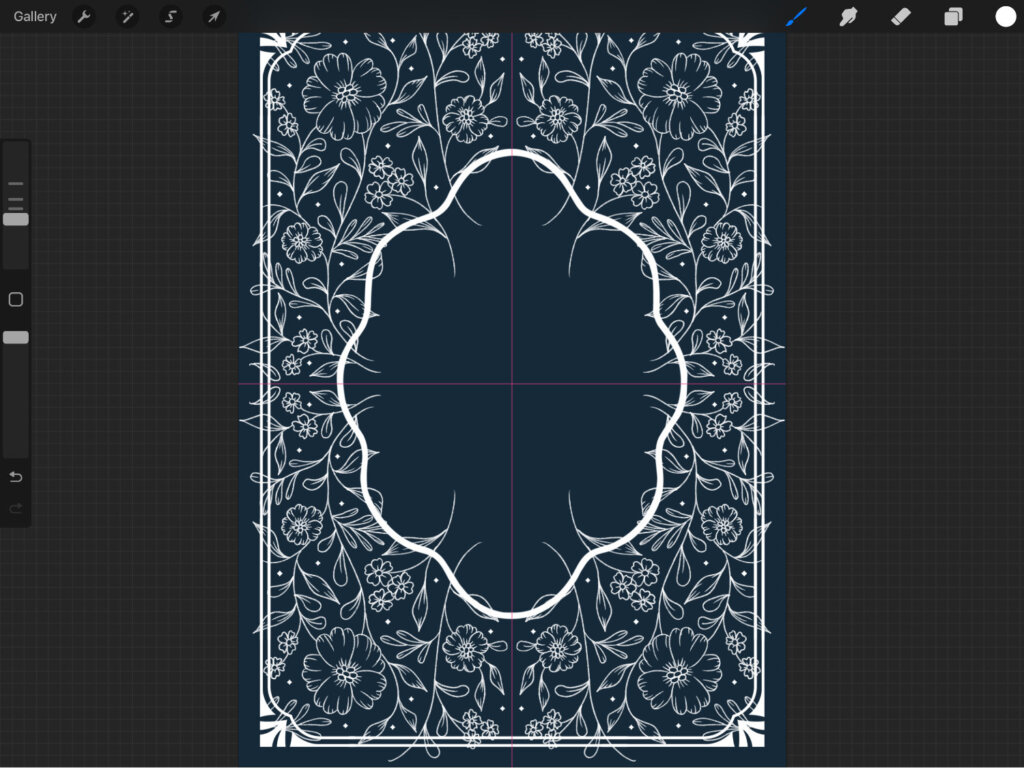
When you’re happy with the overall layout, group all your floral and leaf layers together. Duplicate the group if you want to keep the original layers, then flatten the copy so it’s easier to make changes later if necessary.
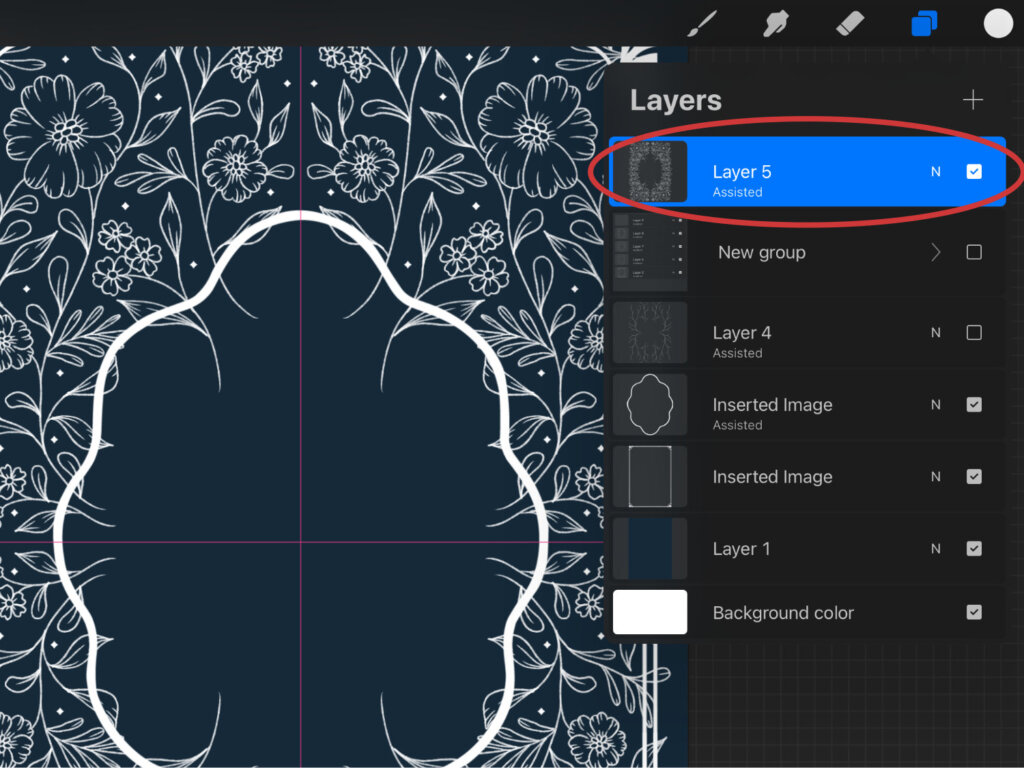
Step 9: Clean Up the Edges
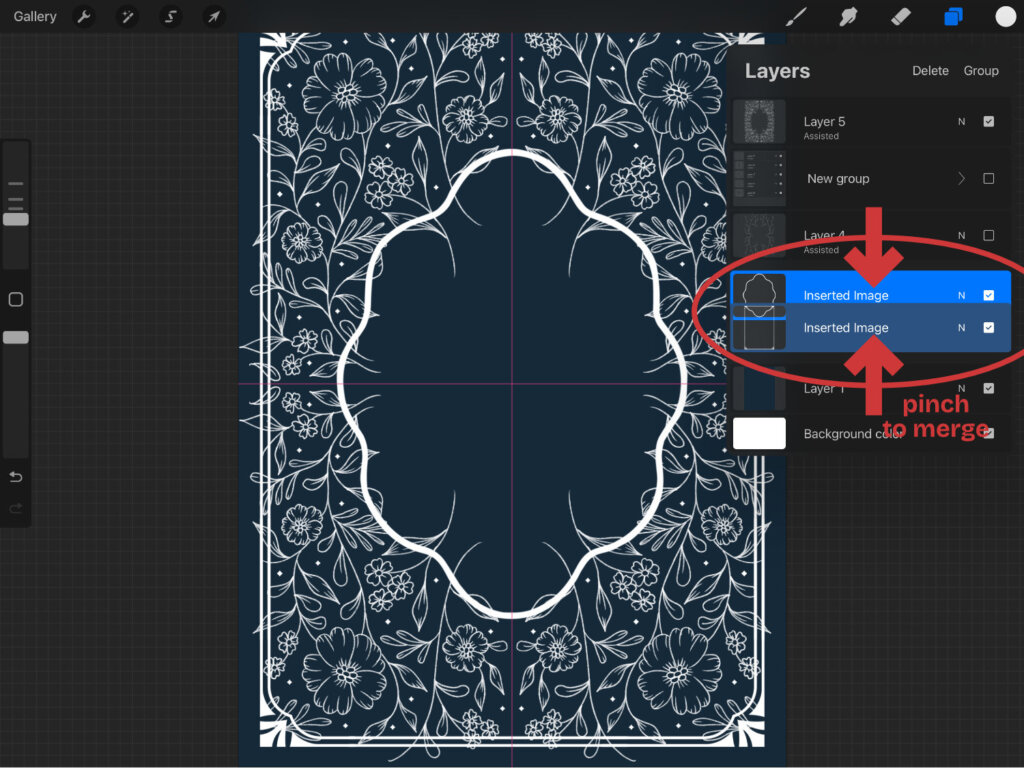
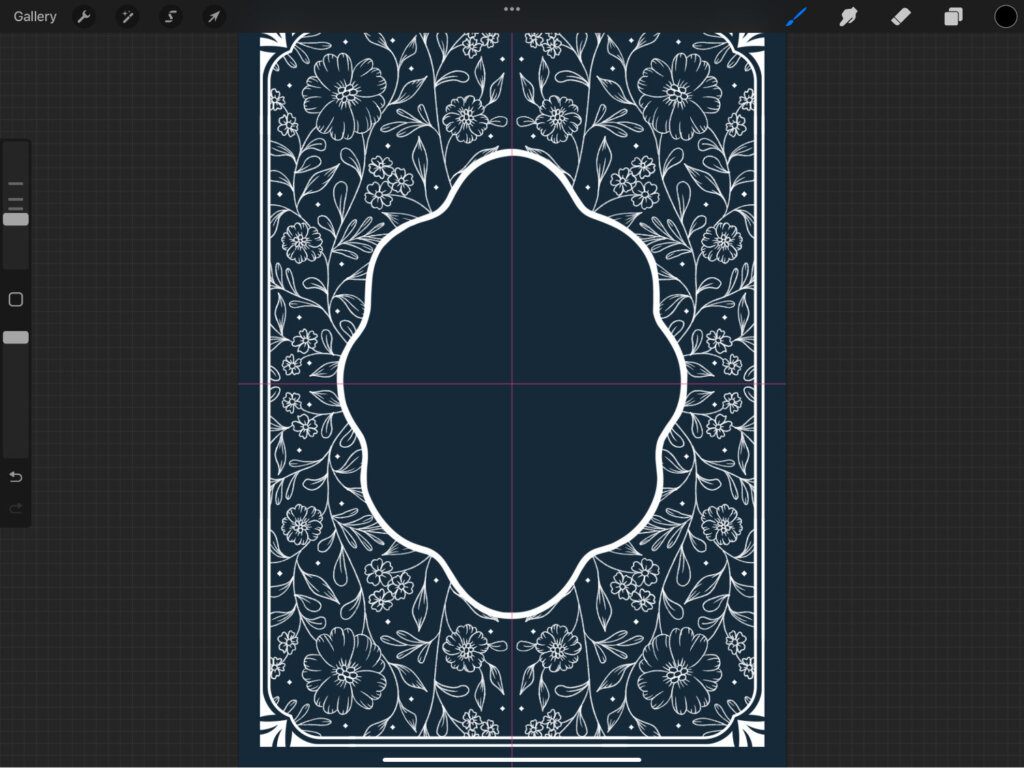
Now let’s confine the design neatly inside the border. Merge your border and frame layers together.
With that layer selected, use the Selection tool set to Automatic and tap the space between the border and frame. Adjust the threshold so only that space is selected.
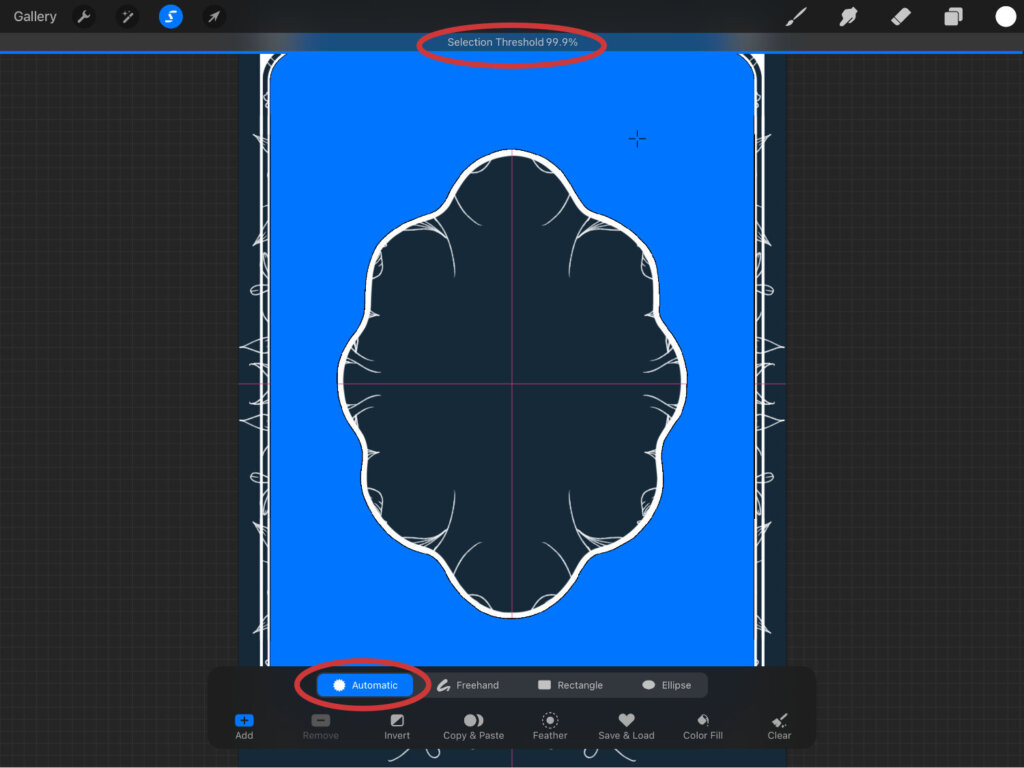
Once selected, apply a mask to the floral illustration layer by selecting it on the layers panel, tap it and click on “Mask”.
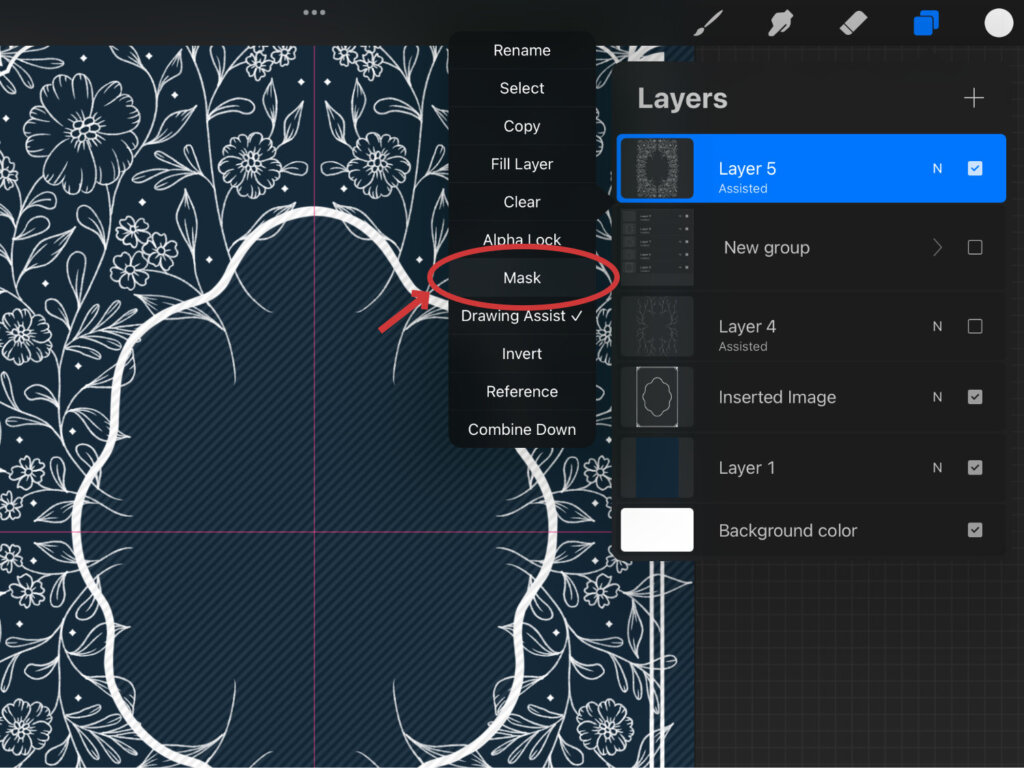
This trims away any overlapping flowers or leaves and keeps the whole design cleanly contained.
Step 10: Add Your Greeting
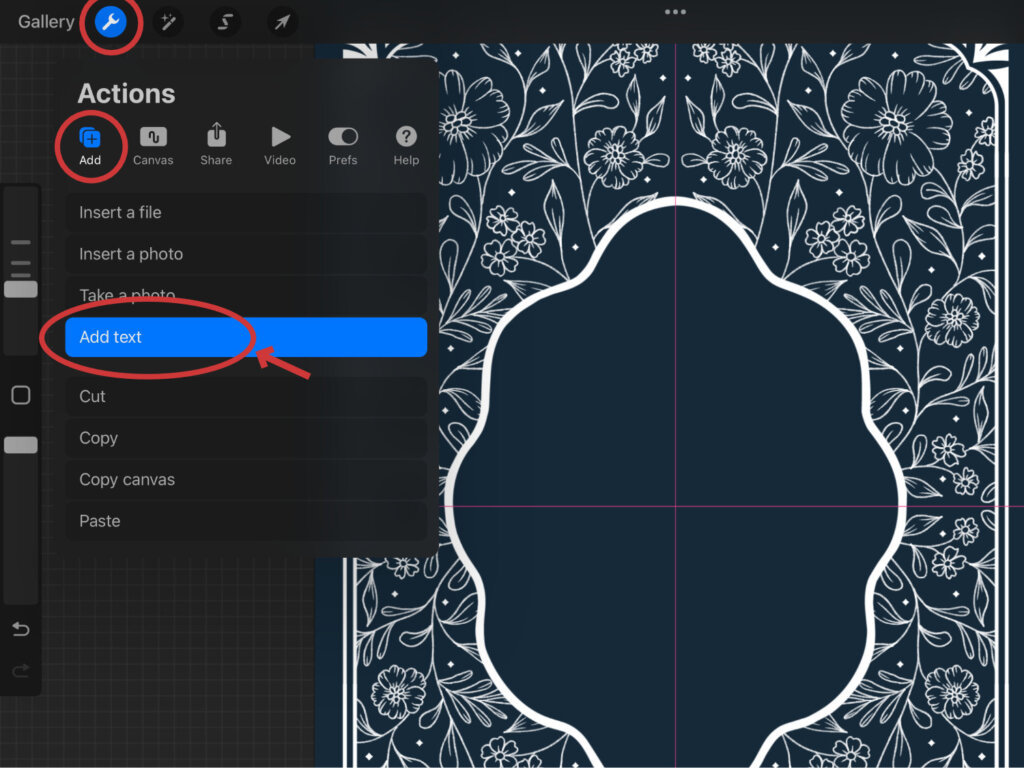
Go to Actions > Add > Add Text and type your message. For this example, I’ll write “Have a wonderful birthday,” but you can type in any message you like.
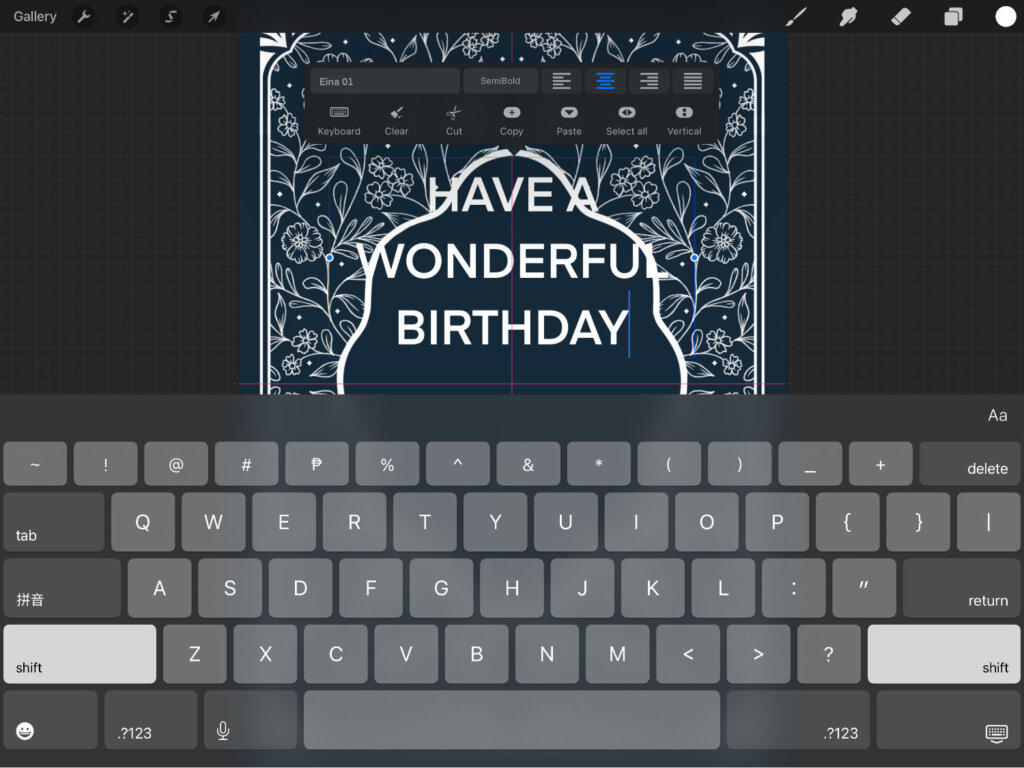
Choose a serif font for a classic feel. I’m using Grand Baron – A Vintage Typeface, but you can use any similar font. If you need to install the font, check out [Part 1] of this series where I show you how to install fonts into Procreate.
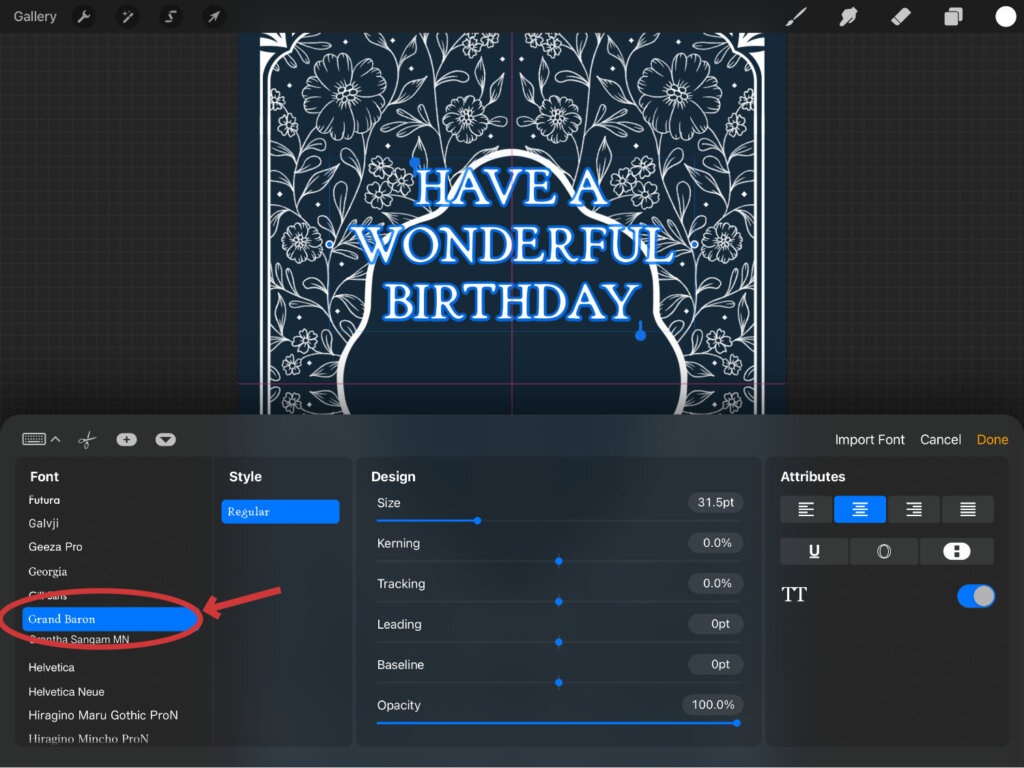
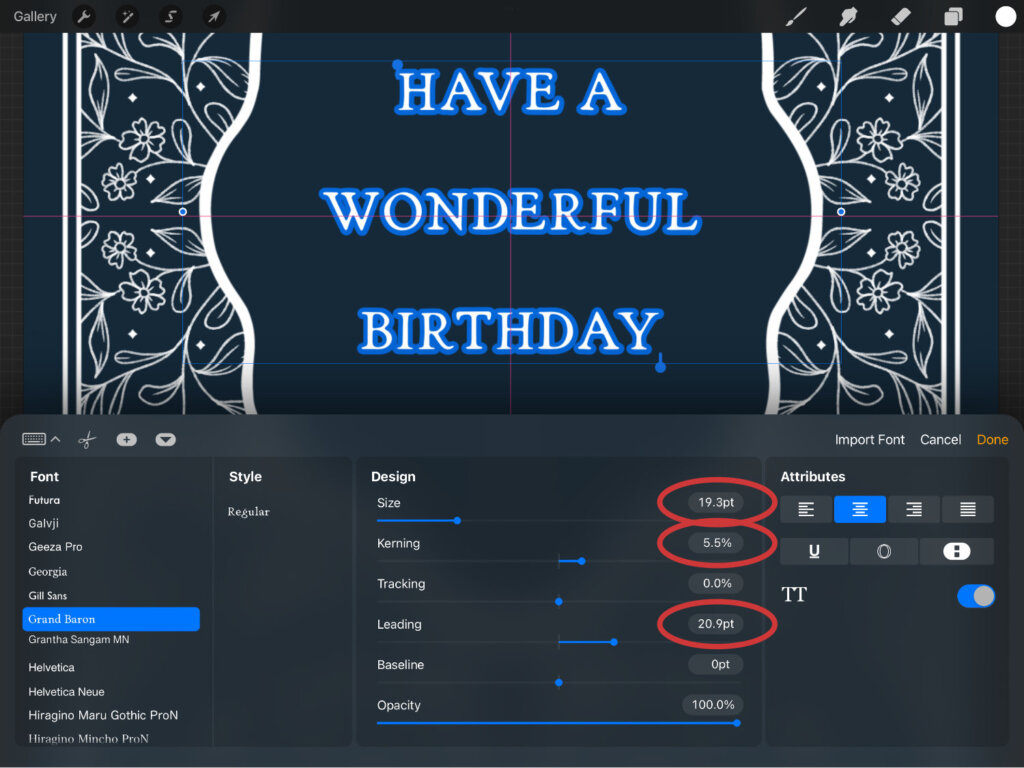
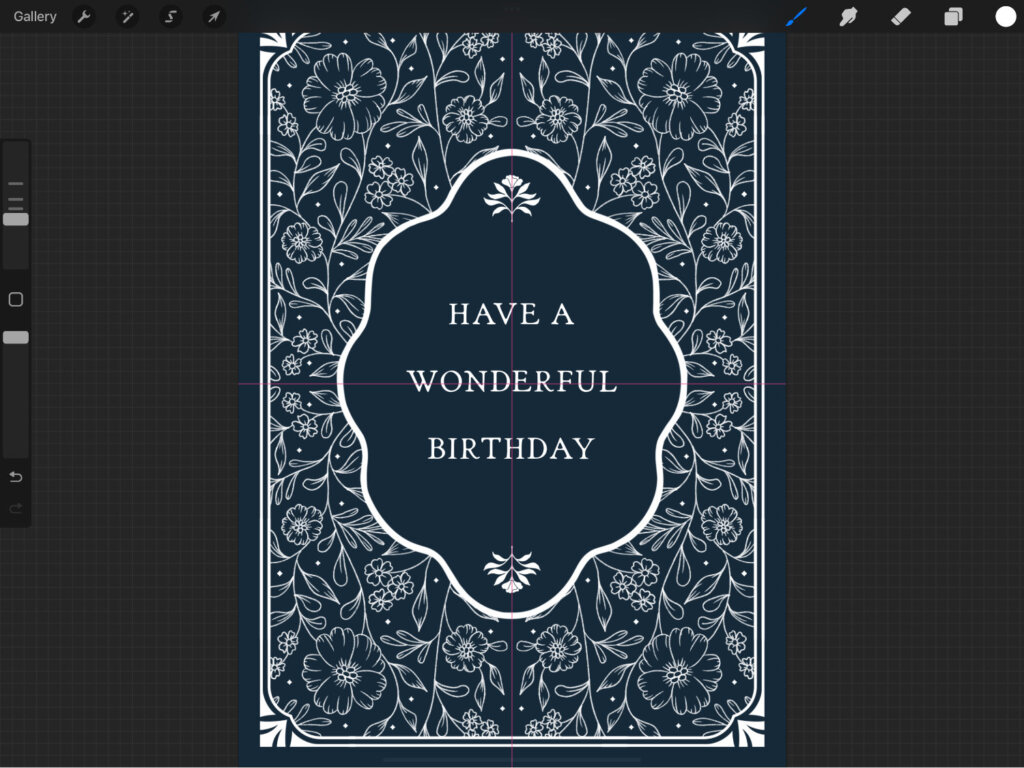
Once your text is on the canvas, adjust the size, tracking, and leading until it feels balanced, then center it inside the frame.
Step 11: Optional Details
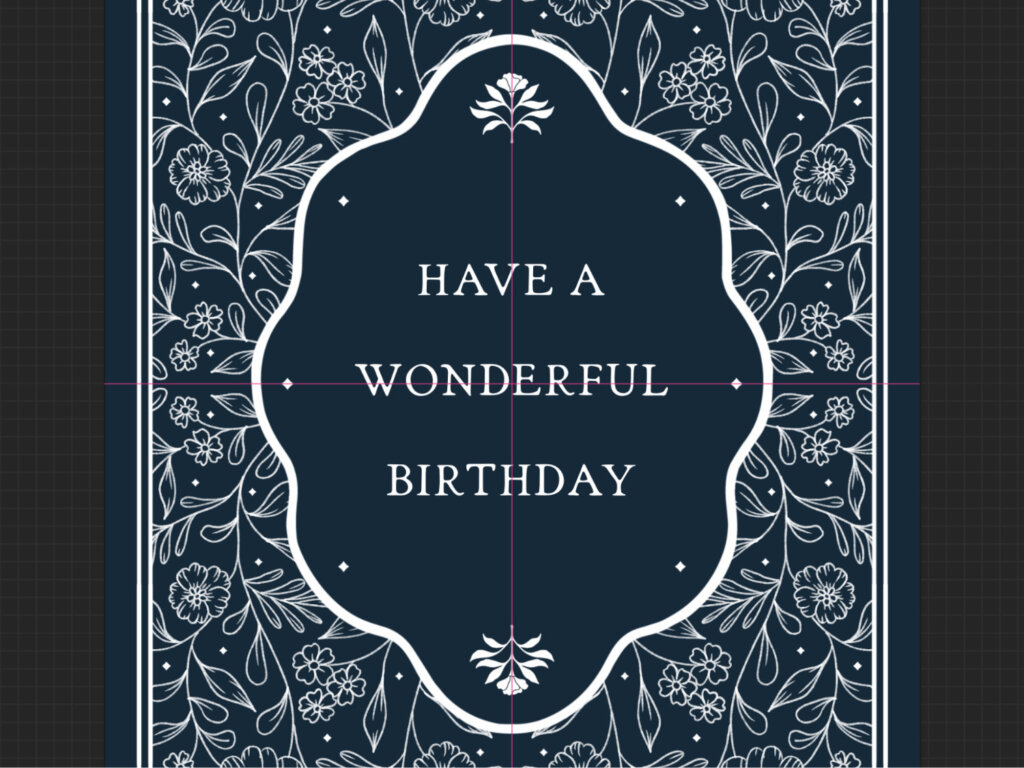
If the design feels a little empty in the middle, add some decorative elements also from the Florish Decorative Vector Collection. Place a small emblem above your text, then mirror it below.
You can also add a few larger diamonds in the curved areas of the frame. Keeping these extras symmetrical helps the whole card look professional and polished.
Step 12: Add Texture and Gold Finish
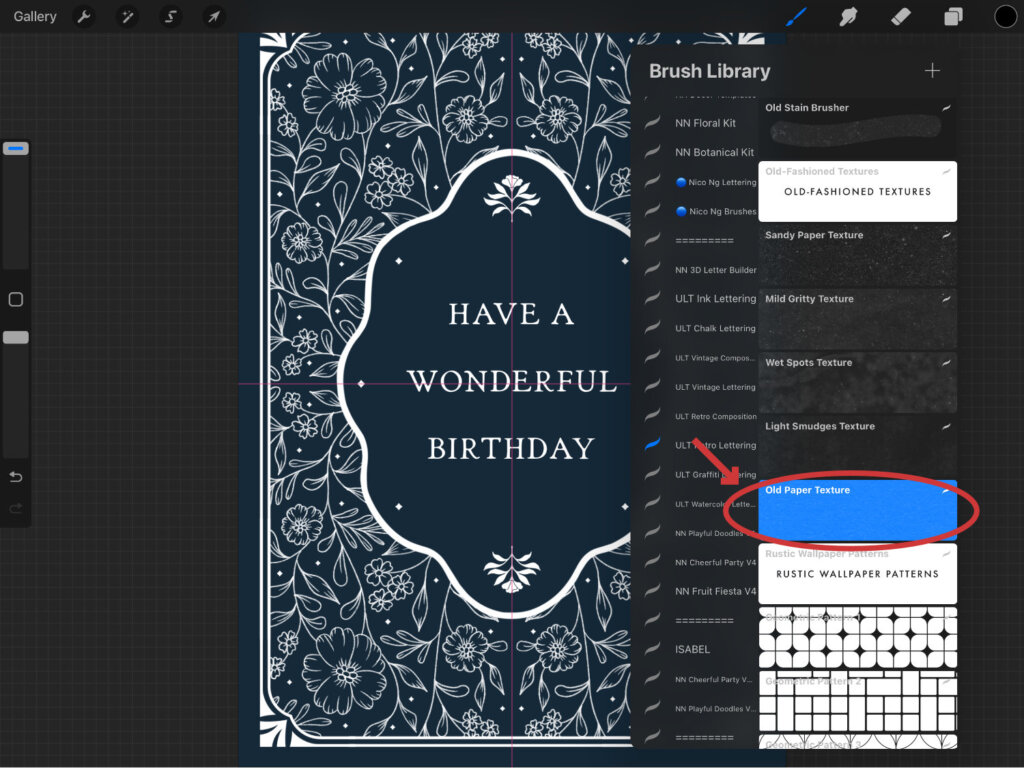
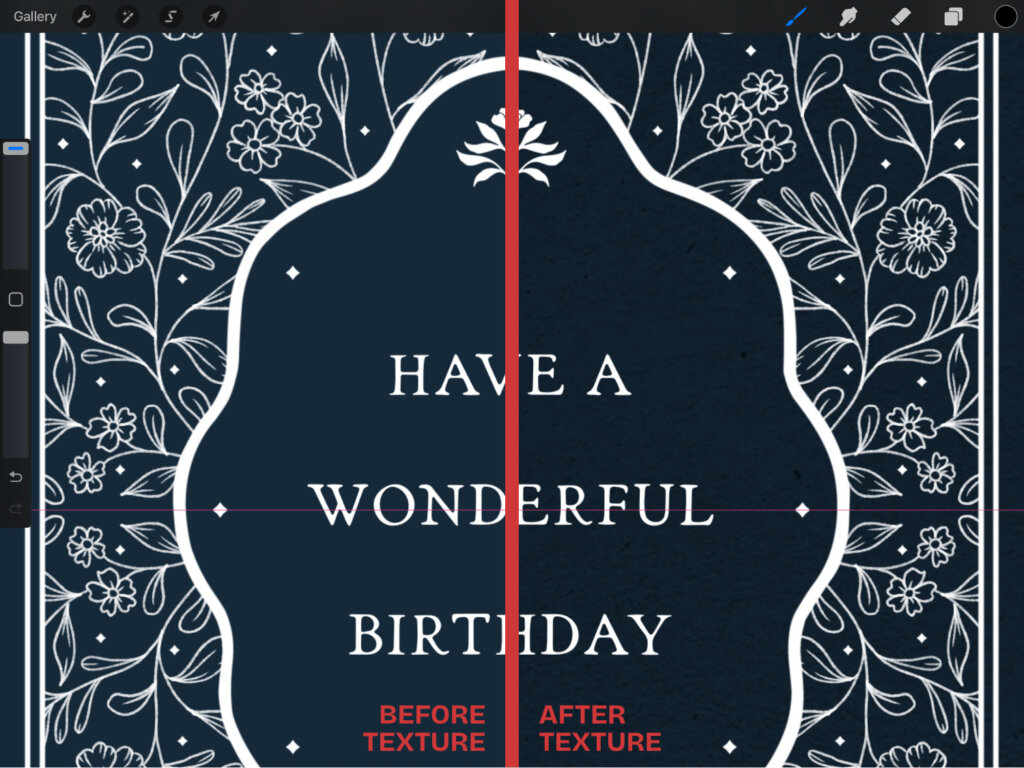
For a digital card, textures can add depth. On a new layer above your background, brush in a subtle paper texture from the Ultimate Lettering Toolbox – Retro Pack like the “Old Paper Texture” brush. But if you’re printing on textured cardstock, you can skip this step.
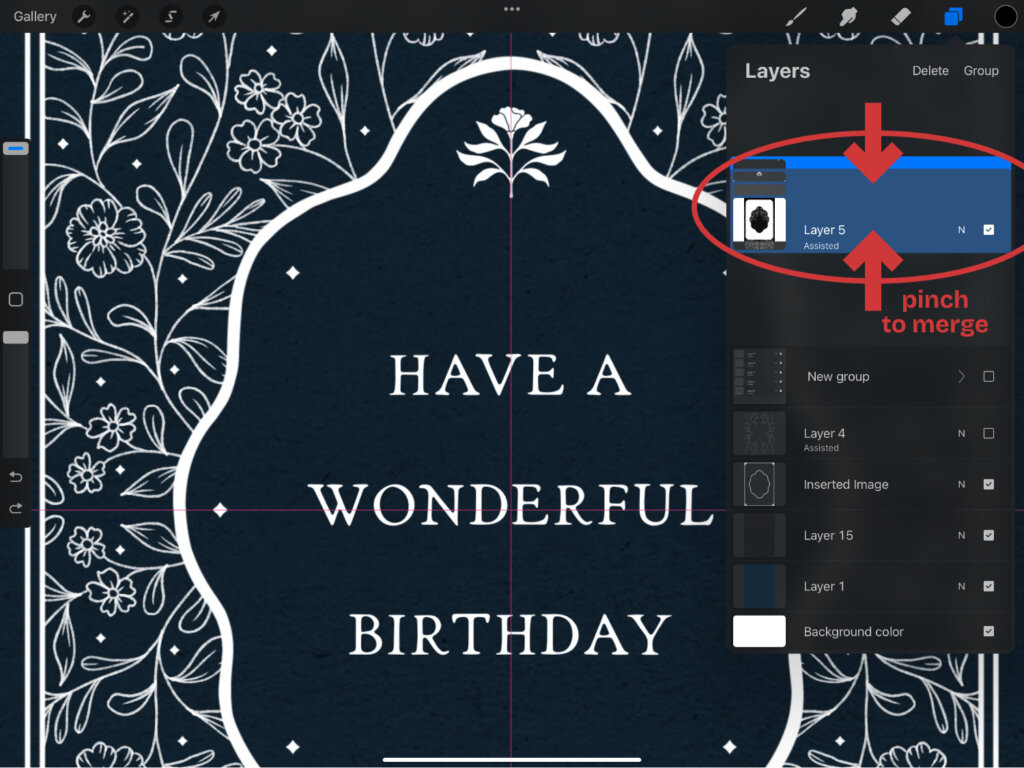
Now merge all your design elements (the florals, borders, text, and decorations) into one layer.
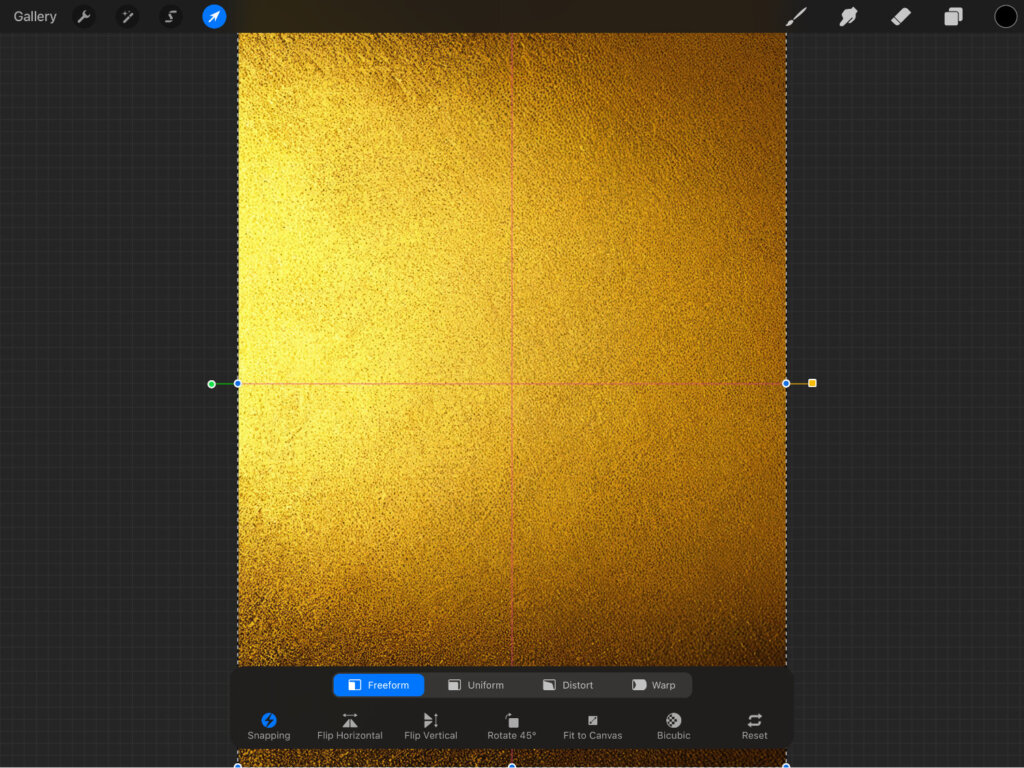
Import a gold metallic texture (I’m using texture #46 from the 440 Gold & Metallic Textures Bundle), place it above your design, and set it as a clipping mask.
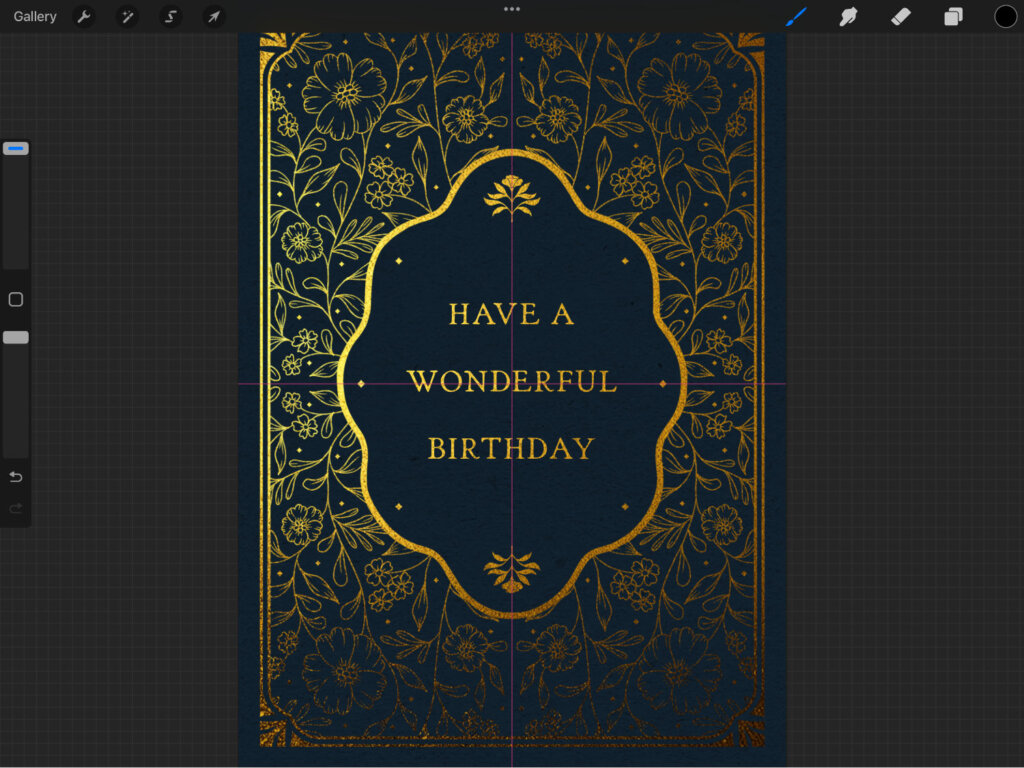
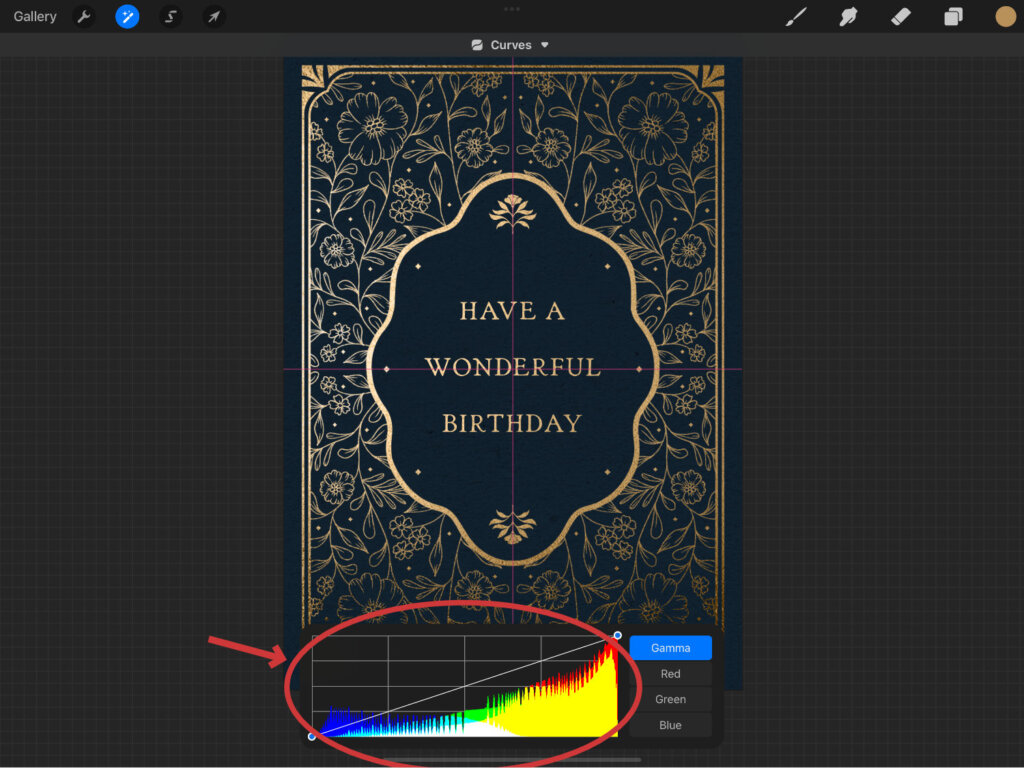
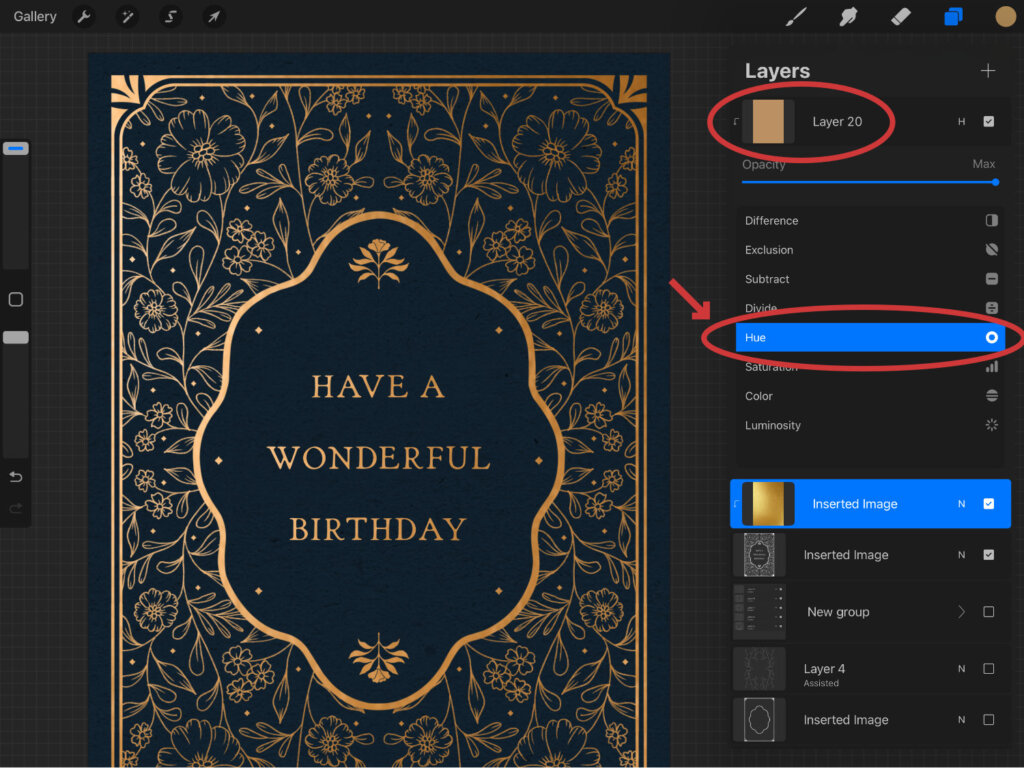
To refine the look, use Hue & Saturation to adjust the tone of the gold, and Curves to brighten highlights or deepen shadows. You can also add a layer filled with the tan color #bb9163, set it as a clipping mask, and change the blending mode to Hue. This helps tone down the gold if it feels too yellowish.
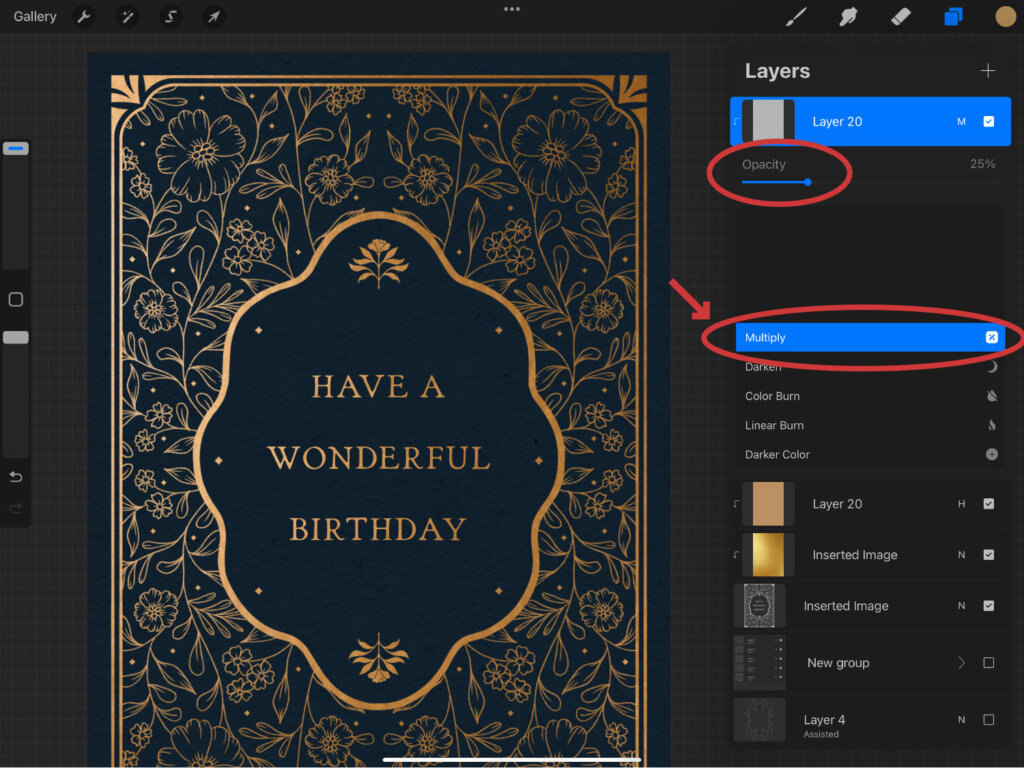
For extra depth, add a new layer of noise. First, fill the new layer with white, then go to the Adjustments menu > Noise and apply the amount you like. Set the blending mode to Multiply and lower the opacity to around 25%. This will give your gold a subtle textured feel.
Finally, create a new layer, brush in white highlights where you want a glow, and apply Gaussian Blur to soften it.
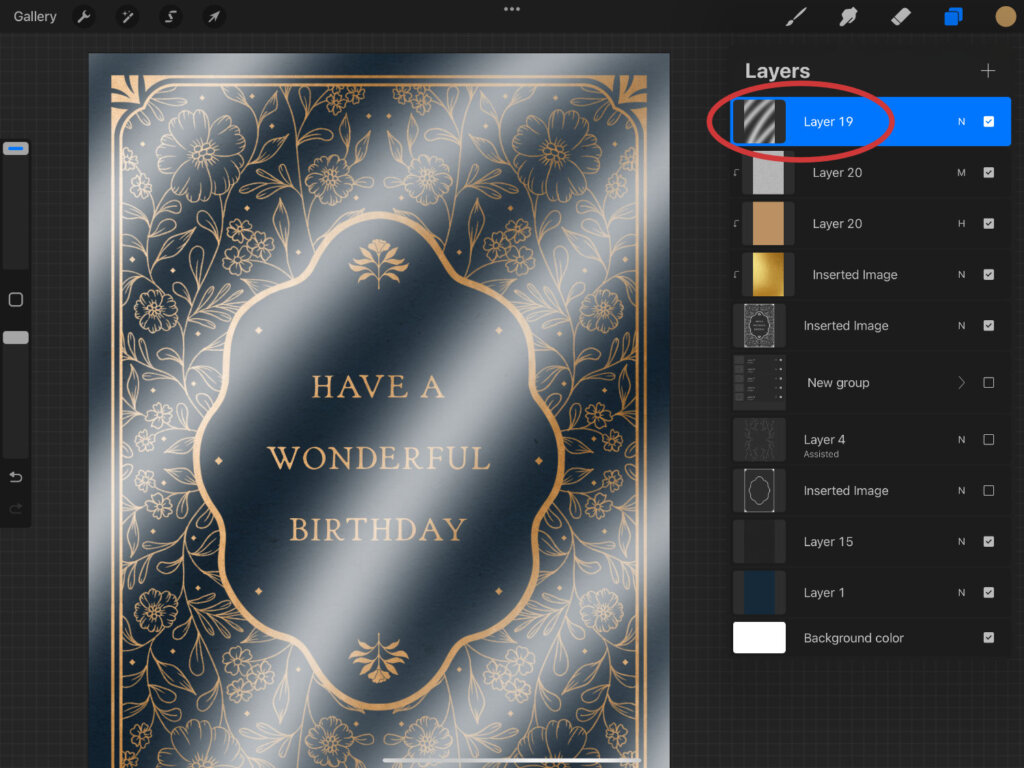
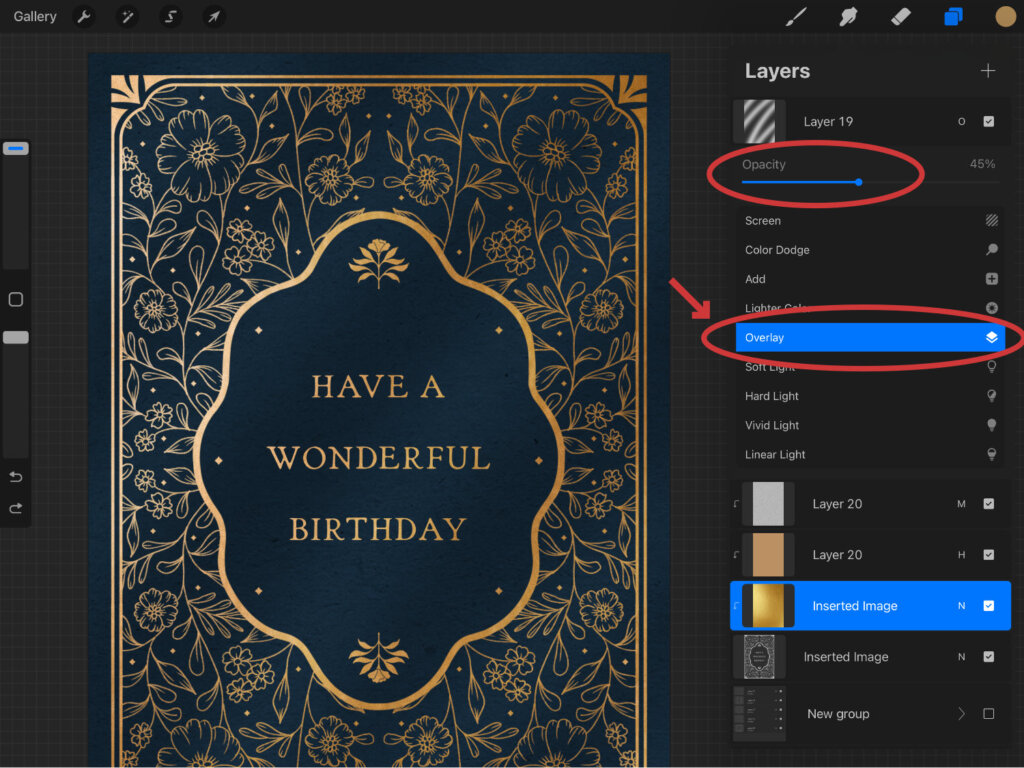
Set the blending mode to Overlay and lower the opacity to about 45% for a soft lighting effect.
Final Result
And that’s it! You’ve just created a vintage-style floral greeting card with a golden foil effect.
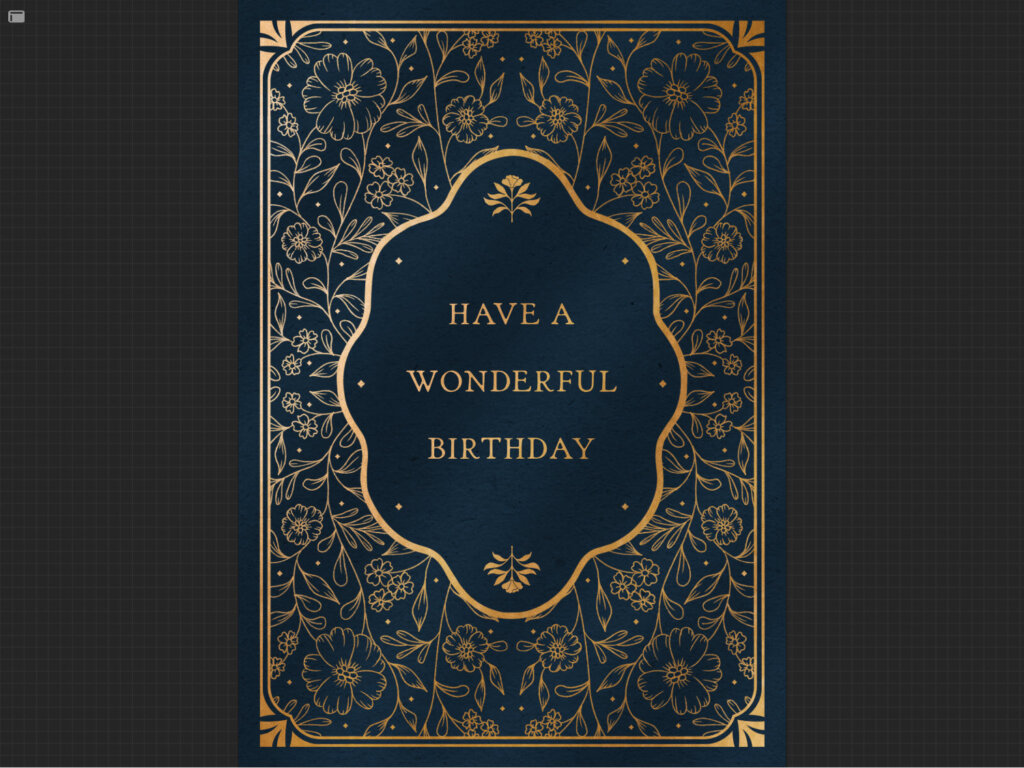
In this project, you learned how to use Procreate’s Drawing Assist and Symmetry Guide to speed up your illustration process, how to build a balanced floral composition, and how to apply textures and metallic finishes for a professional look.
This wraps up the 3-Part Procreate Crash Course Series. If you missed the first two tutorials, you can find them here: [Part 1] | [Part 2].
For an extra twist, try experimenting with different metallic colors like silver, copper, or rose gold. You can also play with background colors like deep green, burgundy, or even black can give your card a completely different vibe.
I’d love to see your version! Change up the message, swap in your own colors, or try a new metallic finish, then tag me on Instagram @nicong.co so I can share your work with the community.
Happy creating, and thanks for joining me in this series!
Cheers,
Nico
Download these worksheets and start practicing with simple instructions and tracing exercises.
Download now!





I’m Nico, a lettering artist and designer from Manila. I create beginner-friendly tools and templates for artists and creatives. Check out my free tutorials in the articles tab or join my Patreon for monthly workshops and creative inspiration. :)
View More Posts