



We all know that our design possibilities are literally endless with the wide variety of amazing resources on Creative Market. Next time, use your fun new content to design your own book. You don’t have to be a best-selling author or a super-scrapper to make your own beautiful books. There are many online book-making services, each with its own wide variety of options and choices, available for everyone from the casual memory keeper to the creative professional.
As a graphic designer, I prefer to have complete creative control over every aspect of my design, especially when I’m creating my own book. I like to be able to use textures, fonts, and other digital assets that I’ve created, found, or purchased. That’s where Blurb.com stands out from most of the competition.
In addition to their own free bookmaking software and a couple of online tools, Blurb also offers a fantastic Adobe InDesign plug-in (as well as a Lightroom plug-in and other templates) to help you streamline your creative process to their bookmaking service. That means that you can start completely from scratch and make a book your way. The InDesign plug-in is the perfect way for creative pros to create a book that is completely unique.
Here are a couple reasons to create your own book:
- Preserve memories: Families, make a scrapbook of the latest vacation. Parents, create a keepsake for the kids, complete with all the best moments of their childhood. Couples, share your special day with an unforgettable wedding album. Scrapbookers, rejoice! Create an album completely from scratch.
- Showcase your best work: Photographers and designers, create a stunning portfolio to show future clients.
- Share a story or anthology: Got a collection of recipes to share, a children’s book to illustrate, or a story to tell?
- Psssst… Personalized books make great gifts for the Holidays!
Today, let’s discover how to use the Blurb InDesign plug-in to create a beautiful book. It’s easy! (If you’re not on InDesign, Blurb also provides templates for Photoshop, Quark Xpress, and Microsoft Word, but I’ll be focusing on InDesign for this tutorial.)
What you’ll need:
- Adobe InDesign CS3+ (I’ll be designing in version CS4)
- Adobe Photoshop and Adobe Illustrator is also helpful, but not necessary. I often integrate all three tools.
- Intermediate knowledge of Adobe InDesign
- Photos, text, and other content with which to create a book. Read: your new Creative Market assets!
- A Blurb.com account
Let’s get started:
- Take a look around Blurb. They’ve got a lot of great options to help you create a beautiful book. Check out Blurb’s bookmaking tools for several different ways to begin. If you haven’t already, create an account with Blurb. You’ll need one to download the InDesign plug-in.
- Download and install the plug-in into Adobe InDesign, based on your version of InDesign and your OS. Great! Now, after you’ve restarted InDesign, the Blurb plug-in can be found by going to File > Blurb Book Creator.
- Click “Create New Book†to get started. Specify your details in Step 2. Visit Blurb to learn more about size and paper options. It’s not necessary to know the number of pages right away, although you will eventually need to specify the exact number of pages in order to create a cover for your book. (I recommend designing the cover of the book last, even though it might seem like a good place to start.) Make sure you specify an even number of pages.
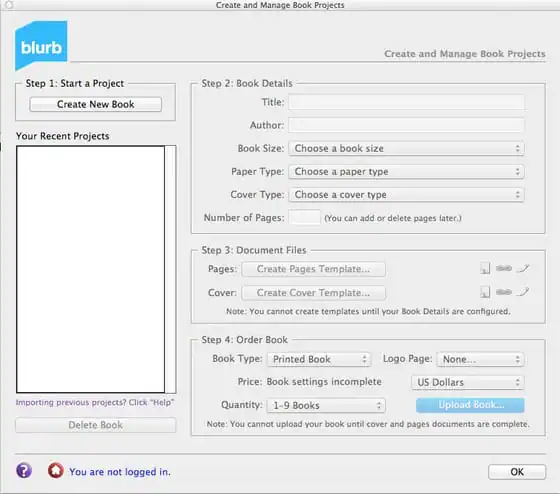
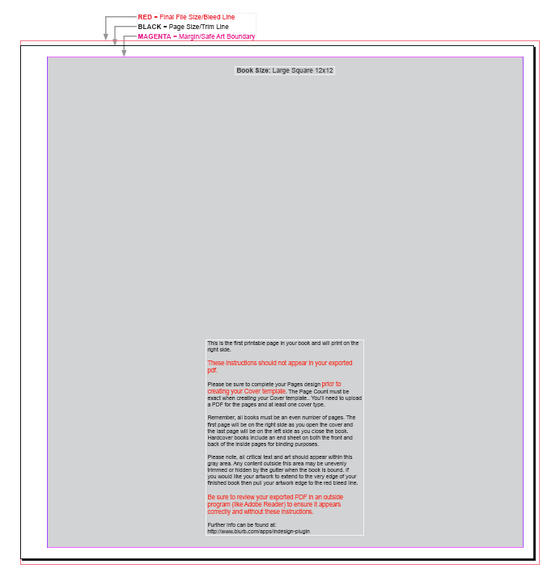
- In Step 3, you can create an InDesign file for the pages of your book and choose where to save it. Once you create the pages file, Blurb will create a template. A new document will open, and you’ll be ready to get started designing your new book! Close the Blurb Book Creator to get started. Your pages file will look a bit like this:
The layers palette will look like this:
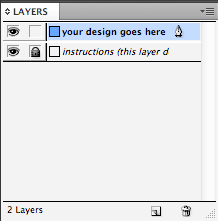
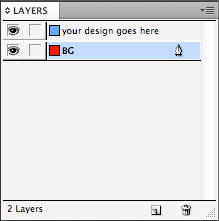
I usually like to create a separate layer for the images, textures, shadows, and other content in the background. An instructions layer, with tips on designing your pages, should be deleted or hidden before sending your book to Blurb. I’ll just go ahead and delete it now, since I’ve read the instructions.
- Start designing the pages! Start wherever you want, but I’ll start at the beginning, on page 1, with what I call the title page. This is slightly different than the cover, which I’ll design later. The title page might feature the title of the book, perhaps the author or designer, and some graphics that give a summary, overview, or teaser of what’s inside.
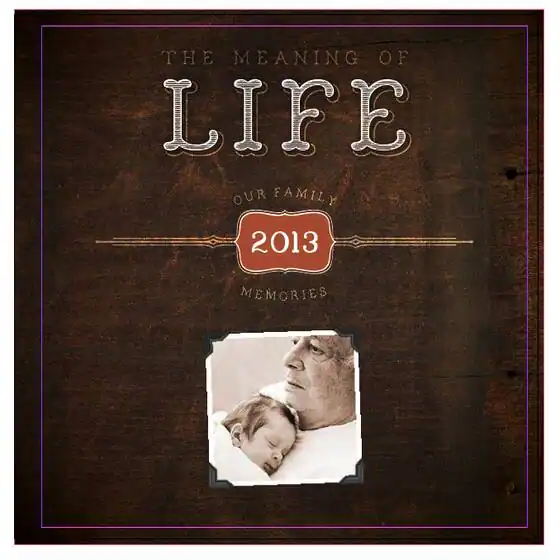
(Creative Market assets used 10 Wood Textures — Set 2, Church in the Wildwood Complete, 67 Classic Frames (Vector), 20 Classic Photo Corners)
A few tips to keep in mind while creating a beautiful, organized book:
- Before you begin designing, “map out†what you’d like to put in your book. Drop some images, text, keywords, or brief descriptions onto each page. That way, you know what goes where, and then you can build upon and design each page from that point.
- Write a table of contents page as you design. A table of contents is helpful to stay organized, both for you as the designer and also for the future admirer of your book.
- Design each spread as one unified design, using good design principles.
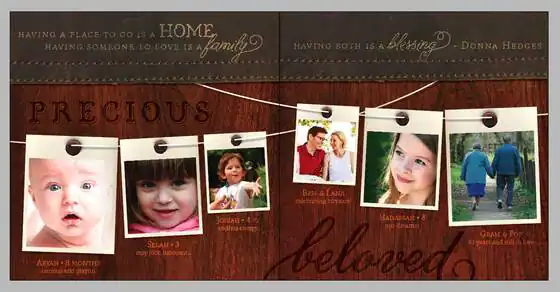
(used Full-Grain Leather Collection, 10 Wood Textures — Set 1, The Grommets & Rivets Collection, Church in the Wildwood Complete, Melany Lane Complete)
- Design around the gutter. The inside margins of each spread should be given a little more space than the outside margins. Be careful that your designs don’t get lost inside the gutter when someone else is looking at your book. Blurb’s template comes with a bit of extra space, but it’s still an area of caution. Make sure your text and important images (or anything you don’t want to cut off in the final printed book) fall within the purple margin lines. However, sometimes, you may want to use the gutter to your advantage.
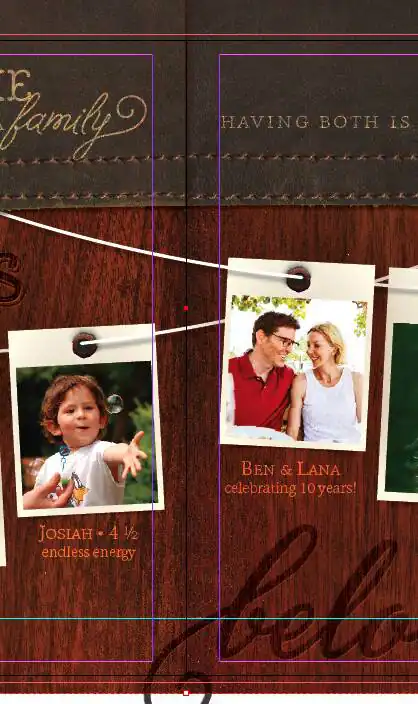
Here’s my gutter. Nothing too important is there. However, I can also use the gutter to hide where the leather texture stops and starts up again.
- Stay organized! Keep all your book assets together in one folder, and organize them by type (e.g. photos, fonts, embellishments, illustrations, backgrounds, etc.) Within your document, keep layers named and organized. Create and use object, paragraph, and character styles. Name your swatches! Delete any styles or swatches you don’t need.
- Save often and back up your files periodically. Don’t lose your beautiful work! Make new versions as you design. You never know- you might like one of your previous design versions better.
- Make a copy of your assets, then edit. If you have a photo named “2013 Family Portrait,†make a copy of it and then add filters, retouch, and Photoshop away to your heart’s content. That way you have an original copy of the photo for your archives, plus a retouched version to put in your book design.
- Link all graphics. Use File > Place when adding graphics to your book. Use the Links panel to manage and access all your linked graphics. InDesign will even organize them for you.
- Use properly exposed photos and bright, clearly defined graphics. Underexposed photos might look too dark in the printed book.
- Use spell check. (Edit > Spelling > Check Spelling) Even the best spellers make typos.
A couple things to remember while designing for Blurb:
Blurb will run a preflight check on your book before you can upload it for the printer. Check your work periodically with the Preflight panel (Window > Output > Preflight) to make sure your work is correct. Here are a few areas the plugin checks:
- Image resolution: Use high-quality graphics. Keep image resolution between 150-300 dpi and convert all graphics to the CMYK color space.
- Page number: Create an even number of pages.
- Fonts: Use fonts with embedding capabilities, and make sure there is no overset text or missing fonts in your book.
- Links: Make sure there are no missing links in your book.
Now, to finish your book:
- When you’ve got each page looking perfect, return to the Blurb Book Creator (File > Blurb Book Creator). Update the page count. Now you can create the cover document. The Blurb Book Creator will use your page count to calculate the spine width and will create a file that looks a bit like this:
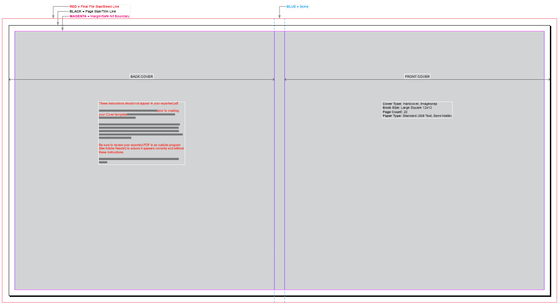
On the left is the back cover. In the middle is the spine. To the right is the front cover. Using the same tips from above, design an awesome cover for your book.
- Awesome! You’ve just designed a beautiful book. The next step is to get it printed so you can show your family, friends, or clients. First, save both the pages and cover file. Next, visit the Blurb Book Creator once again (File > Blurb Book Creator). Log into Blurb from the plug-in with your email and password. Now that your pages and cover design are both complete, you can click “Upload Book.†Blurb will now run a preflight check on your pages and cover files. If it finds no errors, you’ll see this triumphant message:
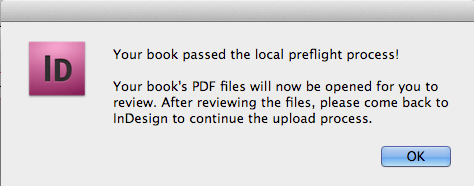
Click OK, and the pages and cover print-ready PDF files will open in Acrobat or Adobe Reader, and you’ll have an opportunity to make sure everything looks perfect. Sometimes the print-ready PDF will look different from your InDesign document, so do take a look!
- After you’ve decided that the book is perfect the way it is, or that it still needs some tweaking, go back to InDesign. You should see this:
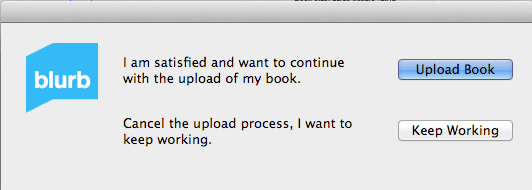
“Keep Working†will allow you to make any desired changes to the InDesign pages or cover files. “Upload Book†will send your book to Blurb.com. If it’s a large book with a lot of graphically-rich pages, uploading may take a few hours, depending on your connection speed. After the book is uploaded, you’ll need to order it from Blurb within 15 days, or your book file will be deleted from Blurb’s server.
Thanks for designing an amazing book with me! Need some design content to use for your book? Here are some great Creative Market assets to help you get started:
Backgrounds:
- Set 3
- Leather Love
- Kraft Paper Pack
- Chalkboard Seamless Textures
- Antique paper texture pack
- Vintage Holiday Digital Papers
Fonts:
- Church in the Wildwood Complete Family
- Charcuterie Collection
- Desire
- Melany Lane Complete Family
- Aesthetique
Other fun assets to use for your next book:
- 20 Classic Photo Corners
- 67 Ornamental Frames
- The Grommets & Rivets Collection
- The Monumental Vintage Vector Pack
- Vector Passport and Postage Stamps
- Mega Pack of Web Ribbons and Badges
Beth Rufener, the shop owner of Ornaments of Grace, is a wife, mom of two, graphic designer, amateur photographer, aspiring foodie, occasional musician, and avid collector of fonts. She and her family live outside of Rittman, Ohio.
Download these worksheets and start practicing with simple instructions and tracing exercises.
Download now!








10 Comments