



If you’re the kind of learner who’d rather make something beautiful than sit through a full app walkthrough, you’re in the right place!
In this series, we don’t go tool by tool. Instead, we learn Procreate step-by-step by actually creating a real design together. Each technique is introduced as we need it, so it’s easier to follow and apply right away, without the overwhelm.
If you haven’t checked out Part 1 of this series yet, I recommend starting there first. You’ll learn how to set up your first canvas, get familiar with the interface, and explore the core tools like brushes, layers, colors, gestures, and even how to install new brushes from Creative Market. You’ll find the link to Part 1 here.
In this second part, we’ll build on what you’ve already learned and dive into more advanced tools to level up your workflow. We’ll explore how to work smarter with layers, use clipping masks and groups, transform and duplicate elements, blend textures, and add type that fits beautifully into your layout.
Let’s get started!
What We’re Making
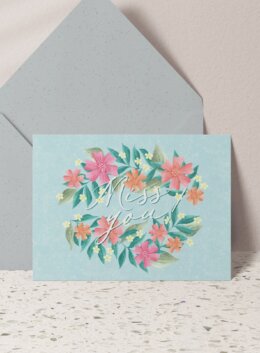
For this project, we’ll create another greeting card, but this time with a summer-inspired floral border layout. It’s designed to leave space in the center for a personalized message.

I’ve prepared a color palette (image below) you can download and save to your iPad. We’ll import it into Procreate to use as a reference throughout the process.

You can also download the Procreate working file to follow our steps more closely.
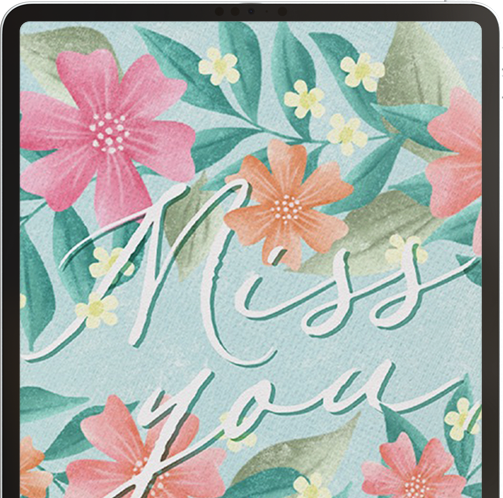
Download this free Procreate template and create your own version of this floral greeting card for loved ones!
Get the fileStep 1: Setting Up the Canvas
Start by opening Procreate and tapping the + icon in the upper right corner to create a new canvas. If you already saved the 5”x7” Greeting Card preset from Part 1, tap on that to open a new canvas. If not, create a new 5” x 7” canvas.

Since we’ll be working in landscape format this time, rotate the canvas 90 degrees by pinching the canvas and turning with two fingers.

Next, let’s import the color palette. Tap the Actions menu (wrench icon), choose Insert a photo, and select the saved palette image from your Photos. Resize and position it in the upper left corner of your canvas so it doesn’t block your workspace.


Step 2: Coloring the Background
Once your palette is in place, let’s set the background color. Create a new layer below the color palette and color pick the light blue shade from the first row of the palette by holding your finger over it.

Then color-drop the light blue color into the canvas.

Step 3: Drawing the First Flower

Create a new layer and color pick Flower Petals color from the second row. Use the “TH Vintage Inker” brush from Nathan Brown’s Dry Texture Brushes for Procreate (or any drawing brush) to draw a rounded “M” shaped petal on the top, and another one at the bottom.


Let’s complete the flower by duplicating and transforming that petal. Swipe left on the petal layer and tap Duplicate, then tap the Transform icon (mouse pointer icon on the top left).

Flip it horizontally using the bottom panel, and rotate the duplicate by about 60 degrees using the green handle above the bounding box.

Duplicate the original petal again, and rotate it to roughly 60 degrees in the opposite direction. You should now have six petals forming a full flower.

Tip: If the rotation feels jumpy or stiff, it’s likely because Magnetics is turned on. Tap the Snapping icon in the Transform panel and toggle Magnetics off for smoother control.

To tidy up, pinch all the petal layers together to merge them. Then color drop the same pink shade into the petals to fill them. You now have a clean, filled flower layer.


Step 4: Adding Shading and Texture
Add a new layer on top of the flower and tap it to turn on Clipping Mask. This confines your shading to just the flower area.

Color pick the darker pink and switch to a larger brush like the “TH Rough Inker” brush. Add shadows near the base and along one side of each petal. Then switch to the lighter pink and add highlights to the petal tips.


Use the Smudge Tool (finger icon beside the brush) and select the same “TH Rough Inker” brush. Reduce the brush size and blend the shadows and highlights following the direction of each petal.


Next, add another clipped layer for finer detail strokes. Use the lightest pink, the “TH Vintage Inker” brush at a small size, and draw strokes from the center of each petal outward. Lightly smudge to soften the look.


Finally, add a third clipped layer and paint small textured white dots in the center of the flower using the Rough Inker.

Then, group all your flower-related layers and name the group “Flower”. To group layers: swipe right on the layers you want to include, then tap Group in the upper right.


Step 5: Drawing the Leaf Group
Create a new layer for your leafy branch. Using the “TH Vintage Inker” brush and a teal shade, draw a curved stem with pointed leaves flowing outward. Color drop to fill each one.


Add a clipped layer for shading and highlights.

Use a darker teal for the shadows and a lighter tone for the highlights. Blend them using the Smudge tool, following the natural flow of the leaves.


Then add another clipped layer for center vein strokes using the Vintage Inker. Smudge slightly for a softer look. Group everything and name it “Leaf 1.”

Step 6: Drawing Loose Leaves
Choose the mid-tone green from the palette and draw several pointed loose leaves in different sizes. Fill each with color.

Use two clipped layers again: one for shading and one for detail strokes. Shade with the Rough Inker, draw vein details with the Vintage Inker, and blend as needed. Group everything and name this one “Leaf 2.”


Step 7: Duplicating and Recoloring the Flower
To add variety, duplicate your flower group twice. Open each group and hide all layers except the base petal layer.

Use Adjustments > Hue, Saturation, Brightness to recolor the first duplicate into coral pink (set hue to around 54). Tweak the saturation and brightness to match the tone in your palette.

Then recolor the clipped shading and highlight layers to match.

Repeat the same process to recolor the other duplicate into a soft peachy orange (set hue to around 59). You now have three flower variations using the same base.

Step 8: Assembling the Composition
Flatten your flower and leaf groups by tapping the group and selecting Flatten.
Tip: If you want to preserve your originals, duplicate each group and flatten the duplicates. Move the working layers to the top and hide the originals.

We’ll use Transform to scale, rotate, and flip each element to avoid visual repetition. Start by duplicating Leaf 2 twice and arrange the copies into a top arc.


Duplicate leaf layers and form the bottom half.

Then merge all the leaf layers together.
Step 9: Placing the Flowers
You’ll need ten total: two pink, four coral, and four peach flowers. Duplicate as needed and place all flower layers above your leaves.


Rotate, flip, and resize each one so they look naturally placed. Avoid putting same-colored and same-sized flowers next to each other for better balance.


Step 10: Filling in the Gaps
Use duplicates of Leaf 2 to fill any remaining empty spots. Place them below Leaf 1 layer and arrange them to create balance.

You can isolate and move individual leaves using the Freehand Selection tool.


As always, rotate and resize to break up repetition and create a dynamic look.

Step 11: Adding Tiny Flowers
To make the layout more playful, let’s add some tiny yellow flowers. I used the “Forget Me Not 2 Petals” stamp brush from the Mega Floral Composition Kit.

Stamp them on a new layer using a light yellow color. This brush auto-rotates and flips shapes to give nice variety. You can draw the tiny flowers manually or use any other flower stamp brushes from Creative Market.


Then pick the darker yellow and use the Rough Inker to draw small rough center dots in each flower.

Step 12: Adding the Message
Now for the message. You can write “Miss You!” or any message you like by hand or use a handwritten-style font.
I’m using the font Rusthand from Creative Market.

To import fonts you have downloaded from Creative Market, click on Actions > Add Text, then tap the font name or the “Aa” button to open the font editor. Tap “Import Font” and select the .otf or .ttf file on your download folder.


Select the font, “Rusthand” on the lower left panel. Type “Miss” and “you!” on separate lines. Adjust the font size and leading until it looks just right.

Slightly rotate the text to give it a natural, handwritten look. Once you’re happy with it, tap the layer and select Rasterize.

If needed, use the Selection Tool and Transform tool to move the word “you!” for better placement.
To add a shadow, duplicate the text layer and move the lower copy slightly down and to the right. Color it with a teal shade.

Step 13: Making the Text Interact with the Design
To tuck parts of your text behind leaves or flowers, merge the text and shadow layers by pinching the two layers together. Then tap the layer and select Mask.

Now, tap the leaf or flower layer you want to bring forward and choose Select. Go back to the mask layer and use the Eraser tool to carefully hide parts of the text.


It looks like the lettering is interacting with your illustration without deleting anything!

Step 14: Adding Texture
For a nice finish, let’s add texture. You can either brush in texture or use PNG overlays like these products from Creative Market, but I prefer using texture brushes.

Create a new layer on top of everything and set the blending mode to Overlay.

Using the color white and the “Aged Manuscript” texture brush from the Mega Floral Composition Kit (or any other texture brush of your choice), brush in your texture.

Add another layer above and use a light teal color with the “Tweed Parchment” texture brush from the same pack to give it a soft aged-paper effect.

You Did It!
Take a step back and admire your finished piece, you just created a beautiful, summer-style floral greeting card from scratch!
Along the way, you learned how to work with layers more flexibly, use clipping masks and transform tools effectively, and build variety from just a few base elements. And hopefully, you got more comfortable using Procreate in a practical, hands-on way.
Feel free to keep tweaking your layout – resize elements, adjust colors, or try adding your own flair. You can even personalize your message and turn it into a printed card, a digital gift, or a sellable product.
I hope this tutorial gave you new ideas, useful techniques, and maybe even a little creative inspiration! If you enjoyed this, stay tuned for Part 3, where we’ll explore more advanced features and design tricks in Procreate. I can’t wait to show you what’s next!
– Nico
P.S. Want to see your drawing come to life? Go to Actions > Video > Time-Lapse Replay to watch your artwork unfold from start to finish. It’s always fun (and satisfying!) to see how far you’ve come.

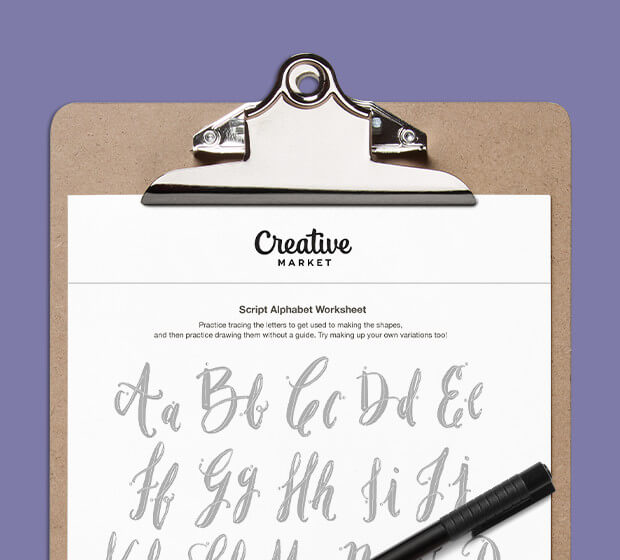
Download these worksheets and start practicing with simple instructions and tracing exercises.
Download now!





I’m Nico, a lettering artist and designer from Manila. I create beginner-friendly tools and templates for artists and creatives. Check out my free tutorials in the articles tab or join my Patreon for monthly workshops and creative inspiration. :)
View More Posts